Add and Customize Radio Buttons
Radio buttons are a powerful way to guide your signers to select a single option from a list, ensuring clarity and accuracy in your digital forms. In SignNow, adding and customizing radio buttons is intuitive and flexible, allowing you to create seamless, interactive experiences for your recipients. This guide will walk you through everything you need to know — from understanding when to use radio buttons, to adding them to your document, customizing their properties, and applying best practices for optimal results.
Understanding Radio Buttons in SignNow
Radio buttons in SignNow are interactive fields that allow recipients to select only one option from a predefined group. This is ideal for scenarios where only a single answer is valid, such as choosing a payment method, selecting a department, or confirming a yes/no response. Each radio button group is treated as a set, ensuring that only one button within the group can be selected at a time. This not only streamlines data collection but also reduces the risk of conflicting responses in your forms. When you add a radio button group, you can define the group name, specify the available options, and determine whether the selection is required. SignNow’s interface makes it easy to visually place and configure these fields, ensuring they fit naturally within your document’s layout.
When to Use Radio Buttons vs. Checkboxes
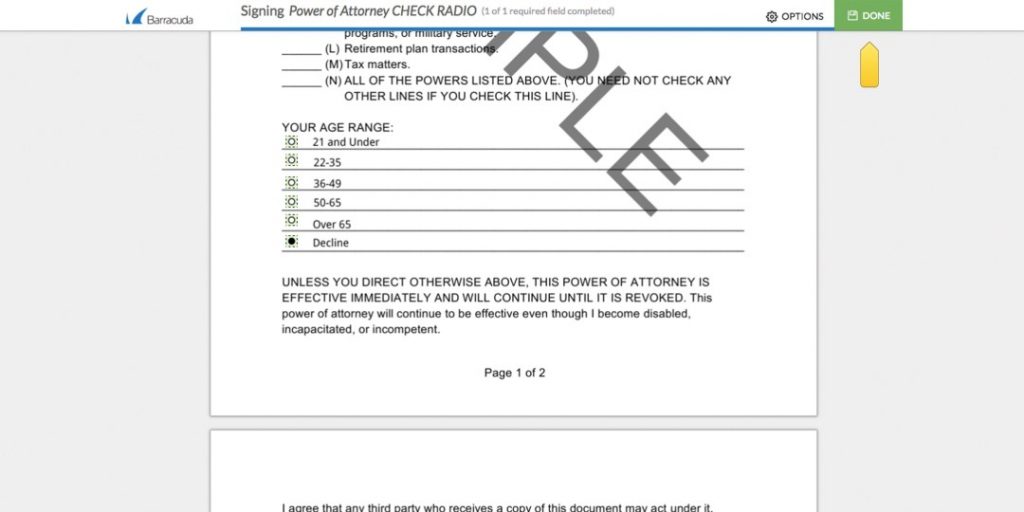
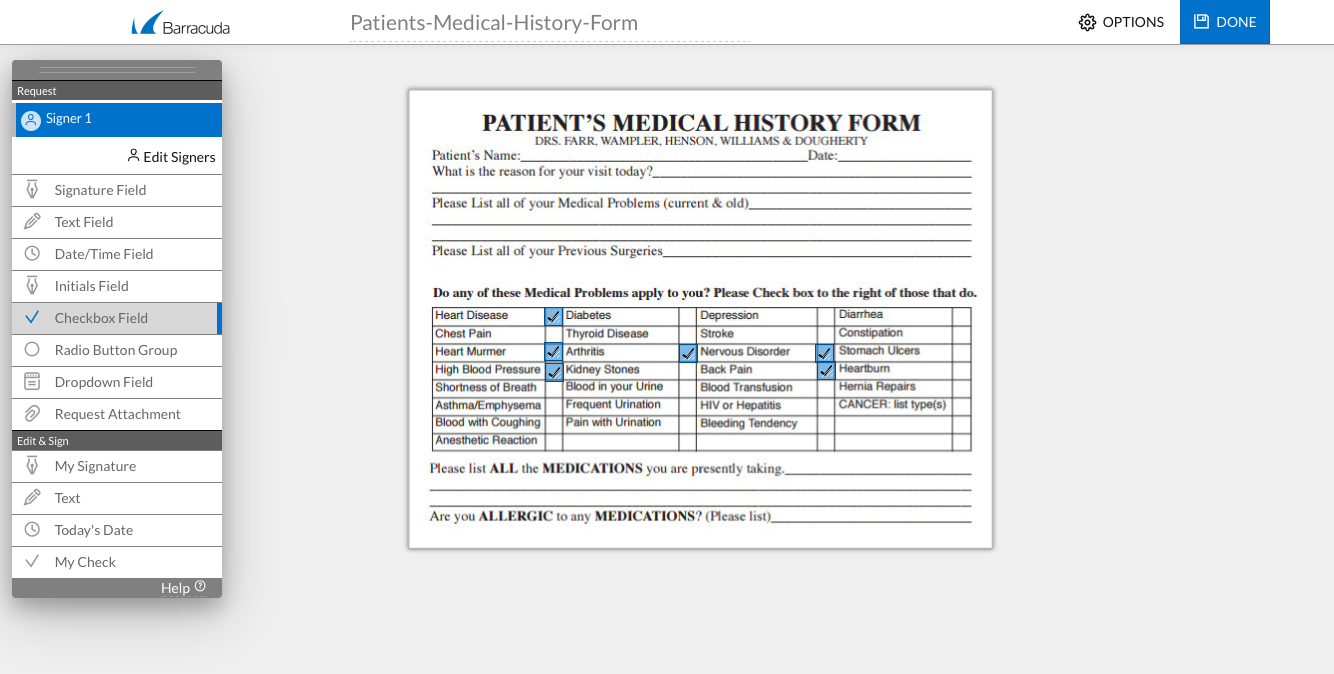
Choosing between radio buttons and checkboxes is crucial for collecting accurate information. Use radio buttons when you want your signer to select only one option from a list. For example, if you’re asking for an age range or a preferred contact method, radio buttons ensure only one answer is chosen. In contrast, checkboxes are best when multiple selections are allowed — such as selecting all applicable medical conditions or agreeing to multiple terms. To illustrate, consider the following examples:
- Radio buttons: Selecting an age range — only one can apply.
- Checkboxes: Selecting medical conditions — multiple can be checked.
Adding a Radio Button Group to Your Document
Adding a radio button group in SignNow is a straightforward process that gives you full control over the field’s behavior and appearance. Here’s how you can do it:
 1. Select the Radio Group Button from the toolbar on the left side of the document editor. This opens the Add Radio Group modal dialog.
2. Enter a Group Name in the provided field. This name helps you identify the group and is required for proper organization.
3. Specify Radio Values by entering each option on a new line in the multiline text area. For example, if you want options like "Yes," "No," and "Maybe," type each on its own line.
4. Set the Required Status by checking the "Required" box if you want to make selection mandatory for the signer.
5. Click Create to add the radio button group to your document. The group will appear in your document preview, ready for further customization.
This process ensures that your radio button group is clearly defined and ready for signers to interact with.
1. Select the Radio Group Button from the toolbar on the left side of the document editor. This opens the Add Radio Group modal dialog.
2. Enter a Group Name in the provided field. This name helps you identify the group and is required for proper organization.
3. Specify Radio Values by entering each option on a new line in the multiline text area. For example, if you want options like "Yes," "No," and "Maybe," type each on its own line.
4. Set the Required Status by checking the "Required" box if you want to make selection mandatory for the signer.
5. Click Create to add the radio button group to your document. The group will appear in your document preview, ready for further customization.
This process ensures that your radio button group is clearly defined and ready for signers to interact with.
Get legally-binding signatures now!
Customizing Radio Button Group Properties
Once your radio button group is added, SignNow provides a range of customization options to tailor the field to your needs. You can move and resize the entire group to fit your document layout perfectly. If you adjust the size of one button, the others in the group will automatically resize to maintain consistency.
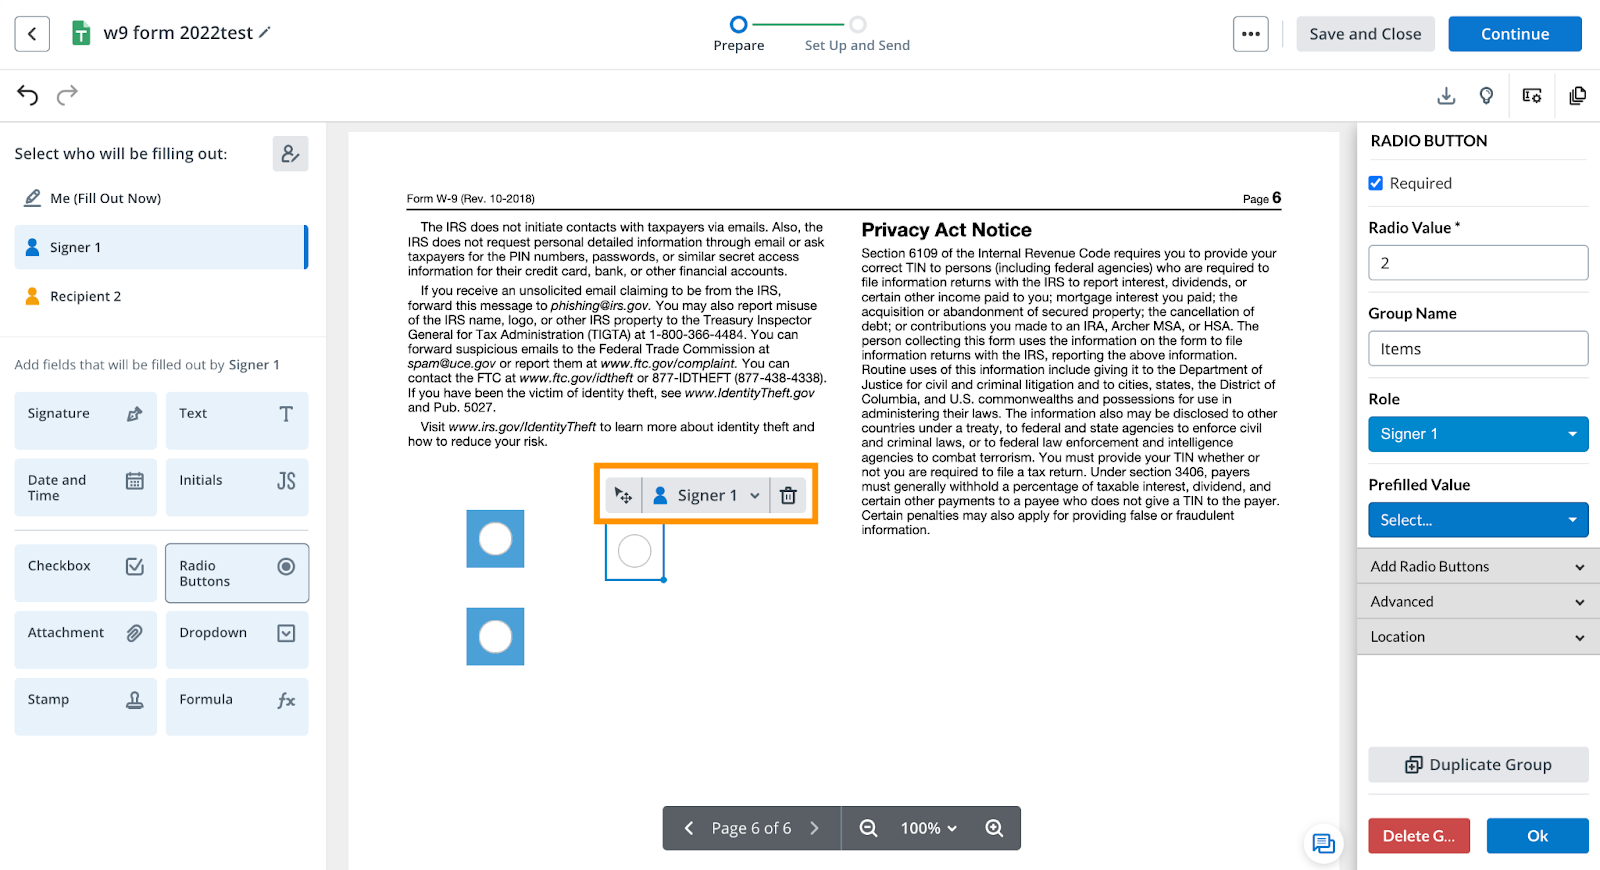 To move the group, simply click and drag it to the desired location. To resize, select any button in the group and drag the handles — all buttons will adjust proportionally. This flexibility ensures your form remains visually balanced and easy to complete, regardless of the document’s structure.
Editing Individual Radio Button Settings
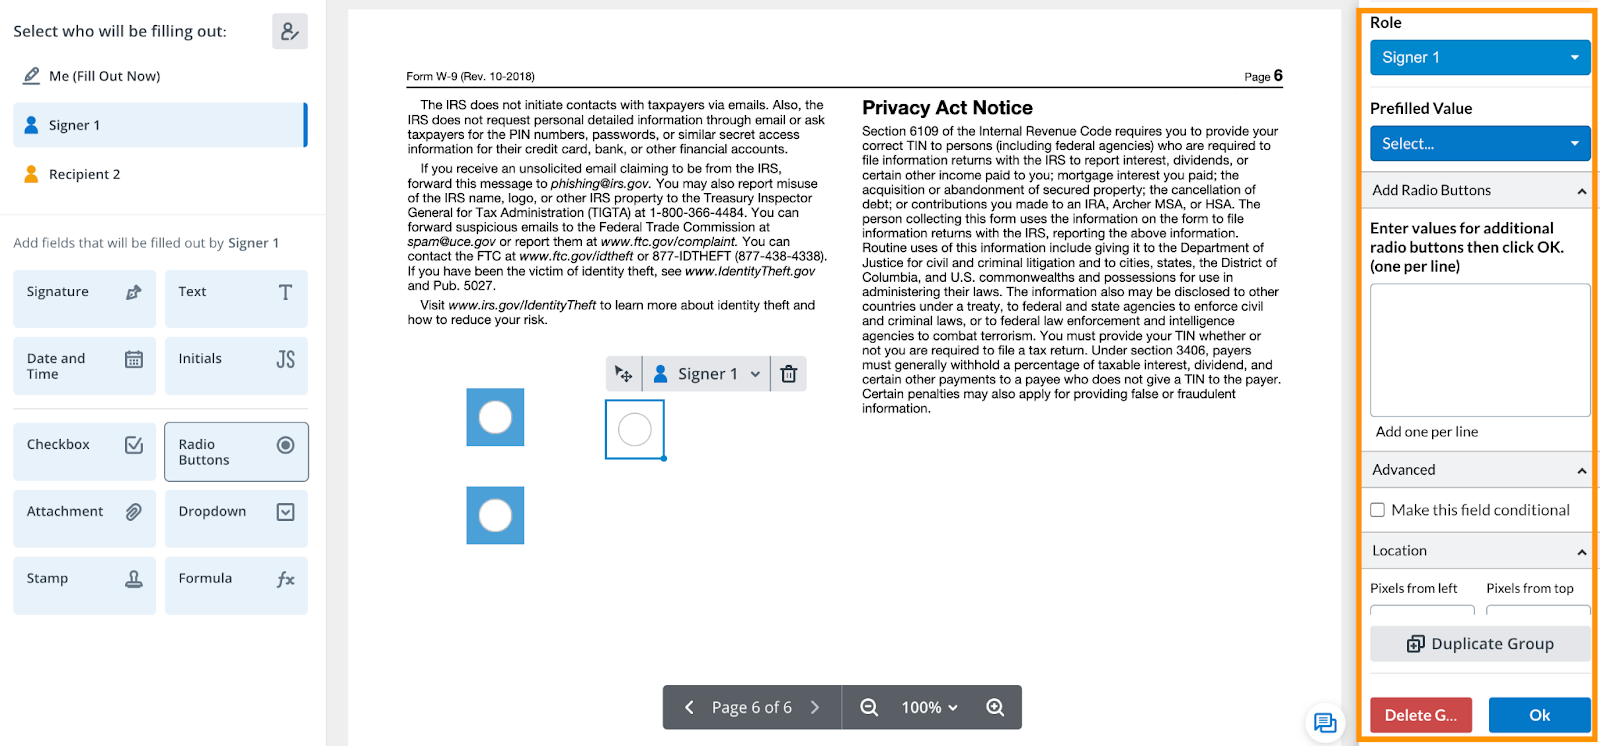
After placing your radio button group, you may want to fine-tune the settings for each individual button. SignNow allows you to:
- Assign roles — designate which signer or recipient is responsible for selecting the option.
- Set prefilled values — pre-select a default option for the signer, streamlining the completion process.
- Assign unique field names — useful for data tracking and integration with other systems.
 This granular control ensures each radio button behaves exactly as you intend, supporting complex workflows and multi-signer scenarios.
Moving and Resizing Radio Buttons
SignNow’s intuitive drag-and-drop interface makes it easy to position your radio buttons exactly where you want them. After adding a radio button group, you can move the entire group or adjust its size to fit your document’s layout. If you resize one button, all others in the group will automatically adjust to match, maintaining a clean and professional appearance. This feature is especially useful when working with complex forms or multi-column layouts, as it ensures your fields remain aligned and visually appealing. Take advantage of the resizing handles and alignment guides to create polished, user-friendly forms.
Best Practices for Using Radio Buttons
To maximize the effectiveness of radio buttons in your forms, consider these best practices:
- Use clear, concise labels for each option to avoid confusion.
- Group related options logically and ensure only one group is used for each set of mutually exclusive choices.
- Make radio groups required when a response is necessary, but avoid overusing required fields to prevent user frustration.
- Test your form before sending to ensure radio buttons function as intended and are easy to select on all devices.
- Use prefilled values thoughtfully to guide users, but allow them to change the selection if needed.
Frequently Asked Questions
-
Can I make a radio button group required for signers?
Yes, when adding a radio button group in SignNow, you can check the "Required" box to ensure that signers must select one of the options before completing the document. This helps guarantee that you receive a response for critical questions.
-
How do I assign a radio button group to a specific signer or recipient?
After adding the radio button group, click on the group or an individual button, then use the right-side menu to assign the field to a specific signer or recipient. This is especially useful for multi-signer documents where different people are responsible for different sections.
-
Can I pre-select a value for a radio button group?
Absolutely. You can set a prefilled value for a radio button group or for individual buttons. This is helpful if you want to suggest a default option or streamline the signing process for your recipients.
-
What happens if I resize one radio button in a group?
When you resize one radio button in a group, all other buttons in that group will automatically resize to match. This ensures a consistent and professional appearance throughout your form.
-
Where can I find more information about SignNow’s pricing plans?
For the most up-to-date information on SignNow’s pricing plans and available features, please visit our pricing page.