Getting Started With SignNow API
- Understanding the SignNow API and Its Capabilities
- Overview of the SignNow .NET SDK
- System Requirements and Compatibility
- Installing the SignNow .NET SDK
- Authentication and Authorization
- Creating and Managing the SignNow Service Context
- Uploading Documents and Sending for Signature
- Retrieving and Downloading Signed Documents
- Frequently Asked Questions
Welcome to your comprehensive guide for getting started with the SignNow API, specifically tailored for .NET developers. Whether you’re building a new application or integrating eSignature workflows into an existing system, SignNow’s robust API and .NET SDK make it easy to automate document signing, streamline approvals, and deliver a seamless digital experience to your users. In this guide, you’ll discover the core capabilities of the SignNow API, learn how to set up your development environment, and walk through practical steps to authenticate, upload, send, and retrieve signed documents — all with real-world examples and visuals to help you succeed.
Understanding the SignNow API and Its Capabilities
The SignNow API empowers businesses and developers to embed legally binding electronic signature workflows directly into their applications, websites, or CRMs. With a RESTful architecture and comprehensive SDKs, SignNow enables you to automate document preparation, signature collection, status tracking, and secure storage — all without leaving your own platform. Key features include:
- Uploading documents with fillable fields (signatures, text, dates, checkboxes, and more)
- Configurable multi-step signing workflows with role-based invites
- Real-time status tracking and audit trails
- Secure OAuth 2.0 authentication and compliance with major regulations (GDPR, HIPAA, SOC 2, and more)
- Support for embedded signing, bulk invites, reminders, and branded experiences
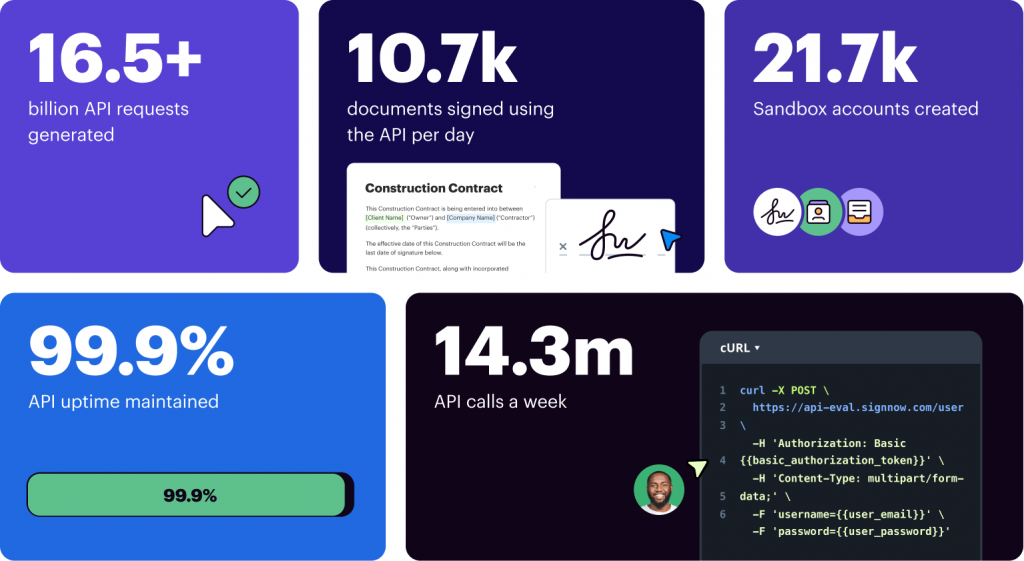 SignNow’s API is trusted by hundreds of Fortune 500 companies and handles billions of API calls, ensuring reliability and scalability for businesses of any size.
Overview of the SignNow .NET SDK
The SignNow .NET SDK is a powerful library that simplifies integration with the SignNow API for .NET developers. It supports .NET Framework 4.5+, .NET Standard 2.0, and runs seamlessly on Windows, Linux, and macOS. This flexibility means you can integrate eSignature workflows into both legacy and modern .NET applications without worrying about compatibility issues or rewriting code during upgrades.
With the SDK, you gain access to intuitive methods for authentication, document management, sending invites, and retrieving signed files. The SDK is open-source and available on GitHub, with detailed documentation and community support to help you get started quickly.
System Requirements and Compatibility
Before you begin, ensure your development environment meets the following requirements:
- .NET Framework 4.5+ or .NET Standard 2.0+ (compatible with .NET Core and .NET 5+)
- Operating system: Windows, Linux, or macOS
- Access to the SignNow .NET SDK on NuGet
- A SignNow account to create API applications and obtain credentials
Installing the SignNow .NET SDK
Getting started with the SignNow .NET SDK is straightforward. You can install the SDK directly from NuGet using your preferred method:
- .NET CLI:
dotnet add package SignNow.Net - Package Manager Console:
Install-Package SignNow.NET - Project File Reference: Add
<PackageReference Include="SignNow.NET" />to your .csproj file
For detailed setup instructions and troubleshooting, refer to the official SignNow .NET SDK documentation.
Authentication and Authorization
To interact with the SignNow API, your application must authenticate using OAuth 2.0. This process ensures secure access and protects sensitive data. Here’s how it works:
- Register your application in the SignNow dashboard to obtain your Client ID and Client Secret.
- Use these credentials, along with your user email and password, to request an access token from the SignNow API.
- The access token is then used to authorize all subsequent API requests.
 A typical authentication flow in C# might look like this:
// Set API base URL (Sandbox or Production)
Uri apiBaseUrl = new Uri("https://api-eval.signnow.com");

// Your credentials
string clientId = "your-client-id";
string clientSecret = "your-client-secret";
string userLogin = "your-email@company.com";
string userPassword = "your-password";

// Create OAuth2 service and obtain token
var oauth = new OAuth2Service(apiBaseUrl, clientId, clientSecret);
var token = await oauth.GetTokenAsync(userLogin, userPassword, Scope.All);
Get legally-binding signatures now!
Creating and Managing the SignNow Service Context
Once authenticated, you’ll create a SignNow service context — a central object that manages all API interactions for your session. This context holds your API base URL and access token, allowing you to access document, invite, and user services through a unified interface.
// Create the SignNow service context
var signNowContext = new SignNowContext(apiBaseUrl, token);
Uploading Documents and Sending for Signature
With your service context ready, you can automate document workflows — from uploading files to sending signature invites. Here’s a typical workflow:
- Read the document file from your system
- Upload the document to SignNow and retrieve its unique ID
- Create a signing invite and send it to the recipient’s email
- Monitor the signing status and download the signed document when complete
// Upload document
await using var fileStream = File.OpenRead("/path/to/document.pdf");
var uploadResponse = await signNowContext.Documents.UploadDocumentAsync(fileStream, "Example.pdf");

// Send signing invite
var signerEmail = "recipient@example.com";
var invite = new FreeFormSignInvite(signerEmail)
{
    Message = $"{signerEmail} invited you to sign the document",
    Subject = "Please sign this document"
};
await signNowContext.Invites.CreateInviteAsync(uploadResponse.Id, invite);
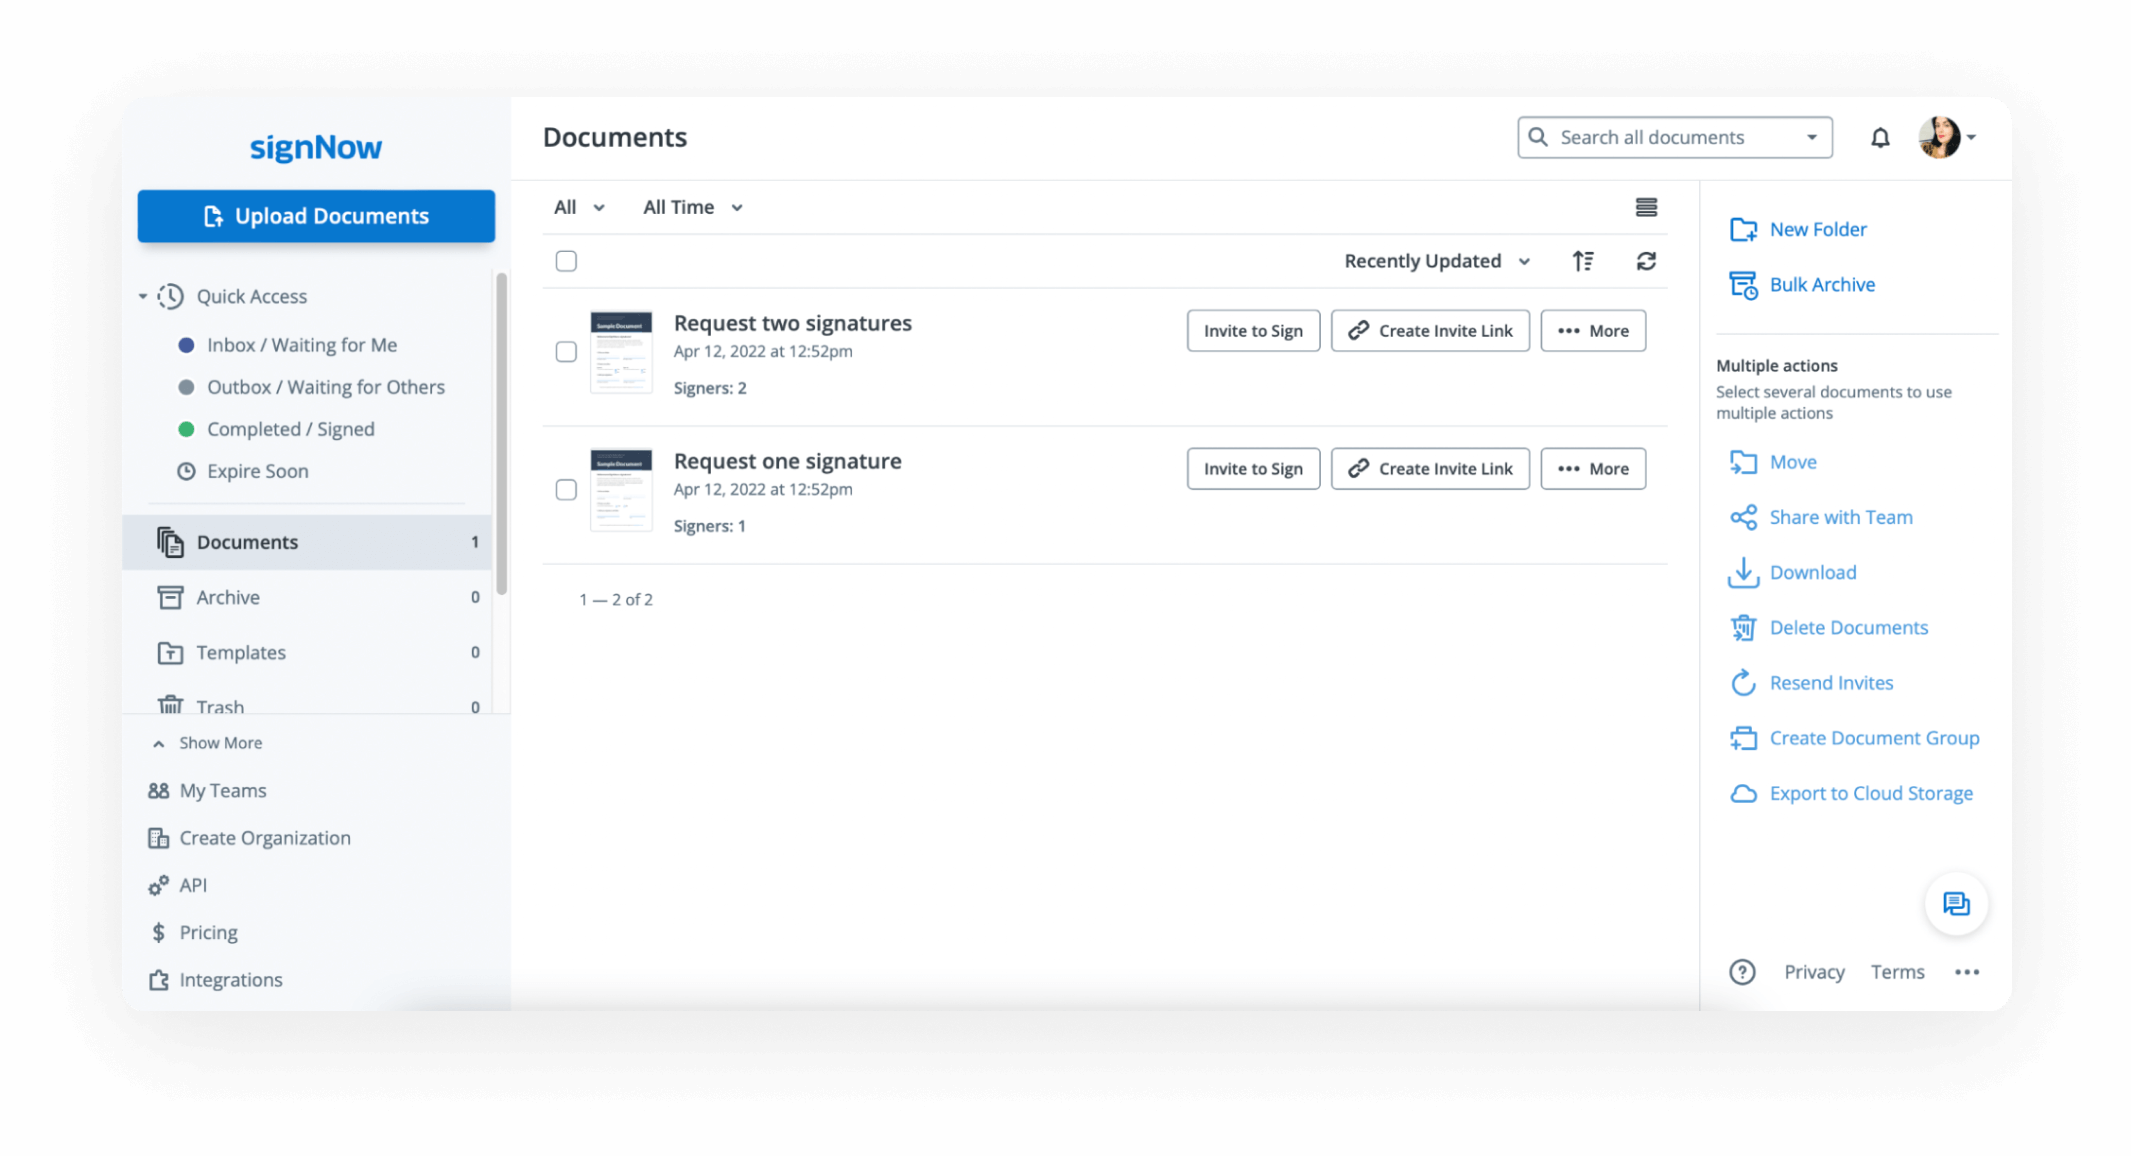 The recipient receives an email invitation and can sign the document using SignNow’s intuitive signing interface. This process is fully automated and can be customized to fit your business workflow.
Retrieving and Downloading Signed Documents
After a document is signed, you can programmatically retrieve its status and download the completed file for storage or further processing. The SignNow API provides methods to:
- Check the signing status of a document
- Download the signed PDF in various formats
- Store the signed document locally or upload it to your system
// Check document status
var document = await signNowContext.Documents.GetDocumentAsync(documentId);
if (document.Status == DocumentStatus.Completed)
{
    var signedDoc = await signNowContext.Documents.DownloadDocumentAsync(document.Id, DownloadType.PdfCollapsed);
    // Save signedDoc.Document stream to your storage
}
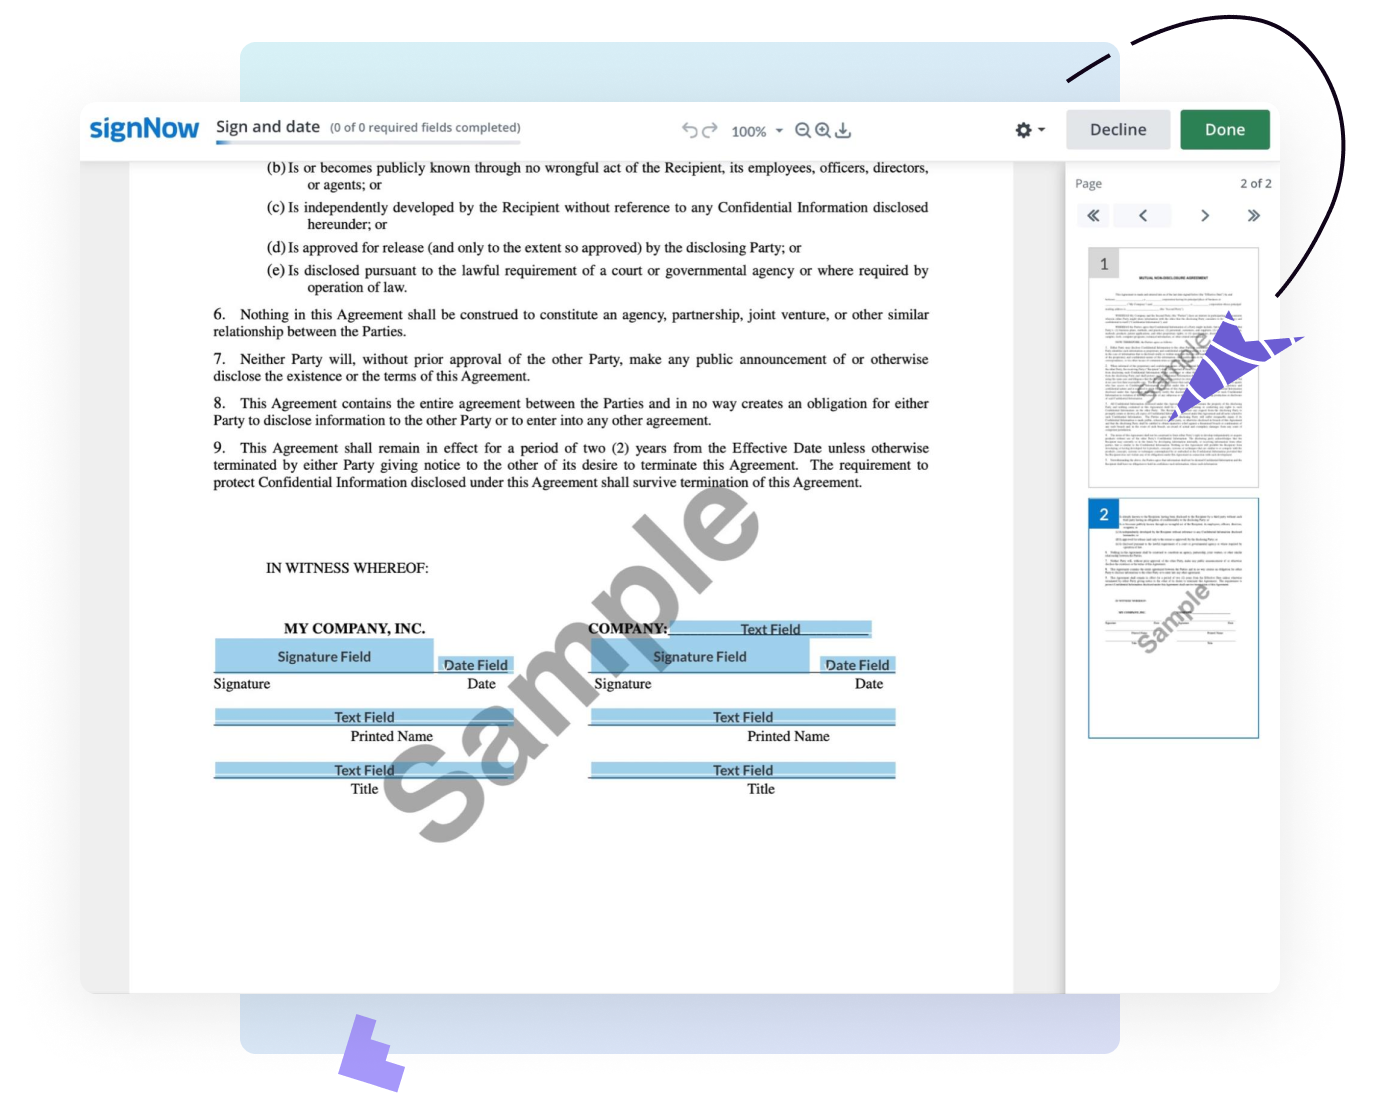 The SignNow signing interface is designed for clarity and ease of use, guiding signers through required fields and providing instant feedback on completion status. Once the document is signed, you can access the final PDF, complete with legally binding signatures and an audit trail.
Frequently Asked Questions
Below you’ll find answers to common questions about getting started with the SignNow API and .NET SDK. For more details, visit the SignNow API documentation or reach out to our support team.
Frequently Asked Questions
-
How do I create a SignNow developer account?
To create a free developer account, visit the SignNow developers page, enter your email, and follow the prompts. You’ll receive an email to verify your account and can then access the API dashboard to manage your applications and credentials.

-
What environments are available for testing and production?
SignNow provides a Sandbox environment for free testing and a Production environment for live, legally binding signatures. You can switch your application from Development to Live mode in the API dashboard as your integration progresses.

-
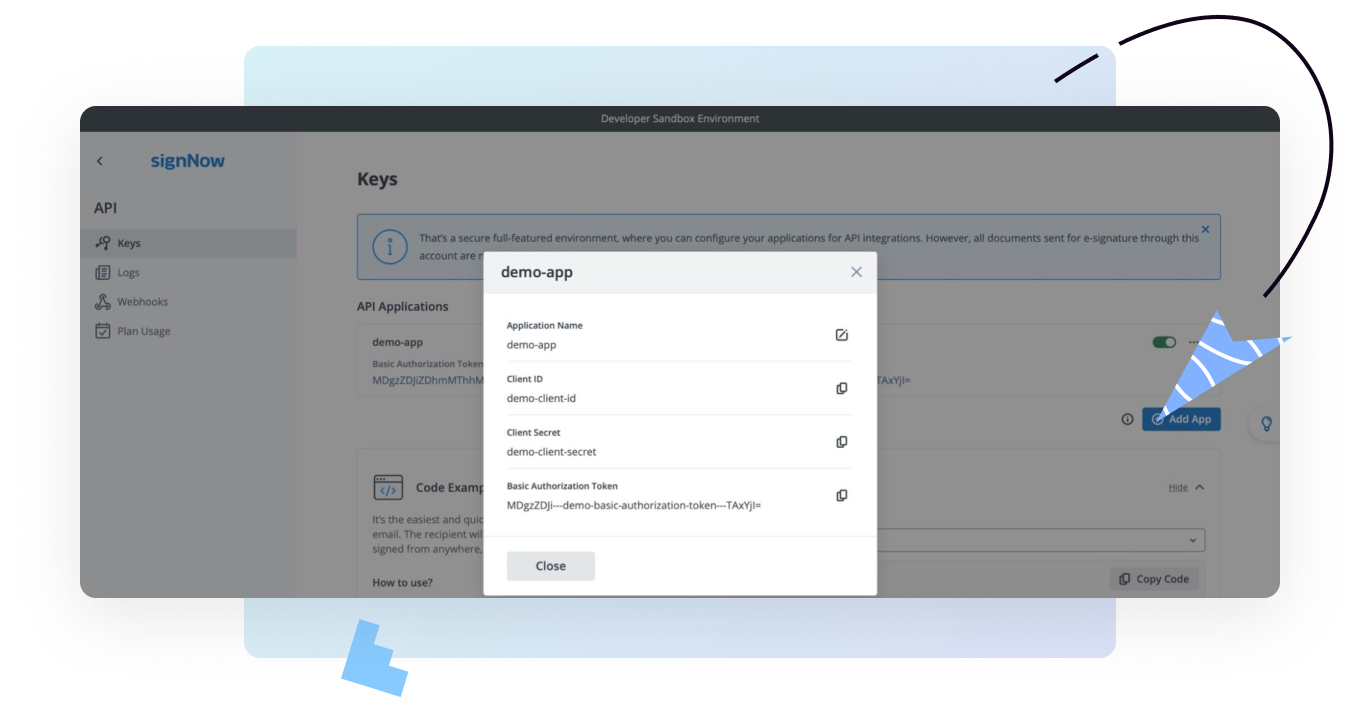
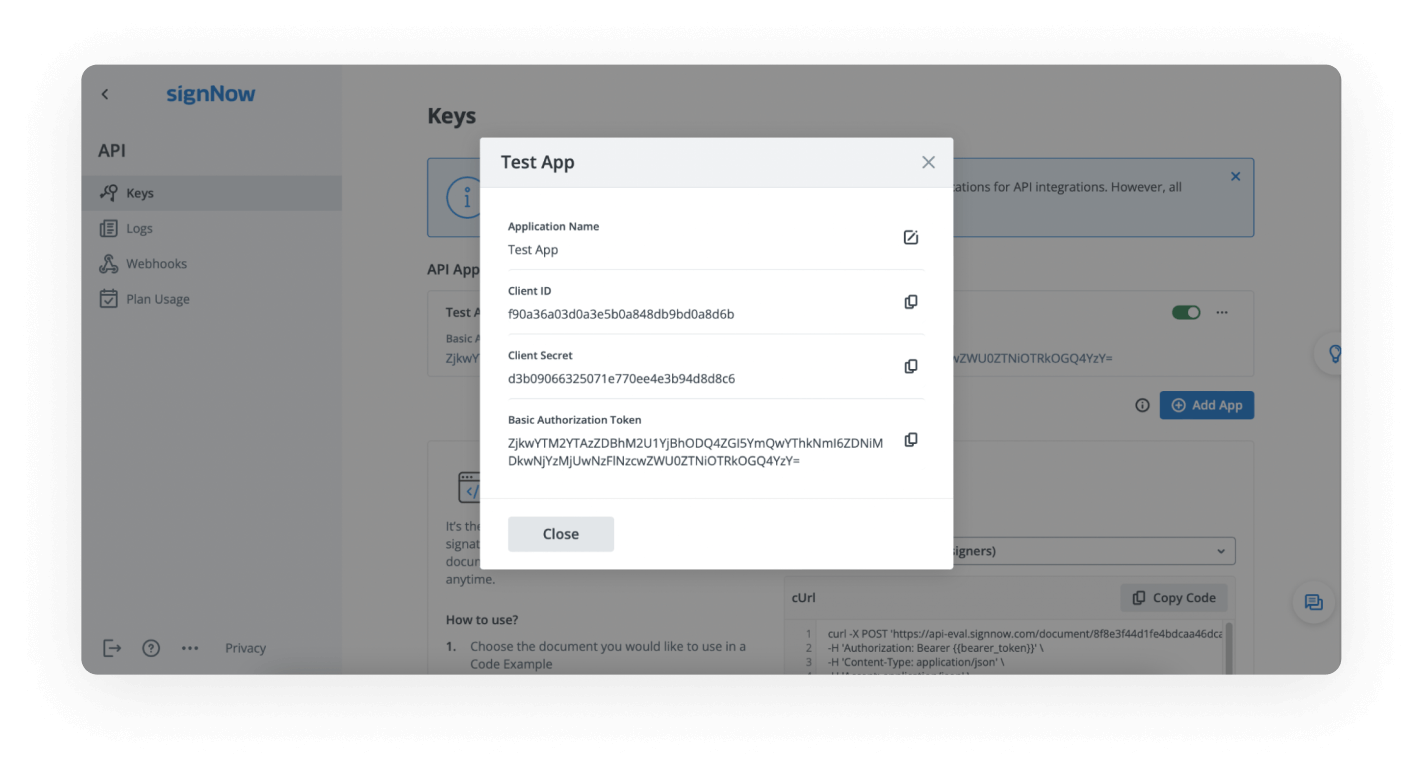
Where do I find my Client ID and Client Secret?
After creating an application in your API dashboard, your Client ID and Client Secret are displayed in the application details. These credentials are required for OAuth 2.0 authentication.
-
How do I send my first document for signature using the API?
Once you’ve set up your application and obtained an access token, you can use the SDK or a cURL command to send a document for signature. The dashboard provides ready-to-use code examples and templates to help you get started quickly.

-
What are the pricing options for the SignNow API?
SignNow offers flexible API plans to fit different business needs. You can start with a free trial in the Sandbox environment and upgrade to a paid plan for production use. For detailed pricing information, please visit our pricing page.
