Send Bulk Invites for Document Signing
- Understanding Bulk Invites in SignNow
- Preparing Your Document Template for Bulk Invites
- Setting Up Signing Roles and Signing Order
- Accessing the Bulk Invite Feature
- Adding and Managing Recipients (Manual Entry & CSV Upload)
- Configuring Multi-Role Templates for Bulk Invites
- Naming Documents and Organizing Signed Copies
- Customizing and Sending Bulk Invitations
- Tracking the Status of Bulk Invites
- Important Notes and Best Practices
Sending documents for signature one by one can be time-consuming, especially when you need to collect signatures from dozens or even hundreds of people. With SignNow’s Bulk Invite feature, you can streamline your workflow by sending a single template to multiple recipients at once—each receiving their own unique signing link. This guide will walk you through every step of the process, from preparing your template to tracking the status of your bulk invites, ensuring you get the most out of SignNow’s powerful bulk sending capabilities.
Understanding Bulk Invites in SignNow
Bulk Invites in SignNow are designed to help organizations efficiently distribute documents for signature to large groups of recipients. Instead of sending out individual invites, you can use a single template and send it to a list of recipients, each of whom will receive their own copy to sign. This is ideal for HR onboarding, policy acknowledgments, permission slips, and any scenario where the same document needs to be signed by many people. Bulk Invites ensure consistency, reduce manual errors, and save significant time for administrators and document managers.
Preparing Your Document Template for Bulk Invites
Before you can send a bulk invite, you need to create a template that will serve as the basis for all signing requests. Start by uploading your document and adding all necessary fillable fields—such as signature, date, and text fields—using SignNow’s intuitive document editor. Assign roles to each field to indicate who needs to complete which part of the document. This step is crucial for multi-role workflows, such as when both an employee and a supervisor need to sign the same form. Once your template is ready, save it for use in the bulk invite process.

Setting Up Signing Roles and Signing Order
Defining signing roles and the order in which recipients sign is essential for structured workflows. In SignNow, you can add multiple roles (e.g., Employee, Supervisor, HR Manager) and specify the sequence in which each role should sign the document. To set the signing order, access the template’s settings and use the 'Edit Signing Order' feature. Assign emails to fixed roles if needed, and arrange the order to match your business process. This ensures that documents are routed correctly and that each recipient signs in the intended sequence.

Accessing the Bulk Invite Feature
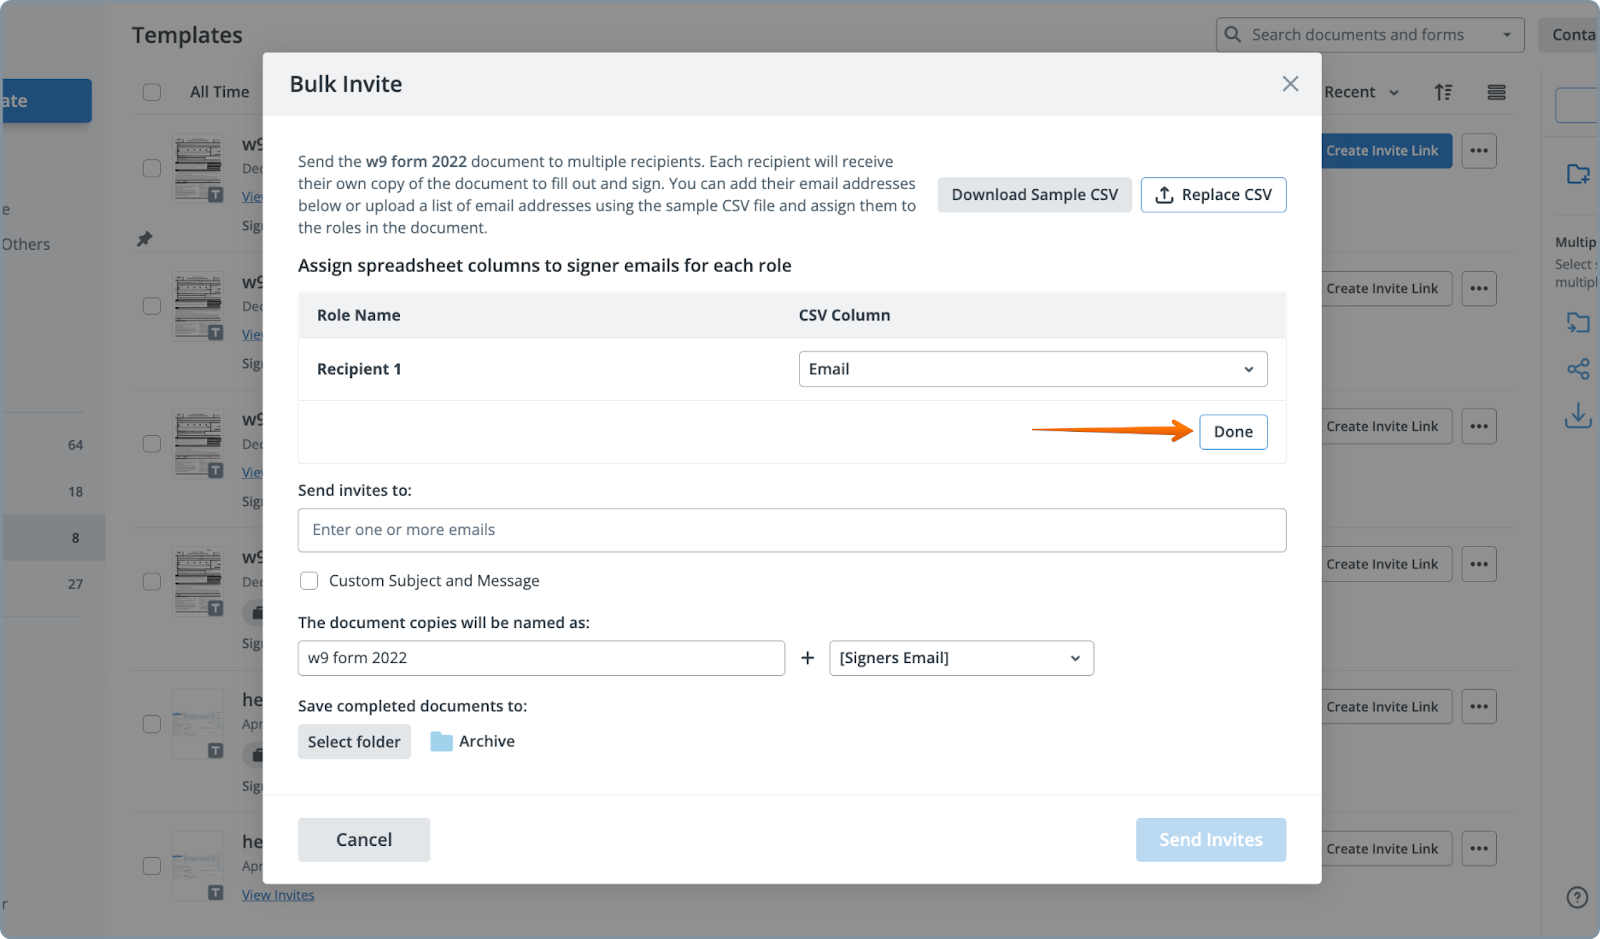
Once your template is prepared, you can access the Bulk Invite feature directly from the Templates folder. Hover over the template you wish to use, click the 'More' (three dots) menu, and select 'Bulk Invite.' This opens a dedicated modal where you’ll manage recipients, document naming, and other settings for your bulk send. The interface is designed for clarity, guiding you through each step of the process.

Adding and Managing Recipients (Manual Entry & CSV Upload)
SignNow offers two convenient ways to add recipients for your bulk invite:
- Manual Entry: Enter email addresses directly into the 'Send invites to' field for smaller groups or quick sends.
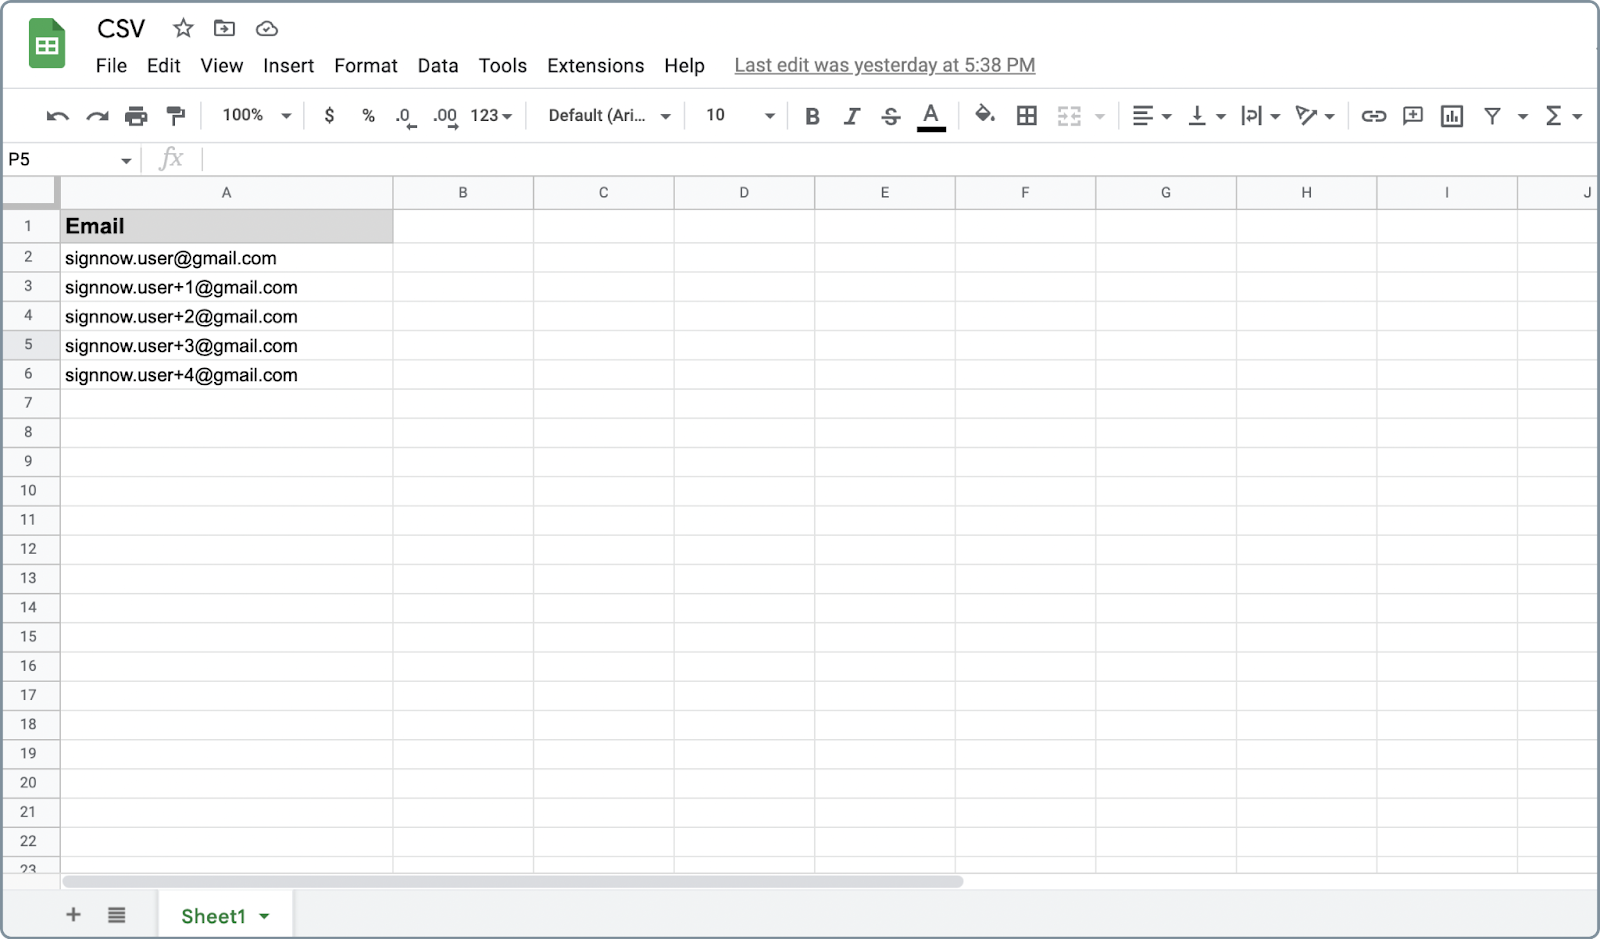
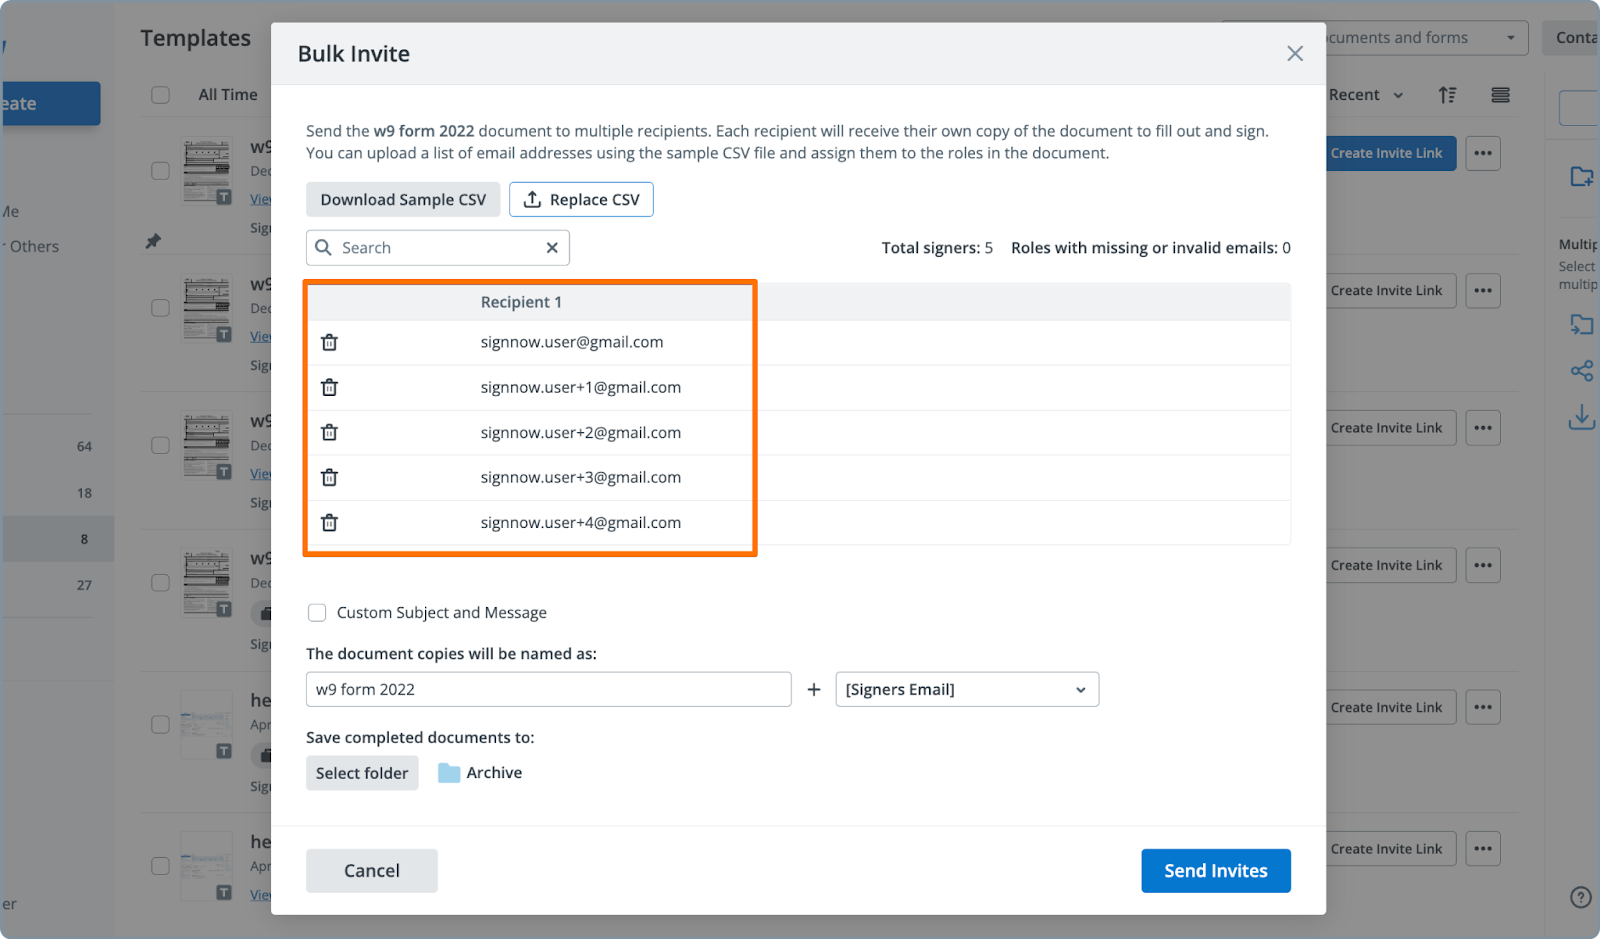
- CSV Upload: For larger groups, prepare a CSV file with recipient emails. Download a sample CSV from the Bulk Invite modal to ensure correct formatting. Each column should correspond to a signing role if your template has multiple roles.

Get legally-binding signatures now!
Configuring Multi-Role Templates for Bulk Invites
If your workflow requires multiple people to sign each document (for example, both an employee and a supervisor), SignNow’s Bulk Invite supports multi-role templates. In your CSV file, include a separate column for each role’s email address. When uploading, map each column to the appropriate role. You can also pre-assign certain roles to specific emails in the template editor and leave others open for bulk upload. This hybrid approach gives you maximum flexibility for complex signing scenarios.


Naming Documents and Organizing Signed Copies
To keep your signed documents organized, SignNow allows you to customize the naming convention for each document sent via Bulk Invite. By default, each signed copy will include the base document name, the recipient’s ordinal number, and their email address (e.g., w9form20227email@domain.com). You can also choose a destination folder for all signed documents—either select an existing folder or create a new one within your Archive. This makes it easy to locate, manage, and audit signed documents, especially when handling high volumes.

Customizing and Sending Bulk Invitations
Before sending, you have the option to personalize the subject and message of your email invitations. This is a great way to provide context or instructions to your recipients. Once you’re satisfied with your settings, click 'Send Bulk Invites.' SignNow will automatically generate and send a unique signing link to each recipient, ensuring privacy and security for every transaction. The streamlined interface makes it easy to review your recipient list, adjust document naming, and confirm folder selection before dispatching your invites.
Tracking the Status of Bulk Invites
After sending your bulk invites, tracking progress is simple. Open the folder where you stored the signed documents, or use the 'View Documents' option from your template’s menu. Here, you can see the status of each document—who has signed, who is pending, and manage follow-ups as needed. This centralized tracking ensures you never lose sight of outstanding signatures and can quickly address any bottlenecks.


Important Notes and Best Practices
- Signing Order: Bulk Invite does not enforce signing order by default. If your workflow requires a specific sequence, set the signing order in the template’s settings before sending your invites. - Multi-Role Flexibility: Assign fixed emails to certain roles in the template editor and leave others open for bulk upload. This allows you to combine static and dynamic recipient assignments for complex workflows. - CSV Formatting: Always use the sample CSV as a reference to avoid formatting errors. Each column should match a role in your template. - Folder Organization: Create dedicated folders for each bulk invite campaign to keep your signed documents organized and easy to retrieve. - Personalization: Take advantage of custom subject and message options to improve recipient engagement and reduce confusion. - Security: Each recipient receives a unique, secure signing link, ensuring privacy and compliance with e-signature standards.
Frequently Asked Questions
-
Can I send a bulk invite to multiple roles within the same document?
Yes, SignNow’s Bulk Invite feature supports multi-role templates. When preparing your CSV file, include a separate column for each role’s email address. During the upload process, map each column to the corresponding role. You can also pre-assign certain roles to specific emails in the template editor and leave others open for bulk upload, giving you flexibility for complex workflows.
-
How do I ensure the correct signing order in a bulk invite?
Bulk Invite does not enforce signing order by default. To set a specific signing sequence, use the 'Edit Signing Order' feature in your template before sending the bulk invite. Assign roles and arrange the order as needed. This ensures that documents are routed and signed in the correct sequence.
-
What happens if I upload a CSV with formatting errors?
If your CSV file contains formatting errors, SignNow will prompt you to correct them before proceeding. Always use the sample CSV provided in the Bulk Invite modal as a reference. Ensure each column matches a role in your template and that all required fields are filled out to avoid delays.
-
Can I track the status of each recipient’s document after sending a bulk invite?
Absolutely. After sending your bulk invites, you can track the status of each document by opening the designated folder or using the 'View Documents' option from your template’s menu. This allows you to see who has signed, who is pending, and manage follow-ups efficiently.
-
How are signed documents named and organized?
Each signed document is named using the base document name, the recipient’s ordinal number, and their email address (e.g., w9form20227email@domain.com). You can choose or create a folder to store all signed documents from a bulk invite, making it easy to manage and retrieve files.
-
Where can I find more information about SignNow’s pricing for bulk invites?
For the most up-to-date information on SignNow’s pricing plans and features, please visit our pricing page.
Ready to simplify your document signing process? SignNow’s Bulk Invite feature empowers you to send, track, and manage high-volume signature requests with ease. For a detailed walkthrough, check out our step-by-step guide or explore more resources on our Features blog. Start saving time and boosting productivity with SignNow today!