Upload a Logo for Custom Branding
- Understanding Custom Branding in signNow
- Eligibility and Access Requirements
- Preparing Your Logo for Upload
- Step-by-Step Guide: Uploading Your Organization Logo
- Previewing and Applying Your Logo
- Managing User Roles for Branding Visibility
- Customizing Email Branding with Your Logo
- Troubleshooting Logo Upload and Display Issues
Custom branding is a powerful way to reinforce your organization’s identity every time you interact with clients, partners, or team members through signNow. By uploading your organization’s logo, you ensure that your brand is front and center on documents, emails, and throughout your signNow experience. This guide will walk you through everything you need to know about uploading a logo for custom branding, from eligibility requirements to troubleshooting tips, so your organization always puts its best face forward.
Understanding Custom Branding in signNow
Custom branding in signNow allows organizations to personalize their account by displaying their unique logo on documents and emails. This feature is available to users on Enterprise and airSlate Business Cloud plans, providing a professional and cohesive look across all communications. With custom branding, your recipients will instantly recognize your organization, building trust and reinforcing your brand identity at every touchpoint. Whether you’re sending contracts, agreements, or internal documents, your logo will be visible, making every interaction unmistakably yours.
Eligibility and Access Requirements
To take advantage of custom branding, your organization must be subscribed to an Enterprise or airSlate Business Cloud plan. If you’re unsure about your current plan or want to explore available options, visit our pricing page for more details. Only users with Admin or Superadmin roles can upload or change the organization logo. Additionally, to see the logo on documents and emails, you must be added as a Member in the organization’s User Management tab. This ensures that branding is applied consistently and securely across your organization’s assets.
Preparing Your Logo for Upload
Before uploading your logo, it’s important to prepare an image that meets signNow’s recommended specifications. For best results, use an image with a ratio of 115x60 pixels or less. Supported file formats include JPG, GIF, PNG, and JPEG, and the file size should not exceed 2 MB. A well-prepared logo ensures crisp, professional display across all platforms. If your logo appears blurry or stretched, try resizing it to fit the recommended dimensions. Keeping your logo simple and clear will help it stand out in both documents and emails.
Get legally-binding signatures now!
Step-by-Step Guide: Uploading Your Organization Logo
Uploading your organization’s logo in signNow is a straightforward process. Follow these steps to ensure your brand is represented everywhere it matters:
- Access My Organizations: Log in to your signNow account and click on My Organizations in the lower-left side panel.

- Go to Admin Panel: In your organization list, click Go to Admin Panel next to the relevant organization.

- Navigate to General Info: In the Admin Panel, select the General Info tab from the sidebar.

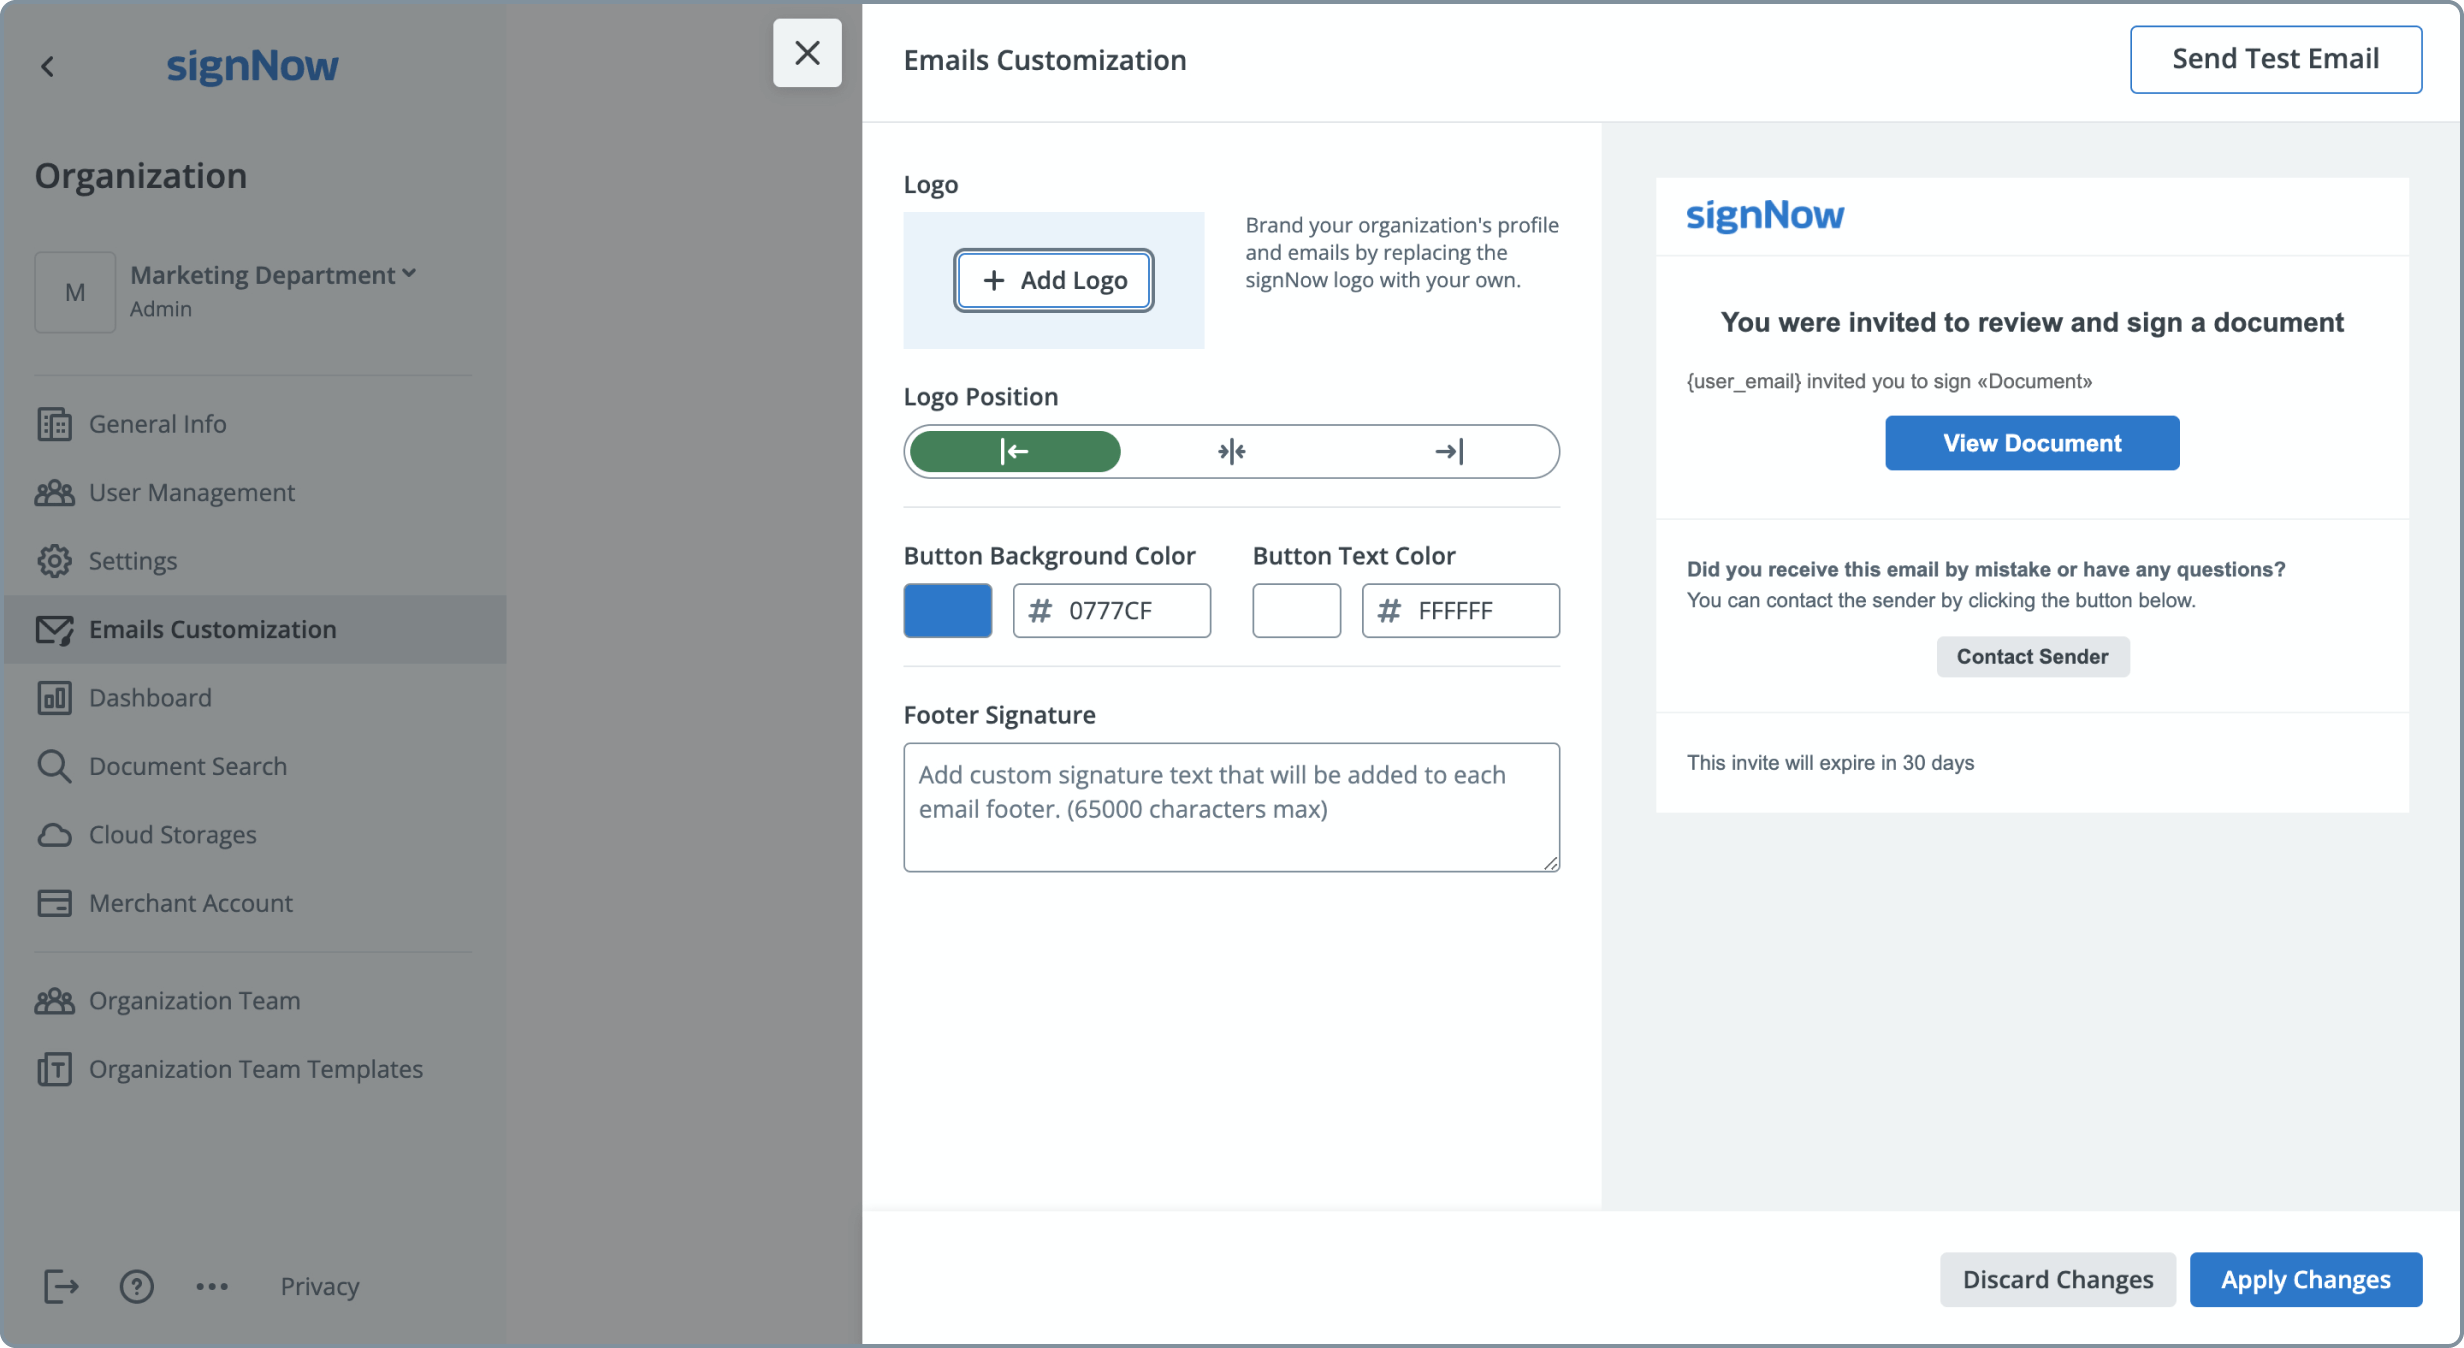
- Add Logo: Click the Add Logo button to open the upload modal.

- Upload Your Image: Click Upload Image and select your prepared logo file from your computer. Supported formats and size limits are displayed for your convenience.
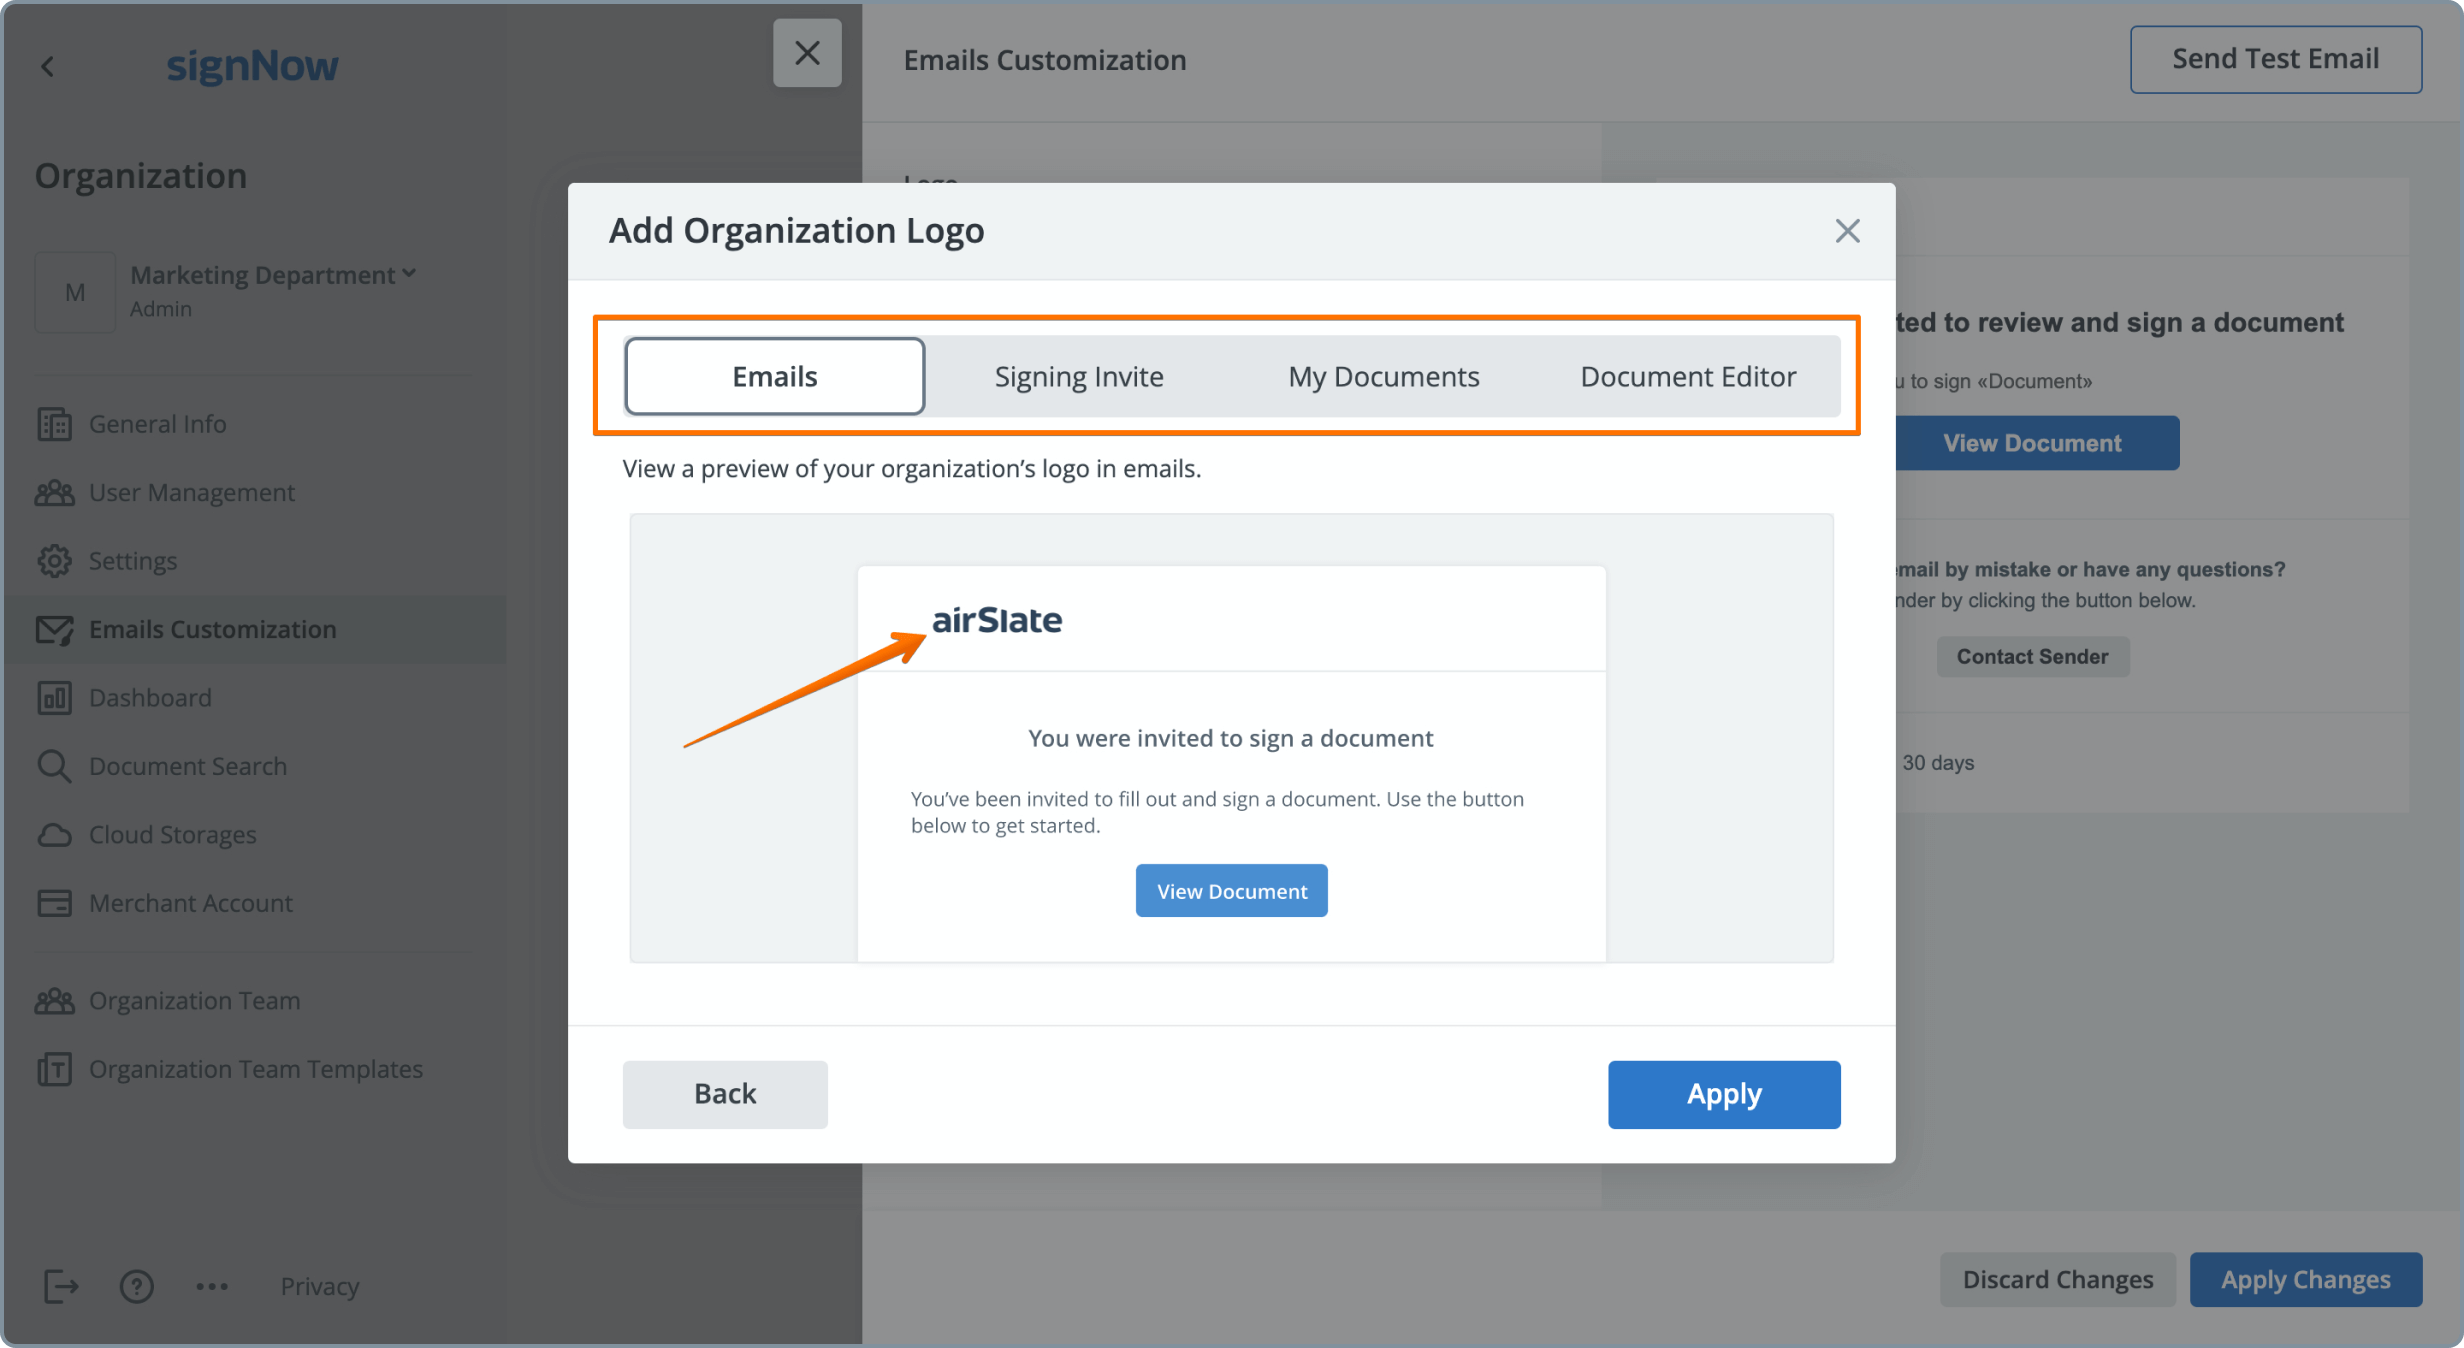
- Preview and Apply: Review how your logo will appear in organization emails and accounts. If satisfied, click Apply to confirm. If not, click Back to upload a different image.

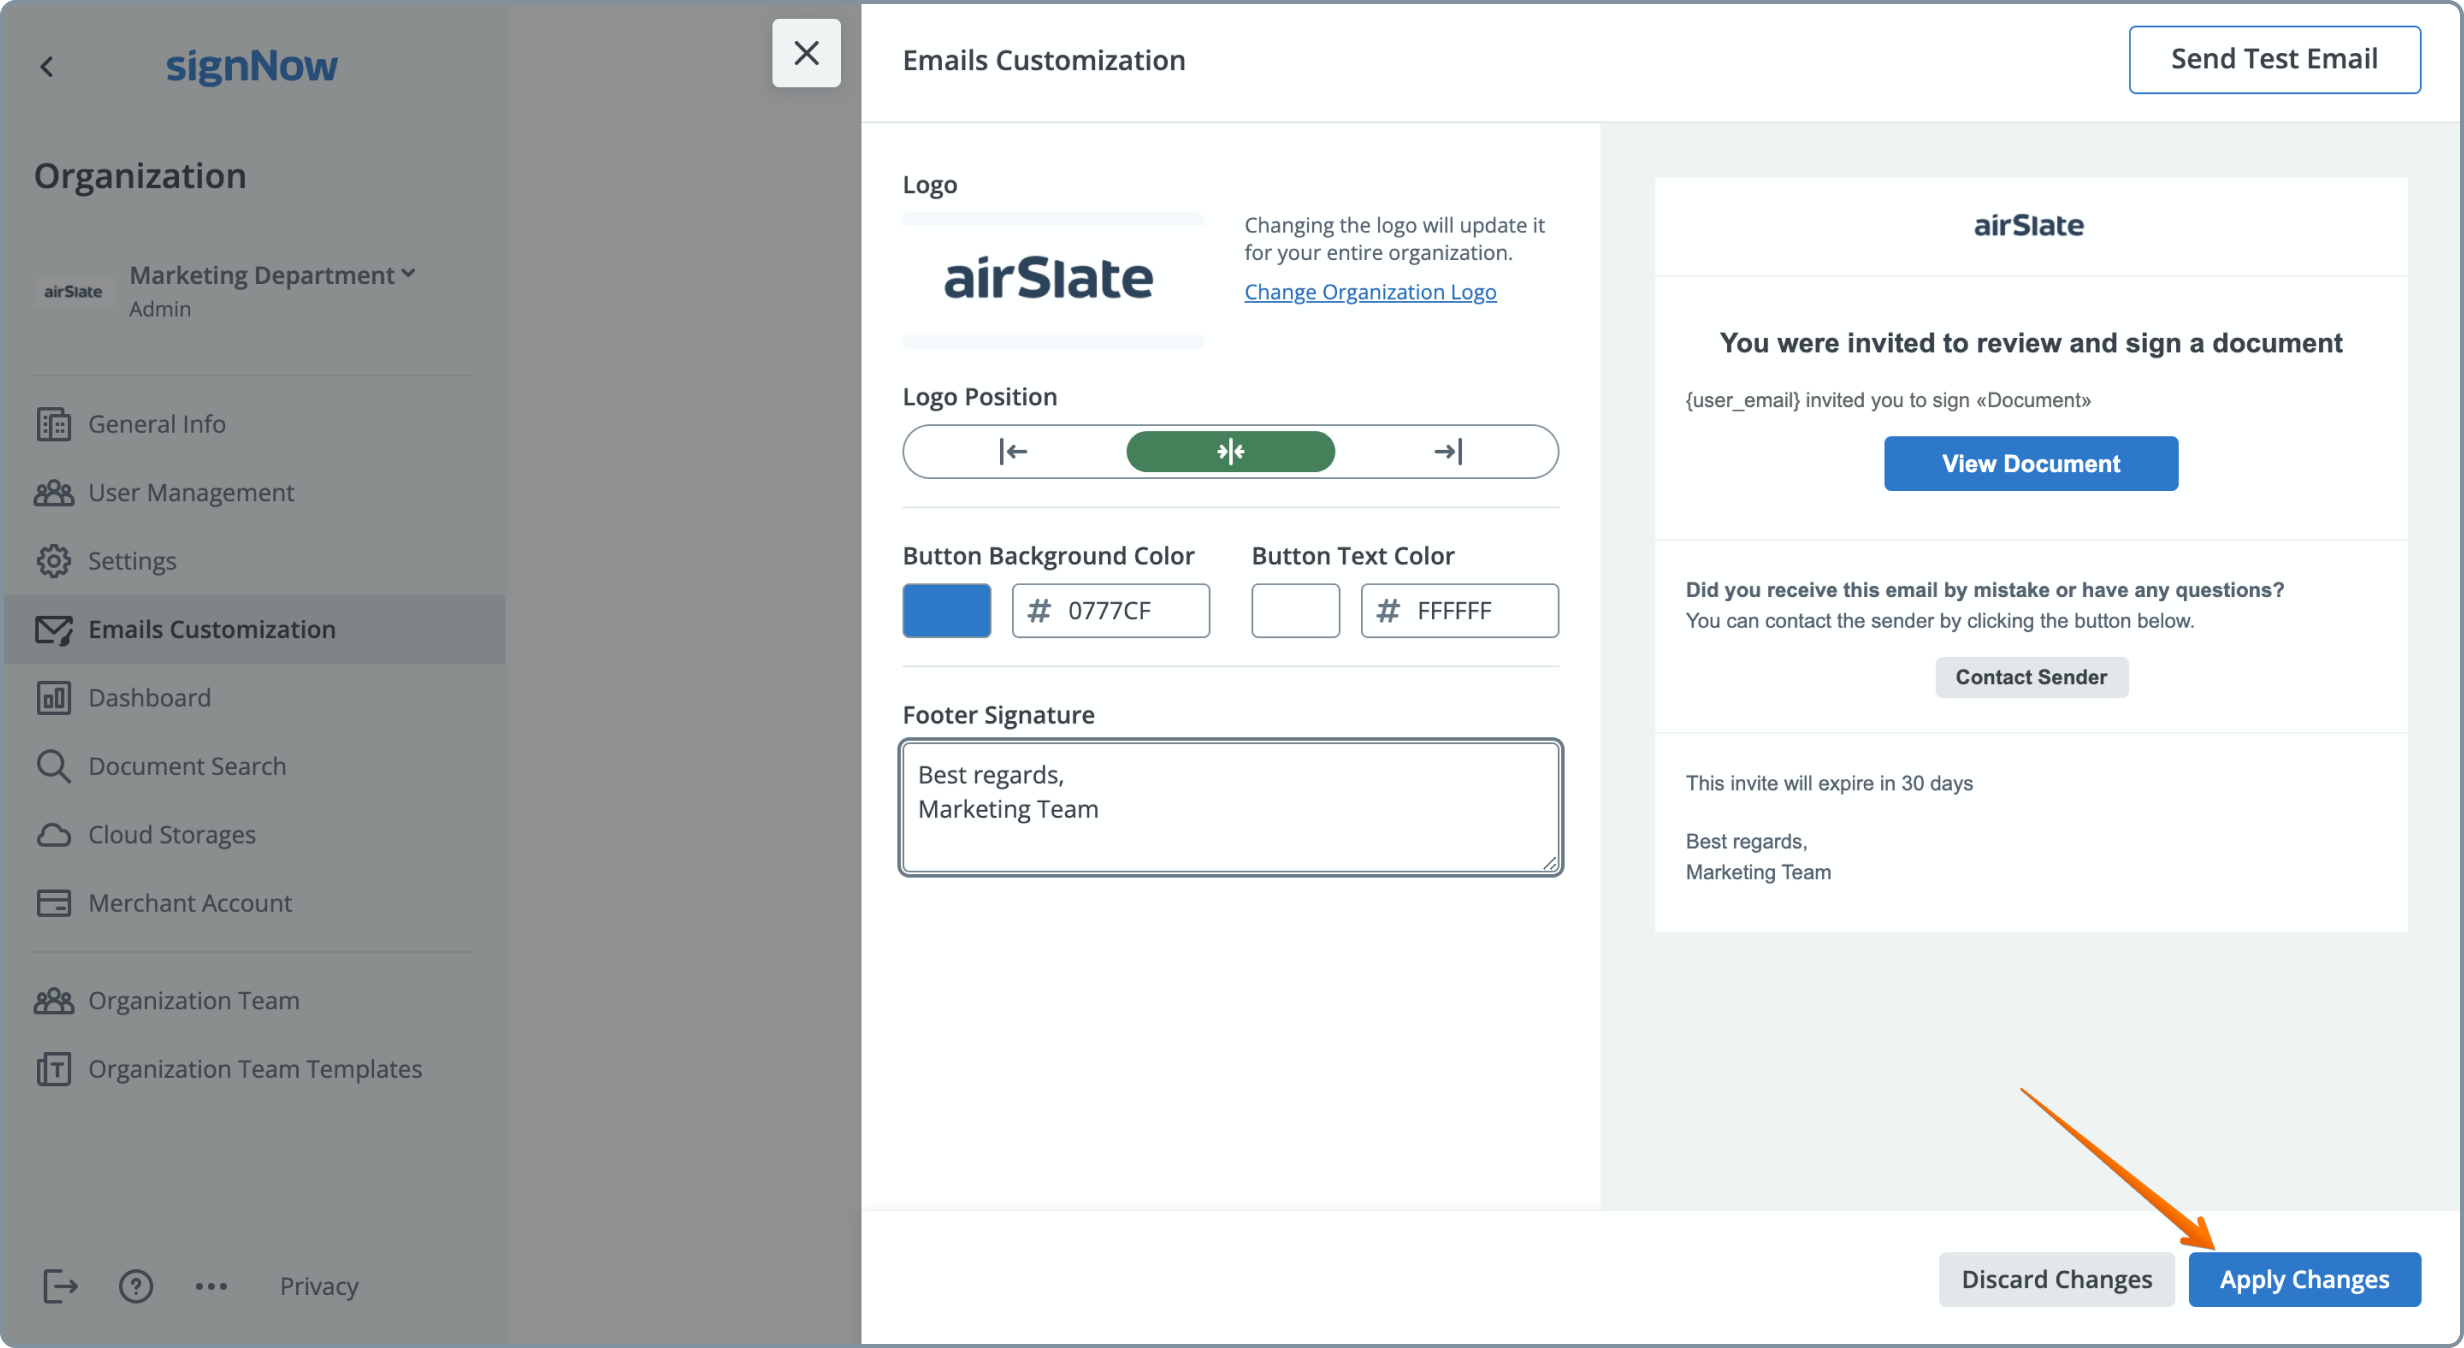
Previewing and Applying Your Logo
After uploading your logo, signNow provides a preview feature so you can see exactly how your branding will appear in emails and on documents. This step is crucial for ensuring your logo looks sharp and professional in all contexts. If the preview doesn’t meet your expectations, you can easily go back and upload a new image. Once you’re happy with the appearance, simply click Apply to finalize your branding. Your logo will now be displayed across your organization’s signNow communications, reinforcing your brand with every interaction.
Managing User Roles for Branding Visibility
It’s important to understand how user roles affect branding visibility in signNow. Only Members of an organization will see the organization’s logo on documents and emails. If you’re an Admin or Superadmin managing multiple organizations, you can upload and change logos for all organizations you oversee. However, to ensure your documents and emails display the correct branding, you must add yourself as a Member in the organization’s User Management tab. This step is essential for consistent branding across all communications.  },{
},{
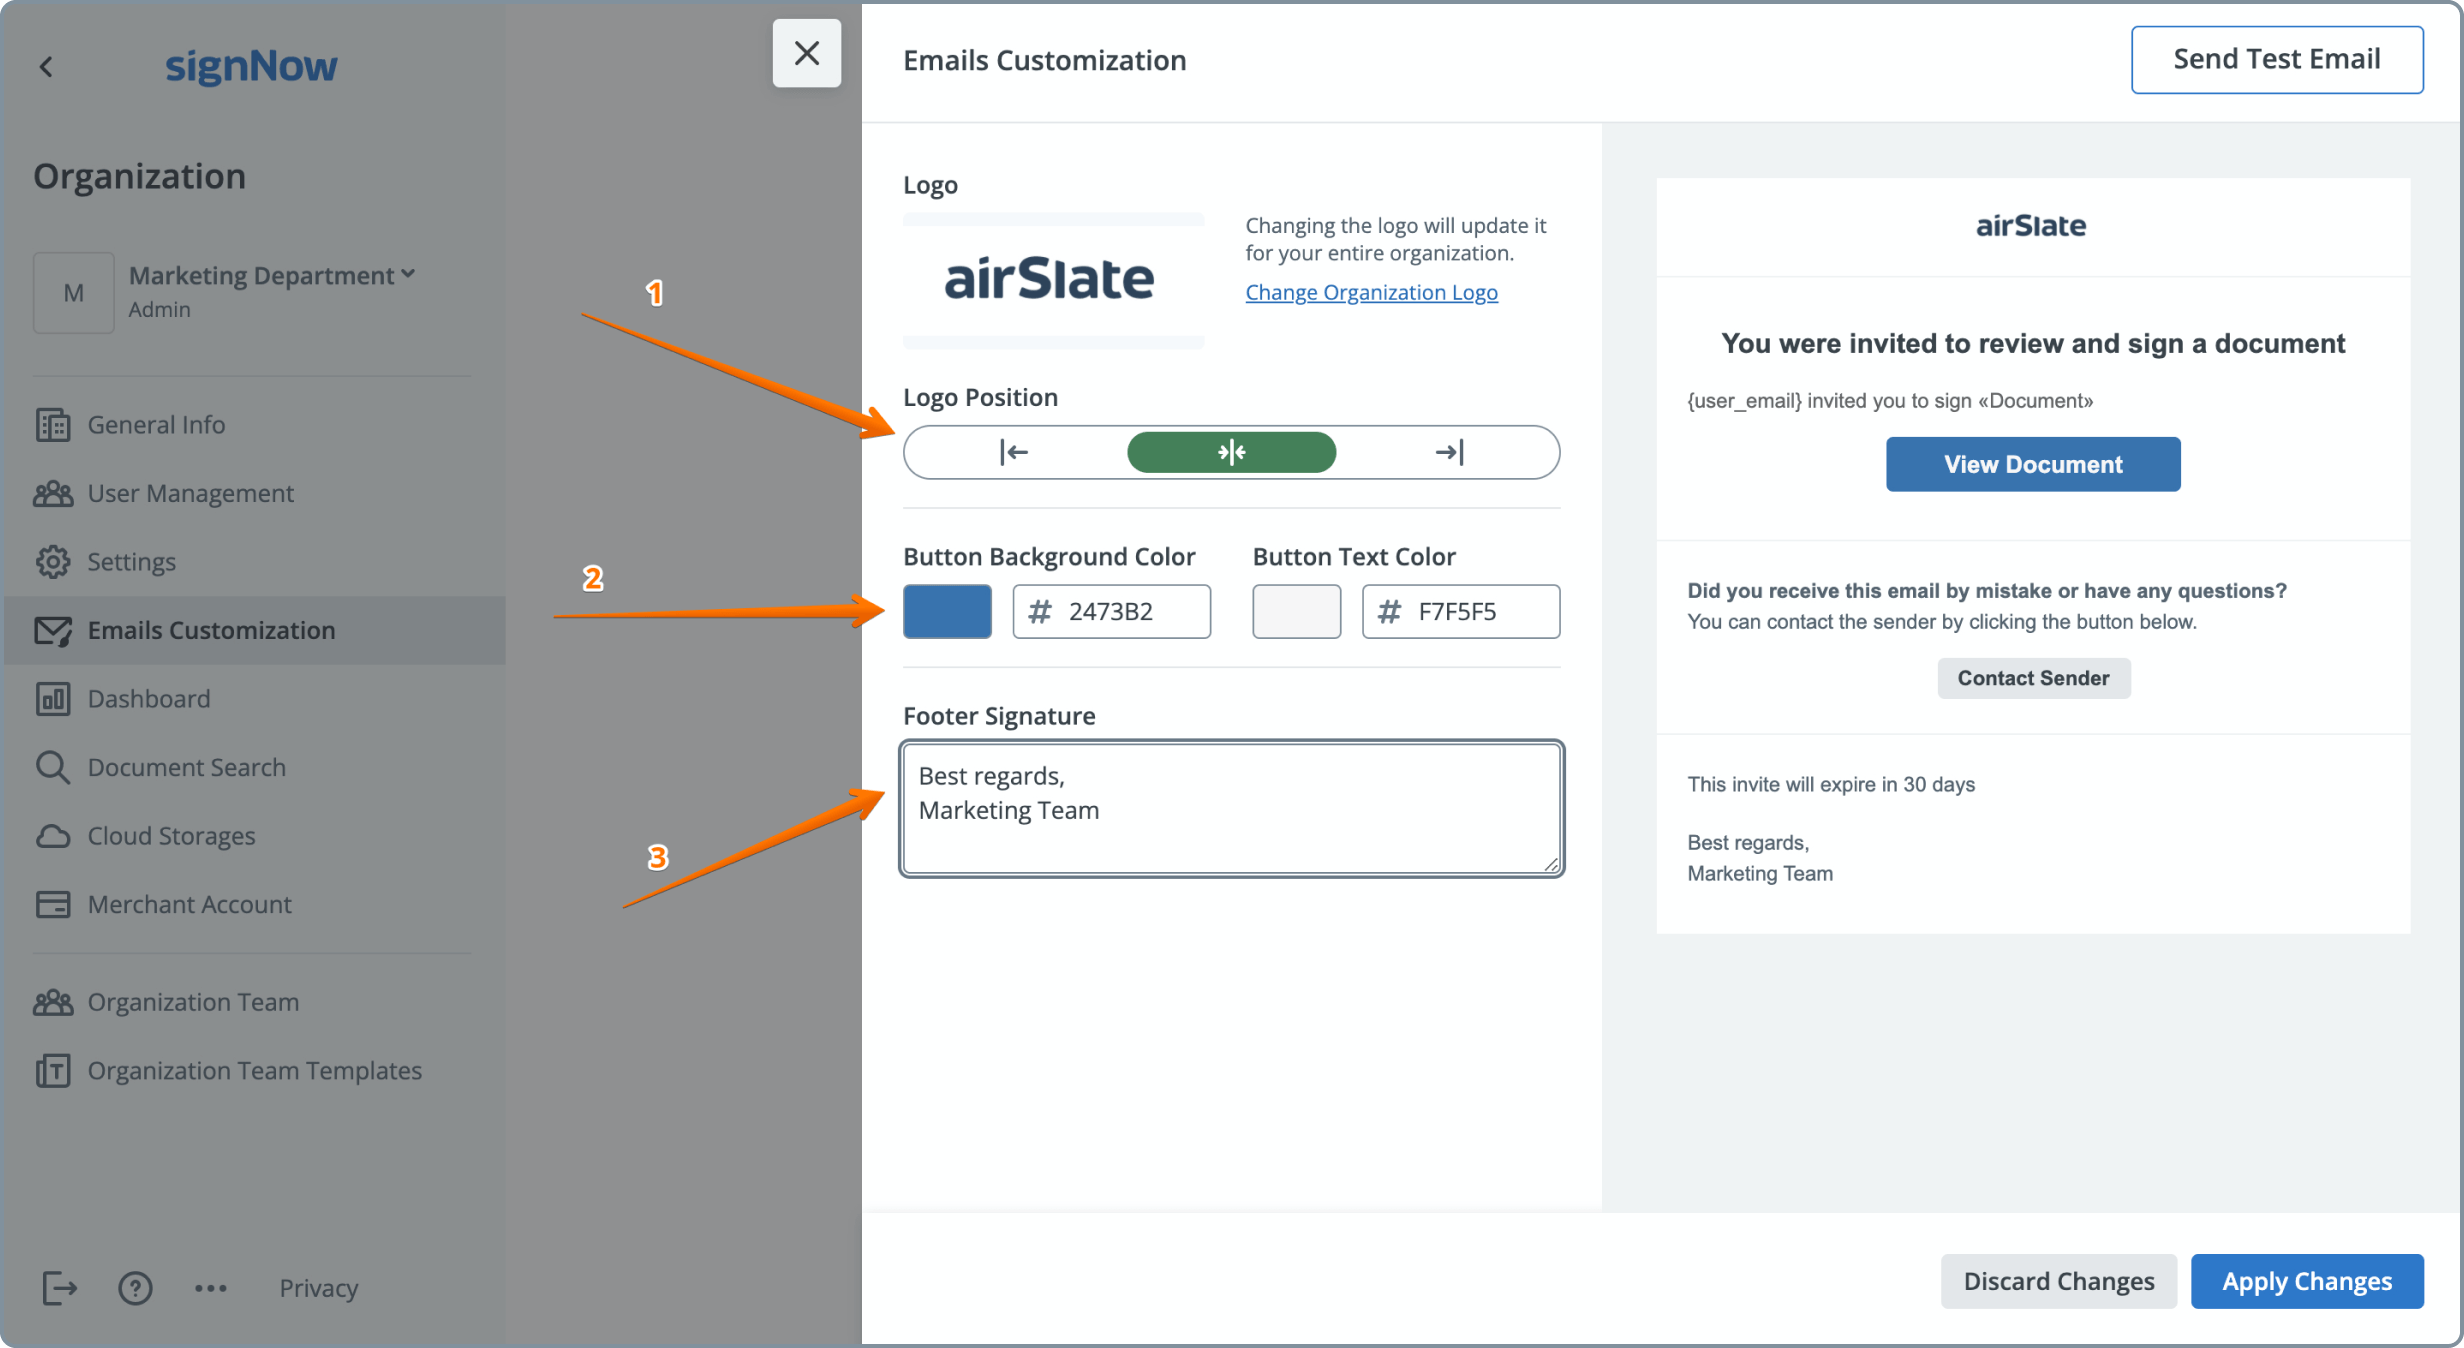
Customizing Email Branding with Your Logo
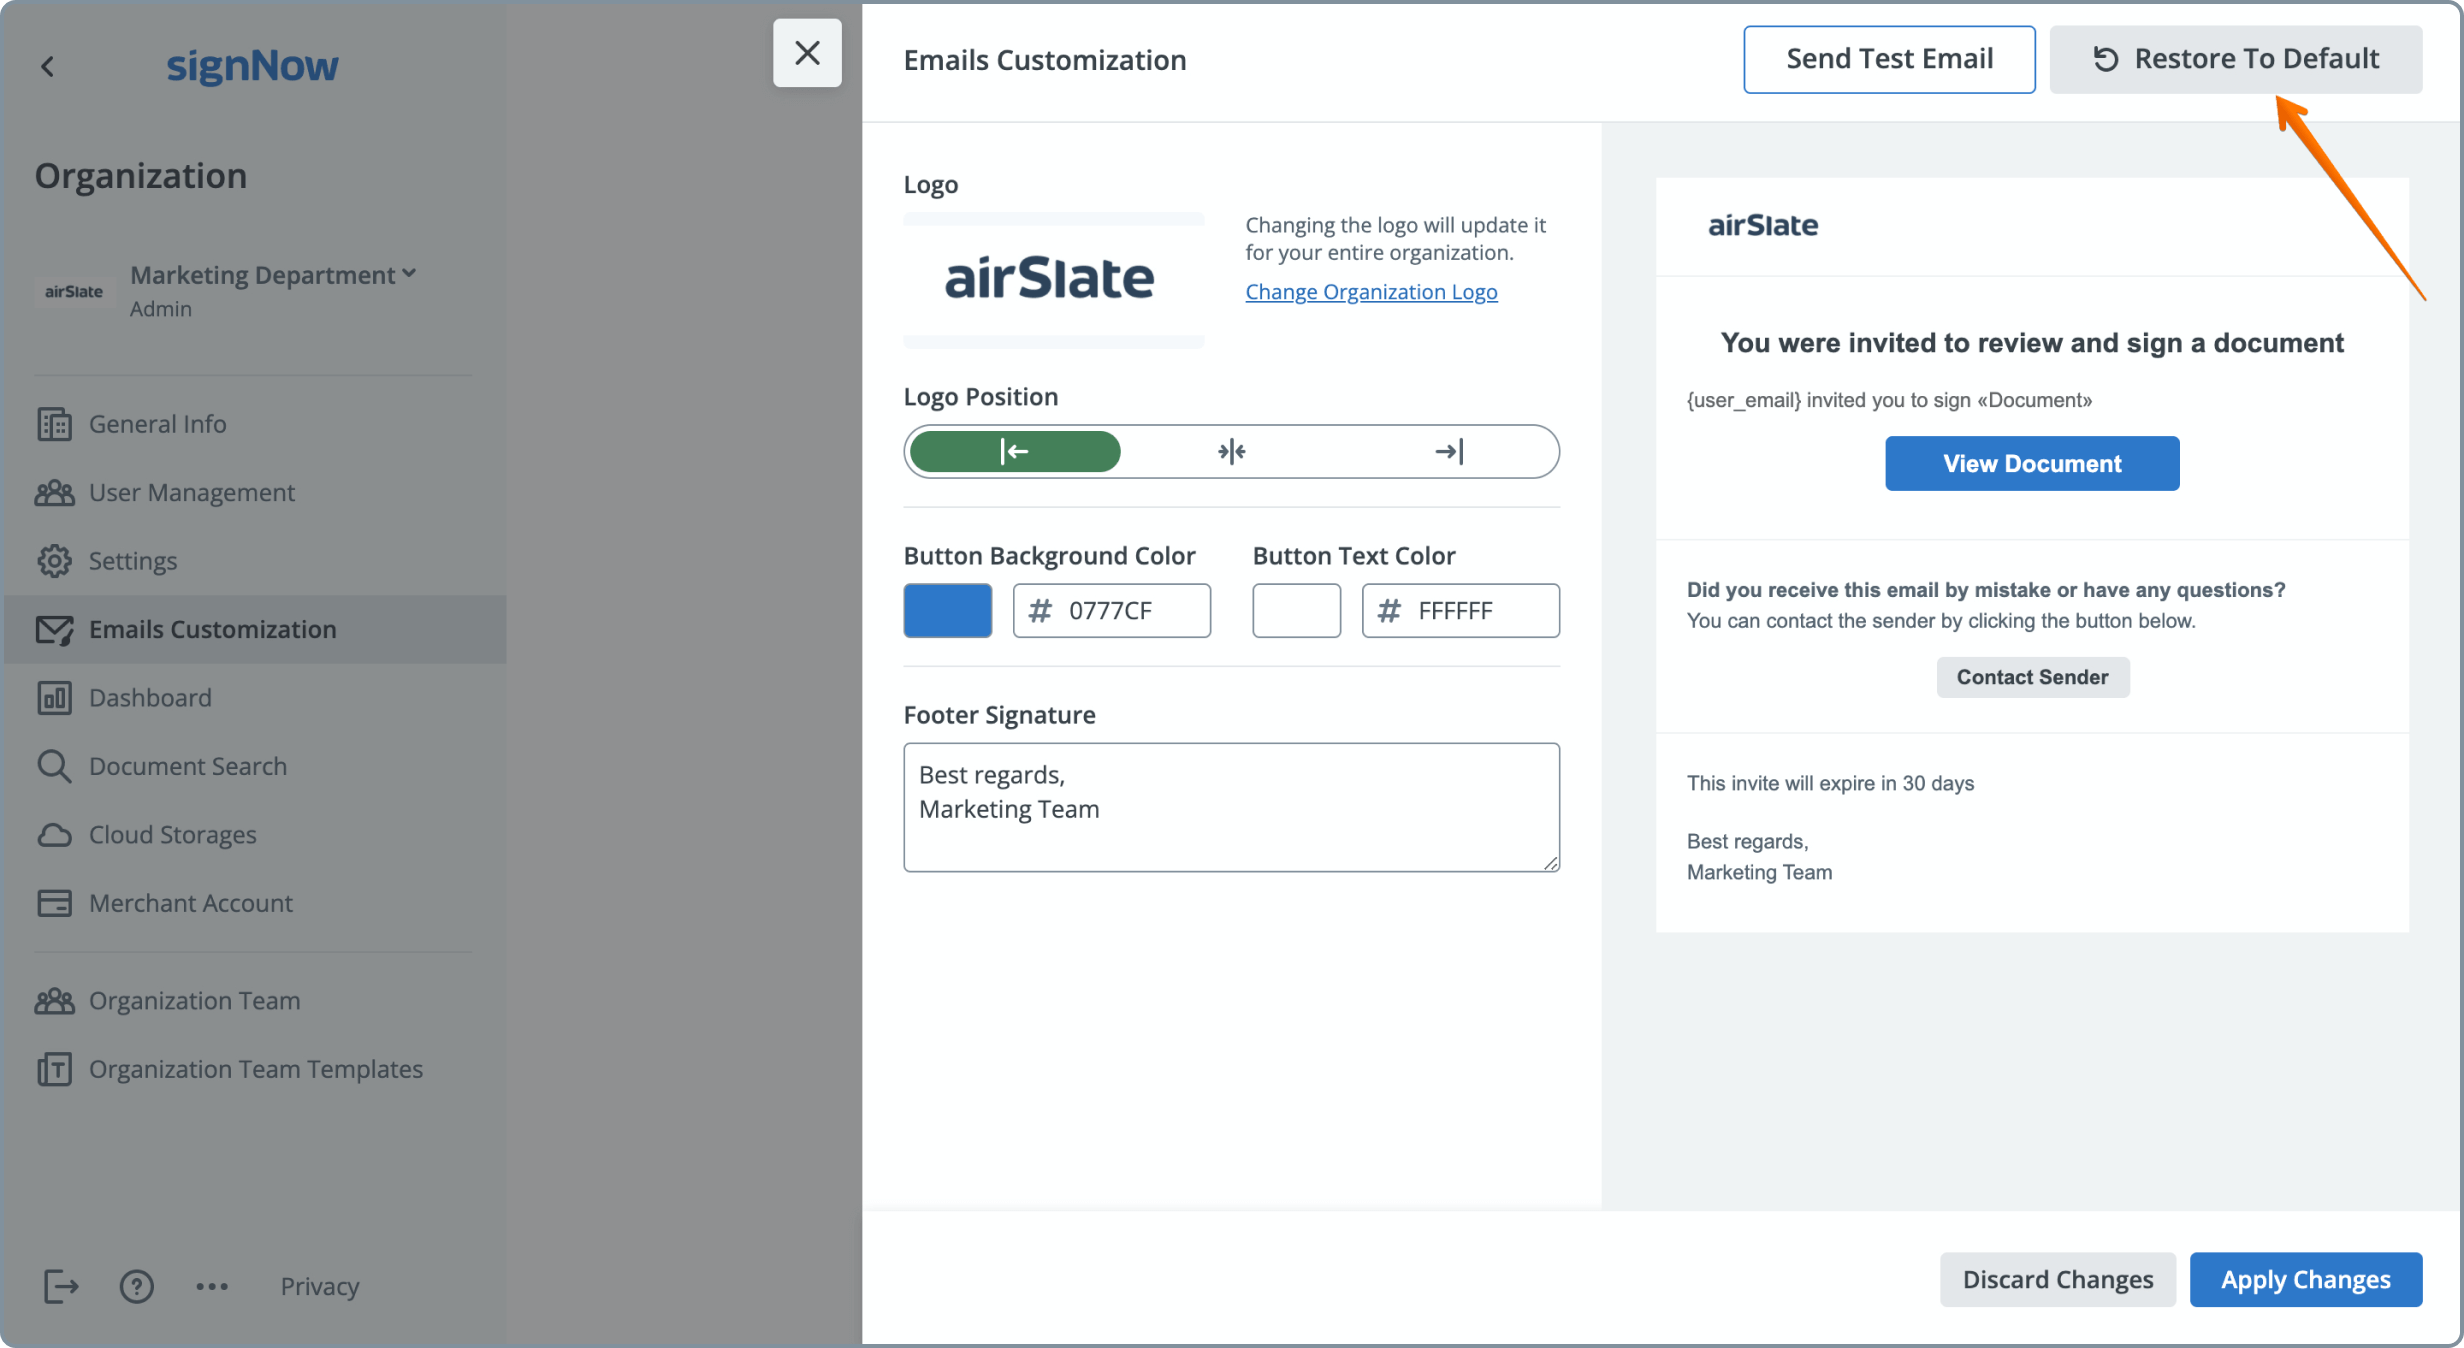
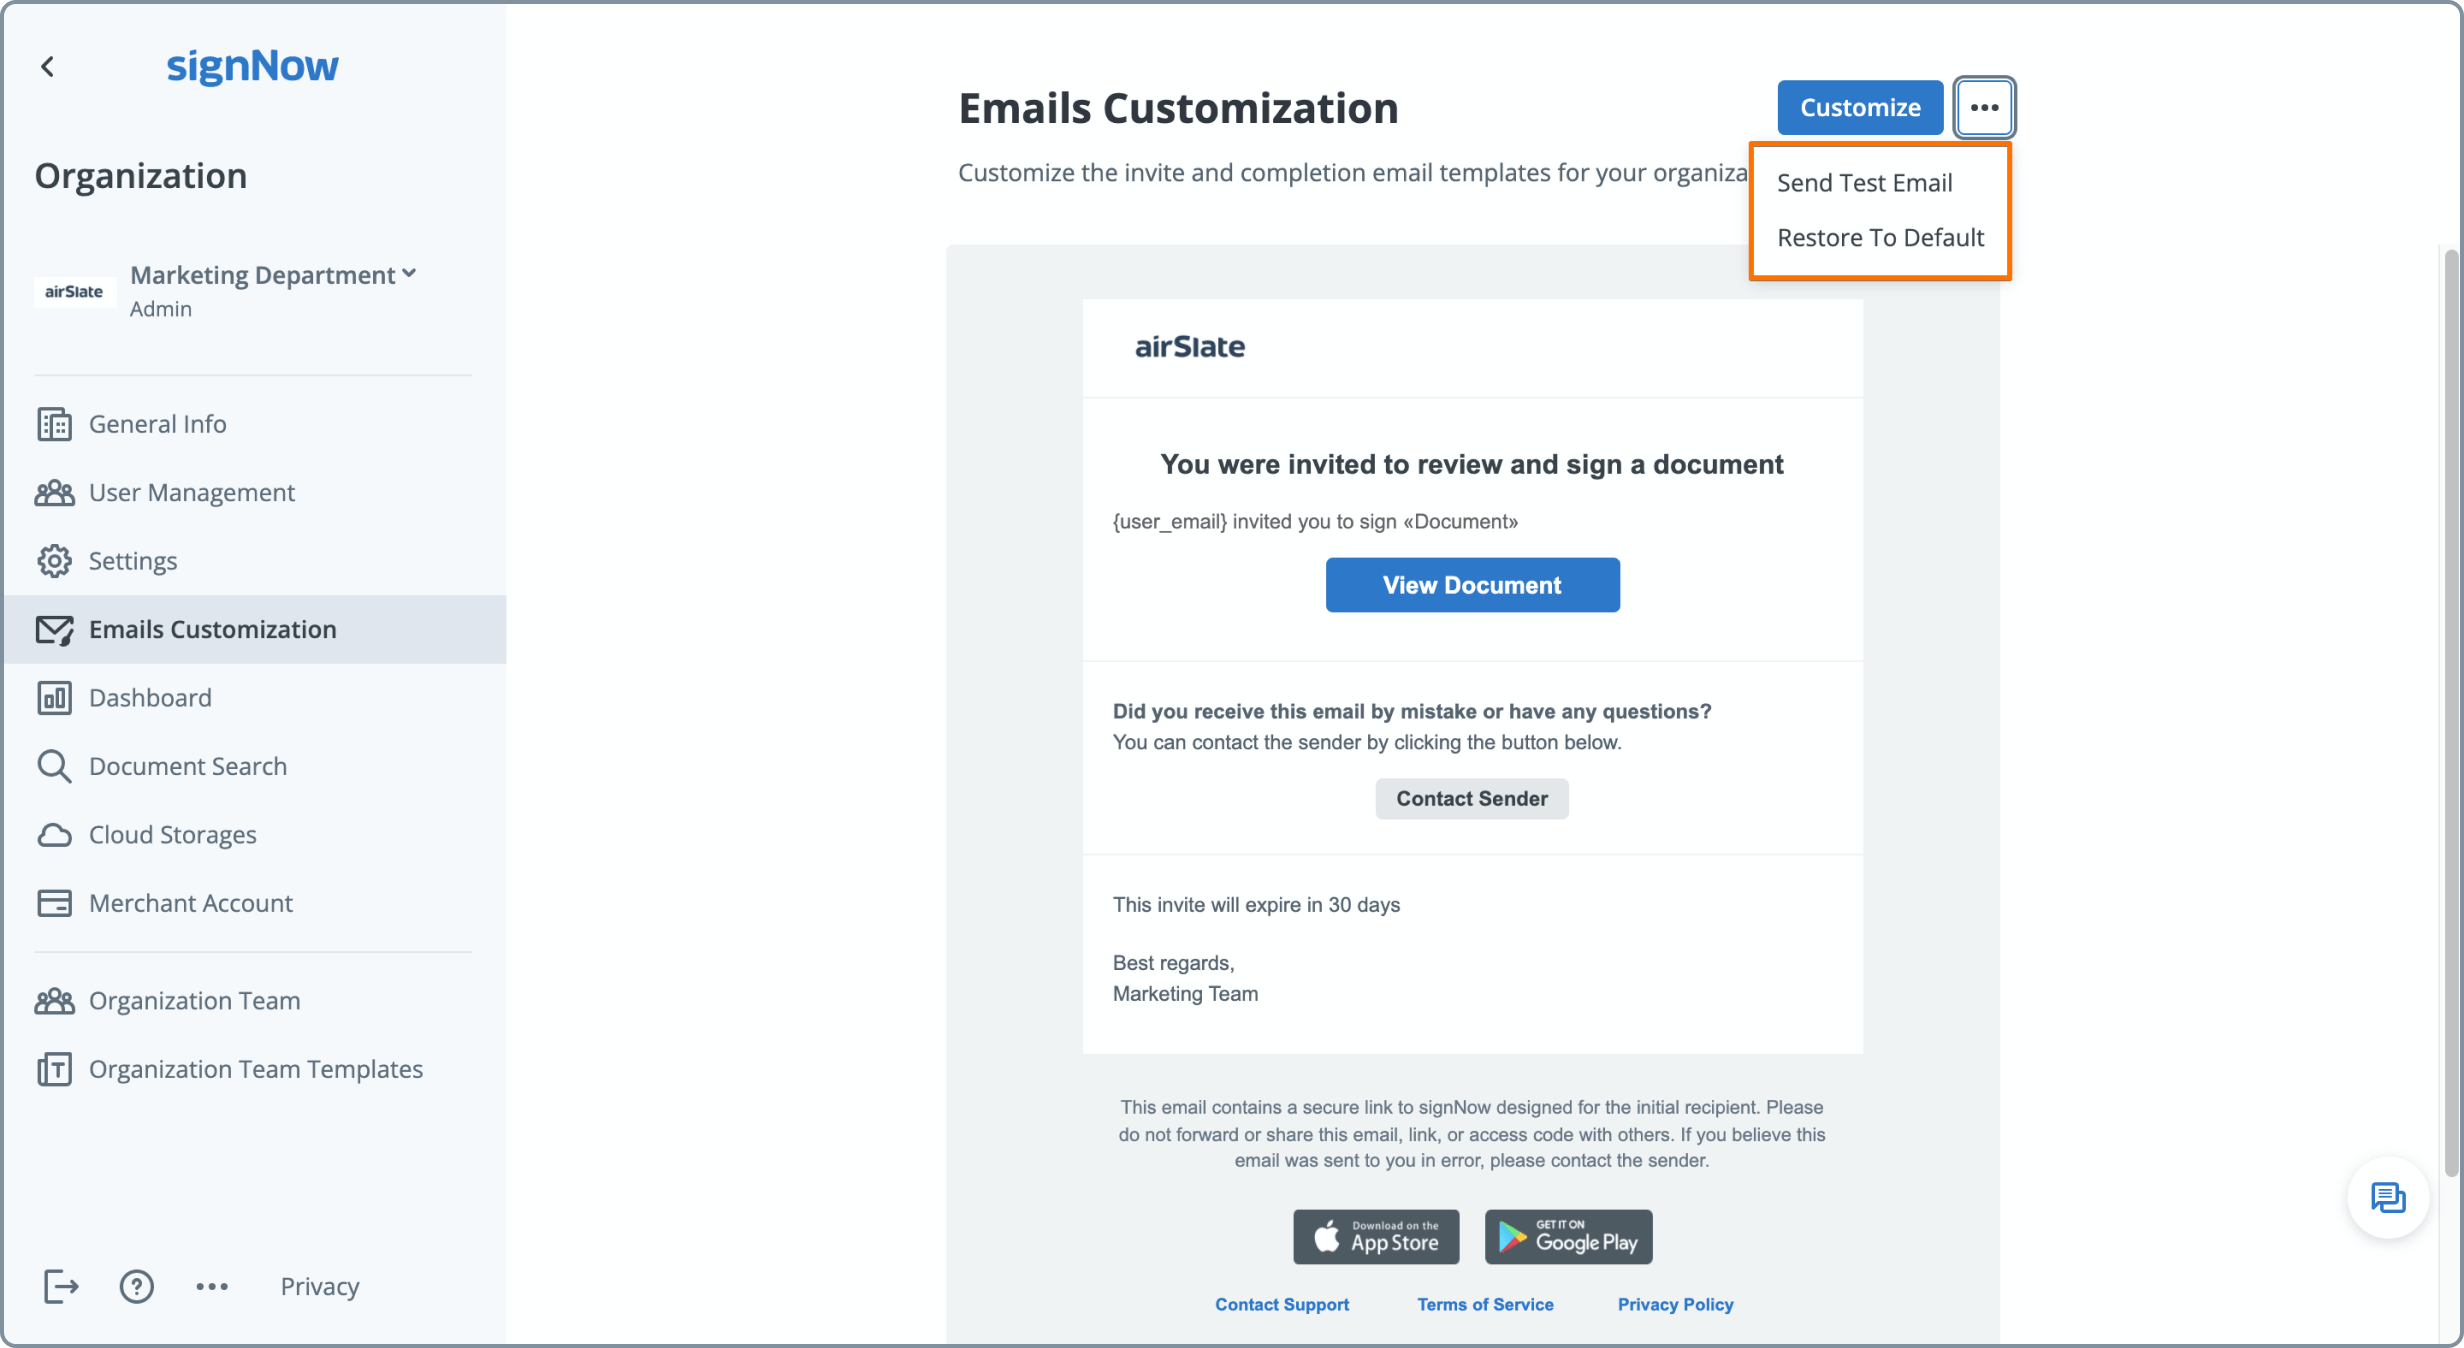
signNow enables you to extend your branding beyond documents by customizing the emails your organization sends. In the Admin Panel, navigate to the Email Customization tab to access a suite of branding options. Here, you can:
- Add your organization’s logo to outgoing emails
- Adjust the logo’s position (left, center, or right)
- Customize the call-to-action button colors
- Add a custom footer signature
Troubleshooting Logo Upload and Display Issues
If you encounter issues while uploading or displaying your logo, there are several steps you can take to resolve them:
- File Format or Size Errors: Ensure your logo is in JPG, GIF, PNG, or JPEG format and does not exceed 2 MB.
- Blurry or Distorted Logo: Resize your logo to the recommended 115x60 pixel ratio or less for optimal clarity.
- Logo Not Displaying: Confirm you are added as a Member in the organization’s User Management tab. Only Members see the organization’s branding on documents and emails.
- Changes Not Appearing: Try refreshing your browser or clearing your cache. Sometimes, updates may take a few moments to propagate across all devices.
- Permission Issues: Only Admins or Superadmins can upload or change logos. If you don’t see the option, check your user role or contact your organization’s administrator.
Frequently Asked Questions
-
Who can upload or change the organization logo in signNow?
Only users with Admin or Superadmin roles in an organization can upload or change the organization logo. However, to see the logo on documents and emails, you must also be added as a Member in the organization’s User Management tab.
-
What are the recommended logo specifications for signNow?
For best results, use a logo image with a ratio of 115x60 pixels or less. Supported file formats include JPG, GIF, PNG, and JPEG, and the file size should not exceed 2 MB. This ensures your logo appears crisp and professional across all signNow communications.
-
Why isn’t my logo showing up on documents or emails?
If your logo isn’t displaying, check that you are added as a Member in the organization’s User Management tab. Only Members see the organization’s branding on documents and emails. Also, ensure your logo meets the required file format and size specifications.
-
Can I customize the branding of emails sent from signNow?
Yes, you can customize the branding of emails by adding your logo, adjusting its position, changing button colors, and adding a custom footer in the Email Customization tab of the Admin Panel. You can preview changes, send test emails, and restore default settings as needed.
-
What should I do if I encounter an error uploading my logo?
First, check that your logo file is in a supported format (JPG, GIF, PNG, JPEG) and is under 2 MB. If you still encounter issues, try resizing your image or using a different file. If problems persist, contact your organization’s Admin or reach out to signNow support for assistance.