Managing Documents in the Dashboard
- Understanding the Dashboard Layout
- Quick Access: Navigating Document Statuses
- Main Folders and Folder Management
- Creating and Organizing Custom Folders
- Managing Deleted Documents in Trash
- Filtering and Sorting Your Documents
- Using Search to Find Documents and Templates
- Bulk Actions and Multi-Select Options
Welcome to your SignNow dashboard! Here, you’ll discover a powerful suite of tools designed to help you manage, organize, and locate your documents with ease. Whether you’re handling a handful of contracts or overseeing hundreds of agreements, the dashboard provides intuitive navigation, robust folder management, and advanced search and filtering options. This guide will walk you through every aspect of document management in your dashboard, ensuring you can work faster and smarter.
Understanding the Dashboard Layout
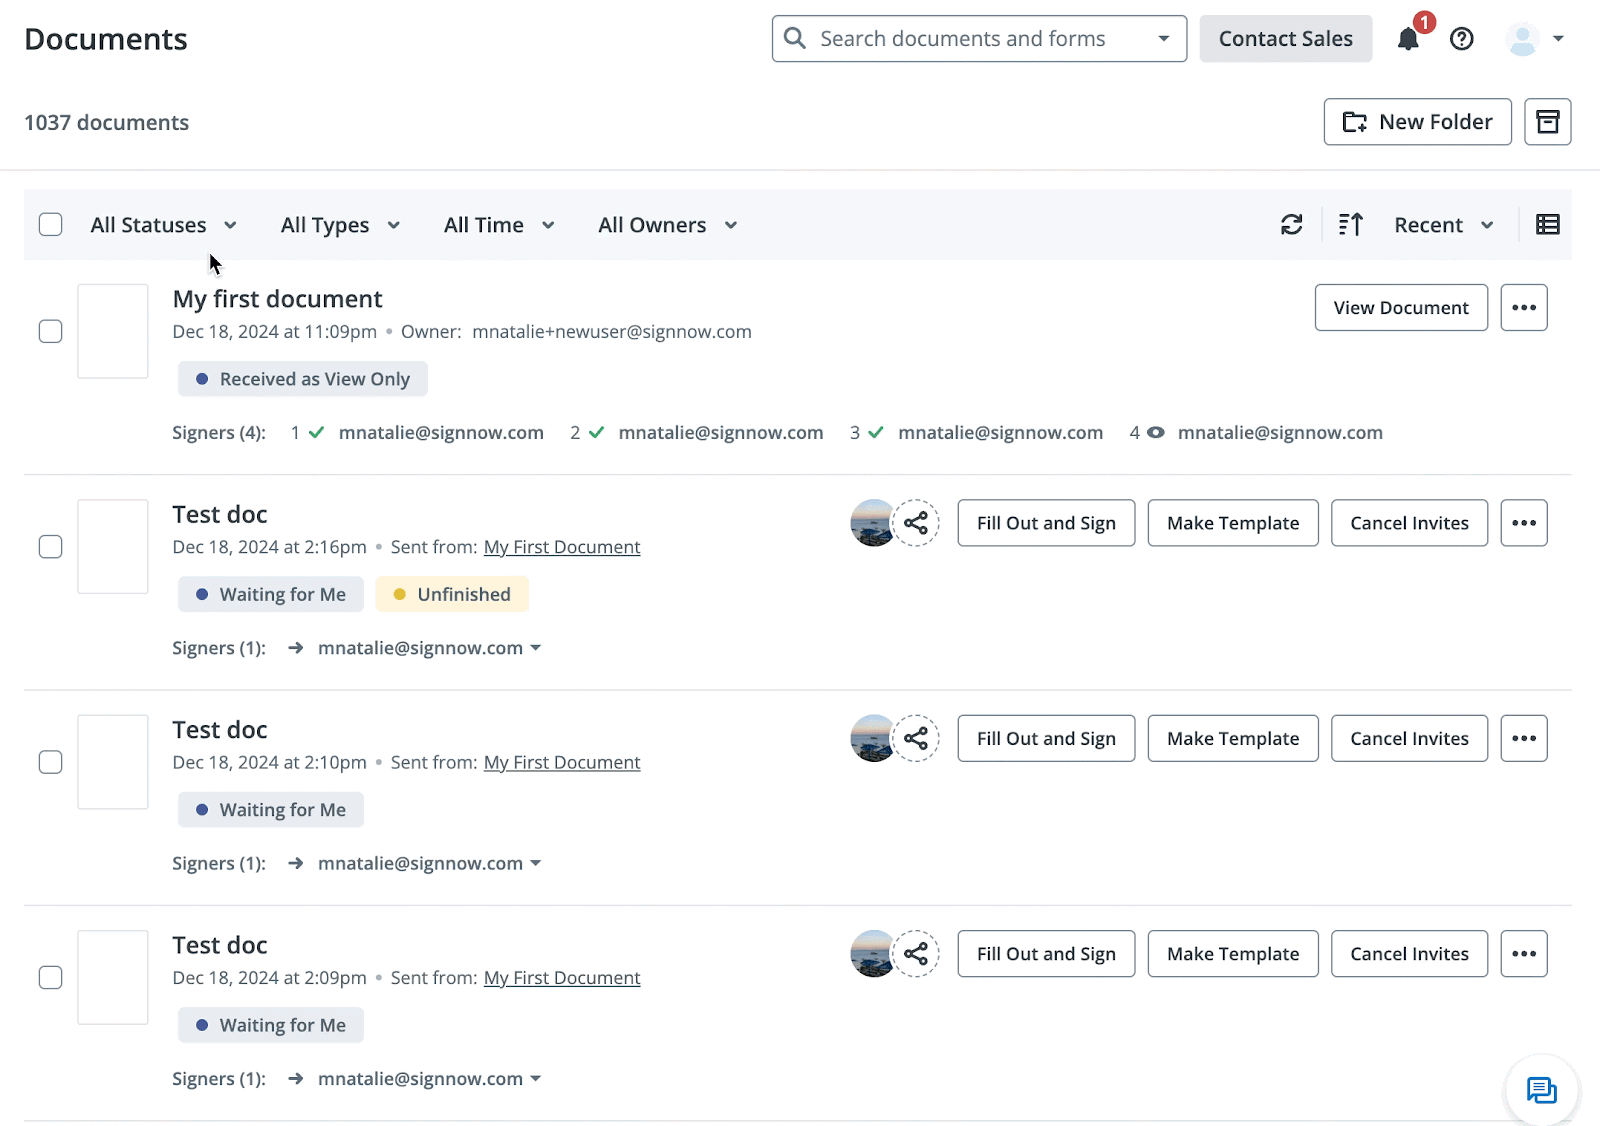
The SignNow dashboard is thoughtfully organized to streamline your workflow. On the left, you’ll find the main navigation panel, which includes quick access to your Documents, Archive, Templates, Trash, and shared resources. The central area displays your document list, complete with status indicators, signer information, and action buttons. The right-hand panel offers management features such as creating folders, archiving, moving, downloading, deleting, and more. Notifications and user profile controls are conveniently located at the top right.
For example, the Upload Documents button is now prominently placed on the left panel for easy access, while the right panel houses all your document management actions. This layout ensures that uploading, organizing, and acting on documents is always just a click away.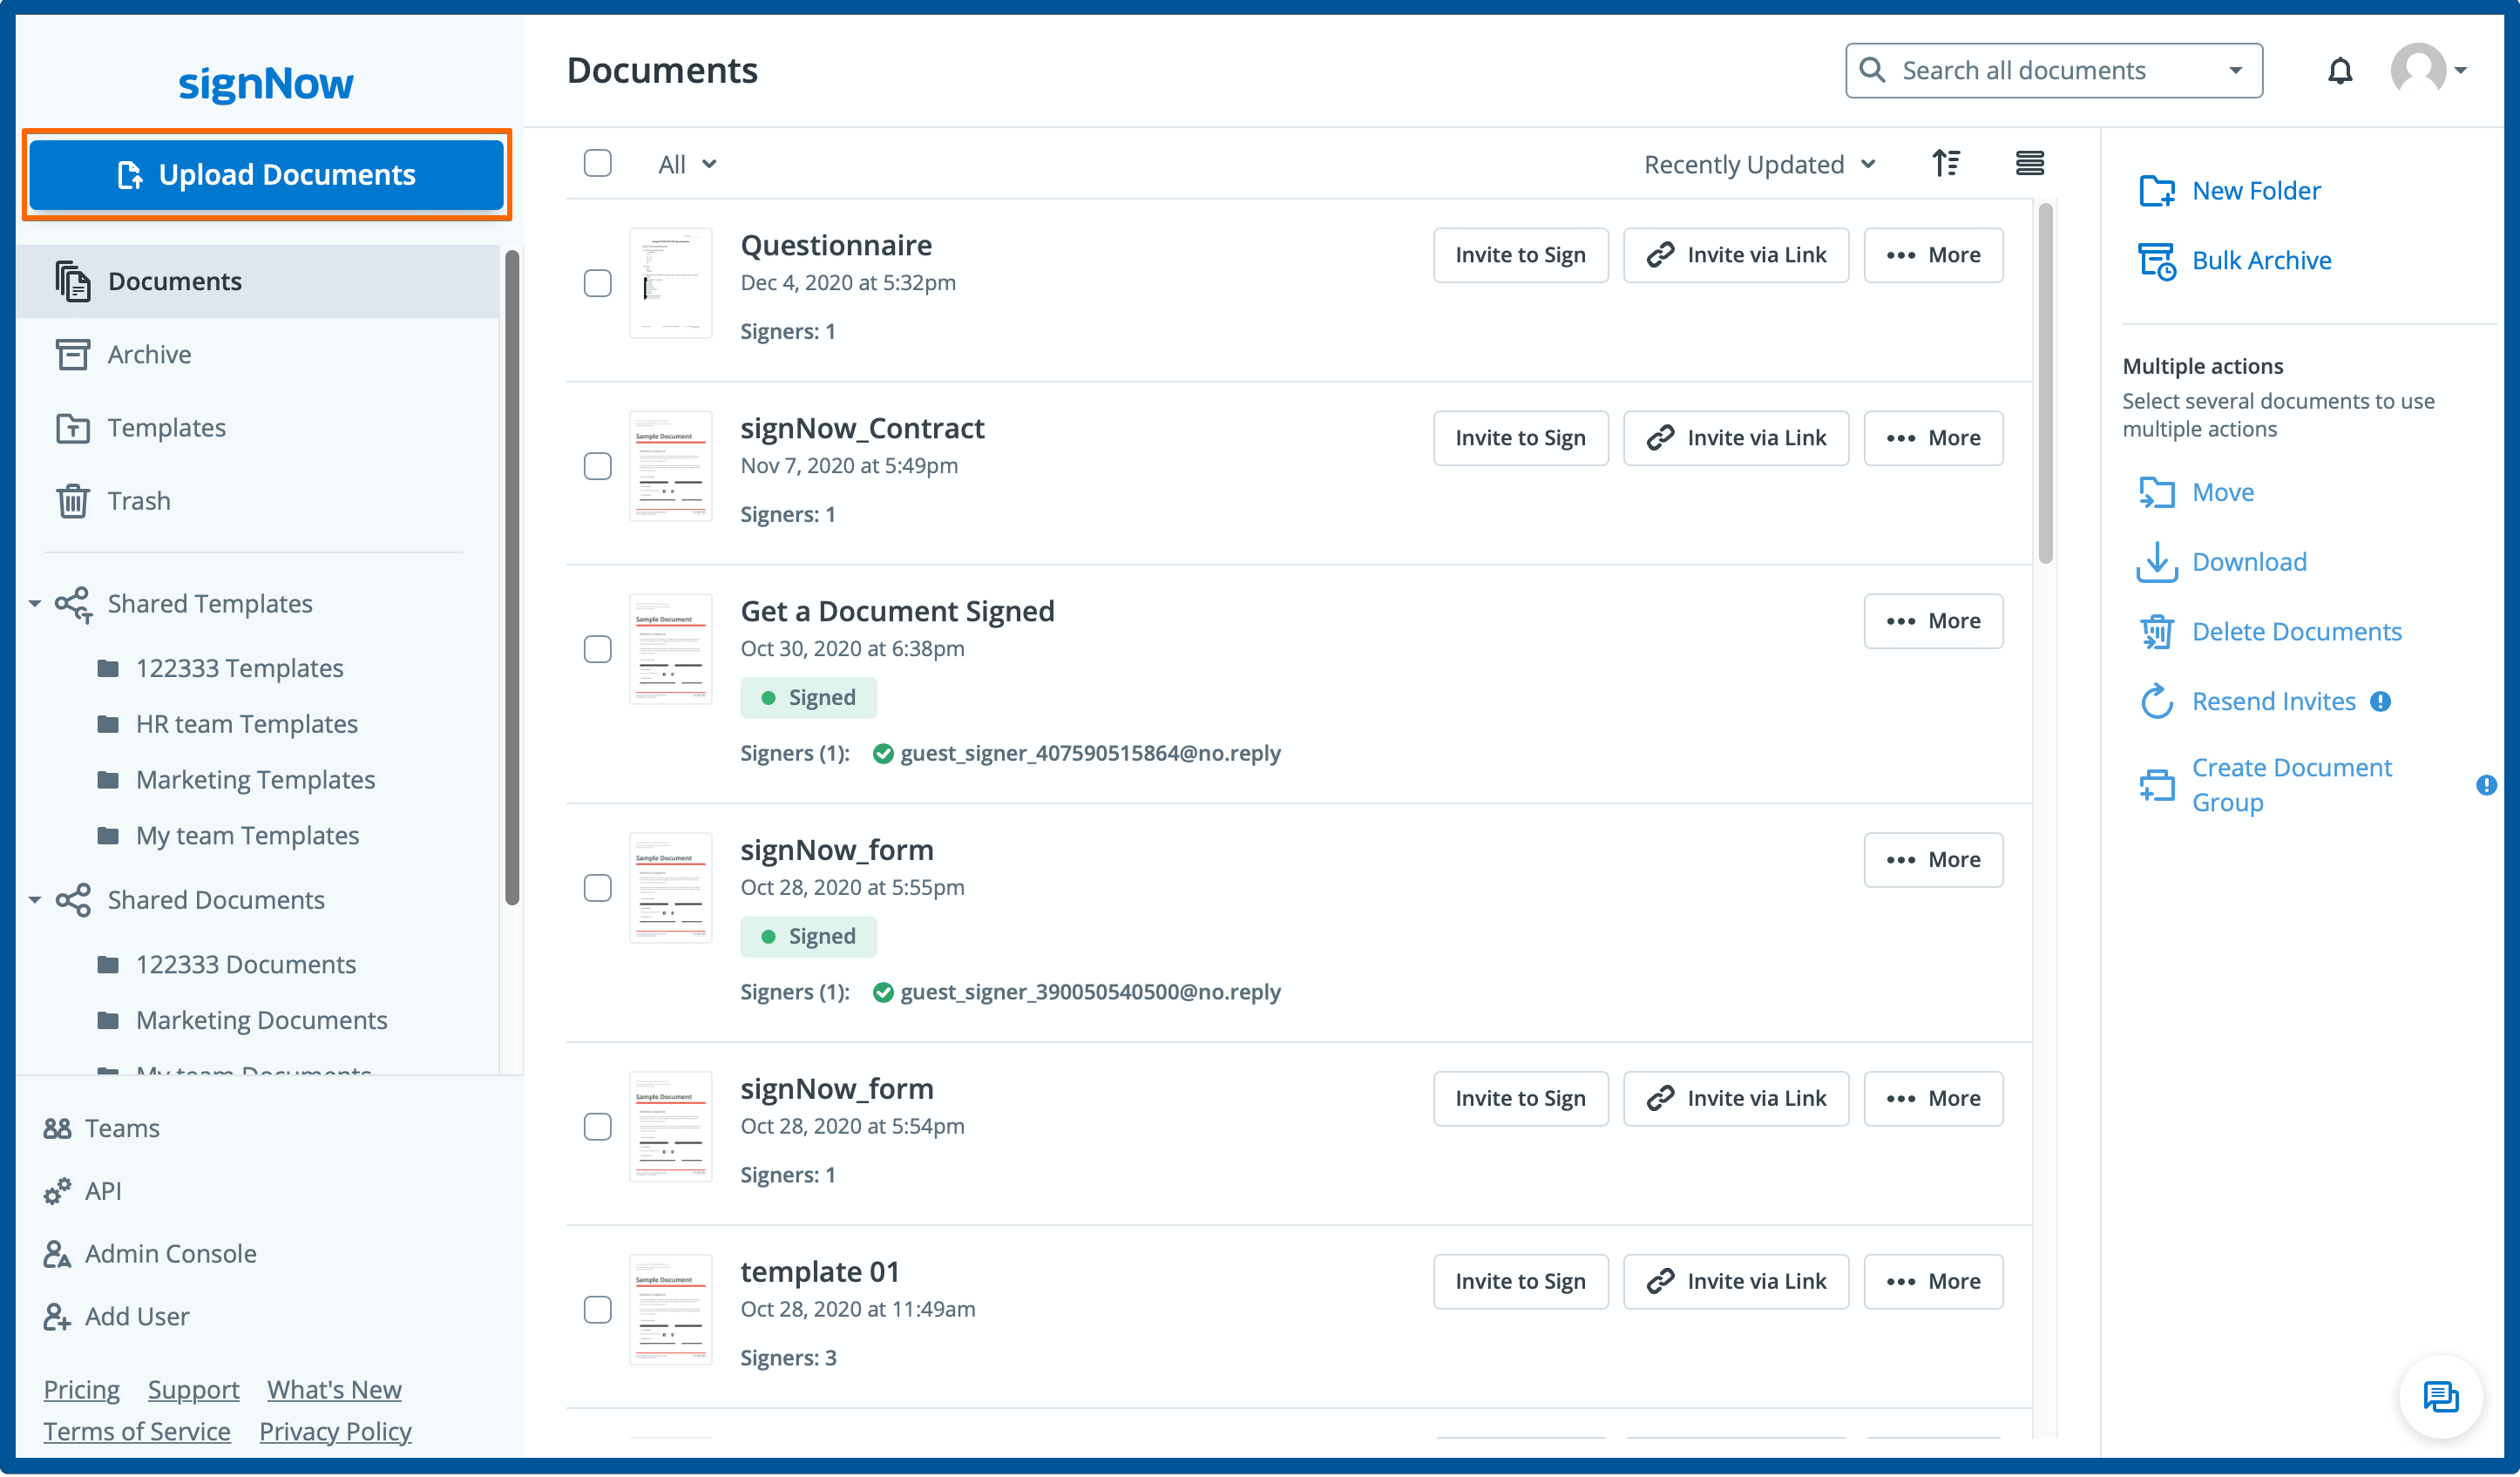
Quick Access: Navigating Document Statuses
The Quick Access section is your shortcut to the most important document statuses. Instantly jump to documents that require your attention or are in a specific state. Here’s what you’ll find:
- Inbox / Waiting for Me: Documents awaiting your signature.
- Outbox / Waiting for Others: Documents you’ve sent out for signature, pending completion.
- Completed: Fully signed documents, ready for download or archiving.
- Drafts: Documents you’re preparing but haven’t sent yet.
- Favorites: Documents you’ve marked for easy access.
- Expiring Soon: Invitations nearing expiration, so you can act before they lapse.
- Shared with Me: Files and templates shared by others, accessible based on your permissions.
- Owned by Me: All documents and templates you own.


Main Folders and Folder Management
Your dashboard includes several main folders that serve as the backbone of your document organization. These folders—Documents, Templates, Archive, Trash, Document Groups, and Document Group Templates—cannot be removed, ensuring you always have a consistent structure.
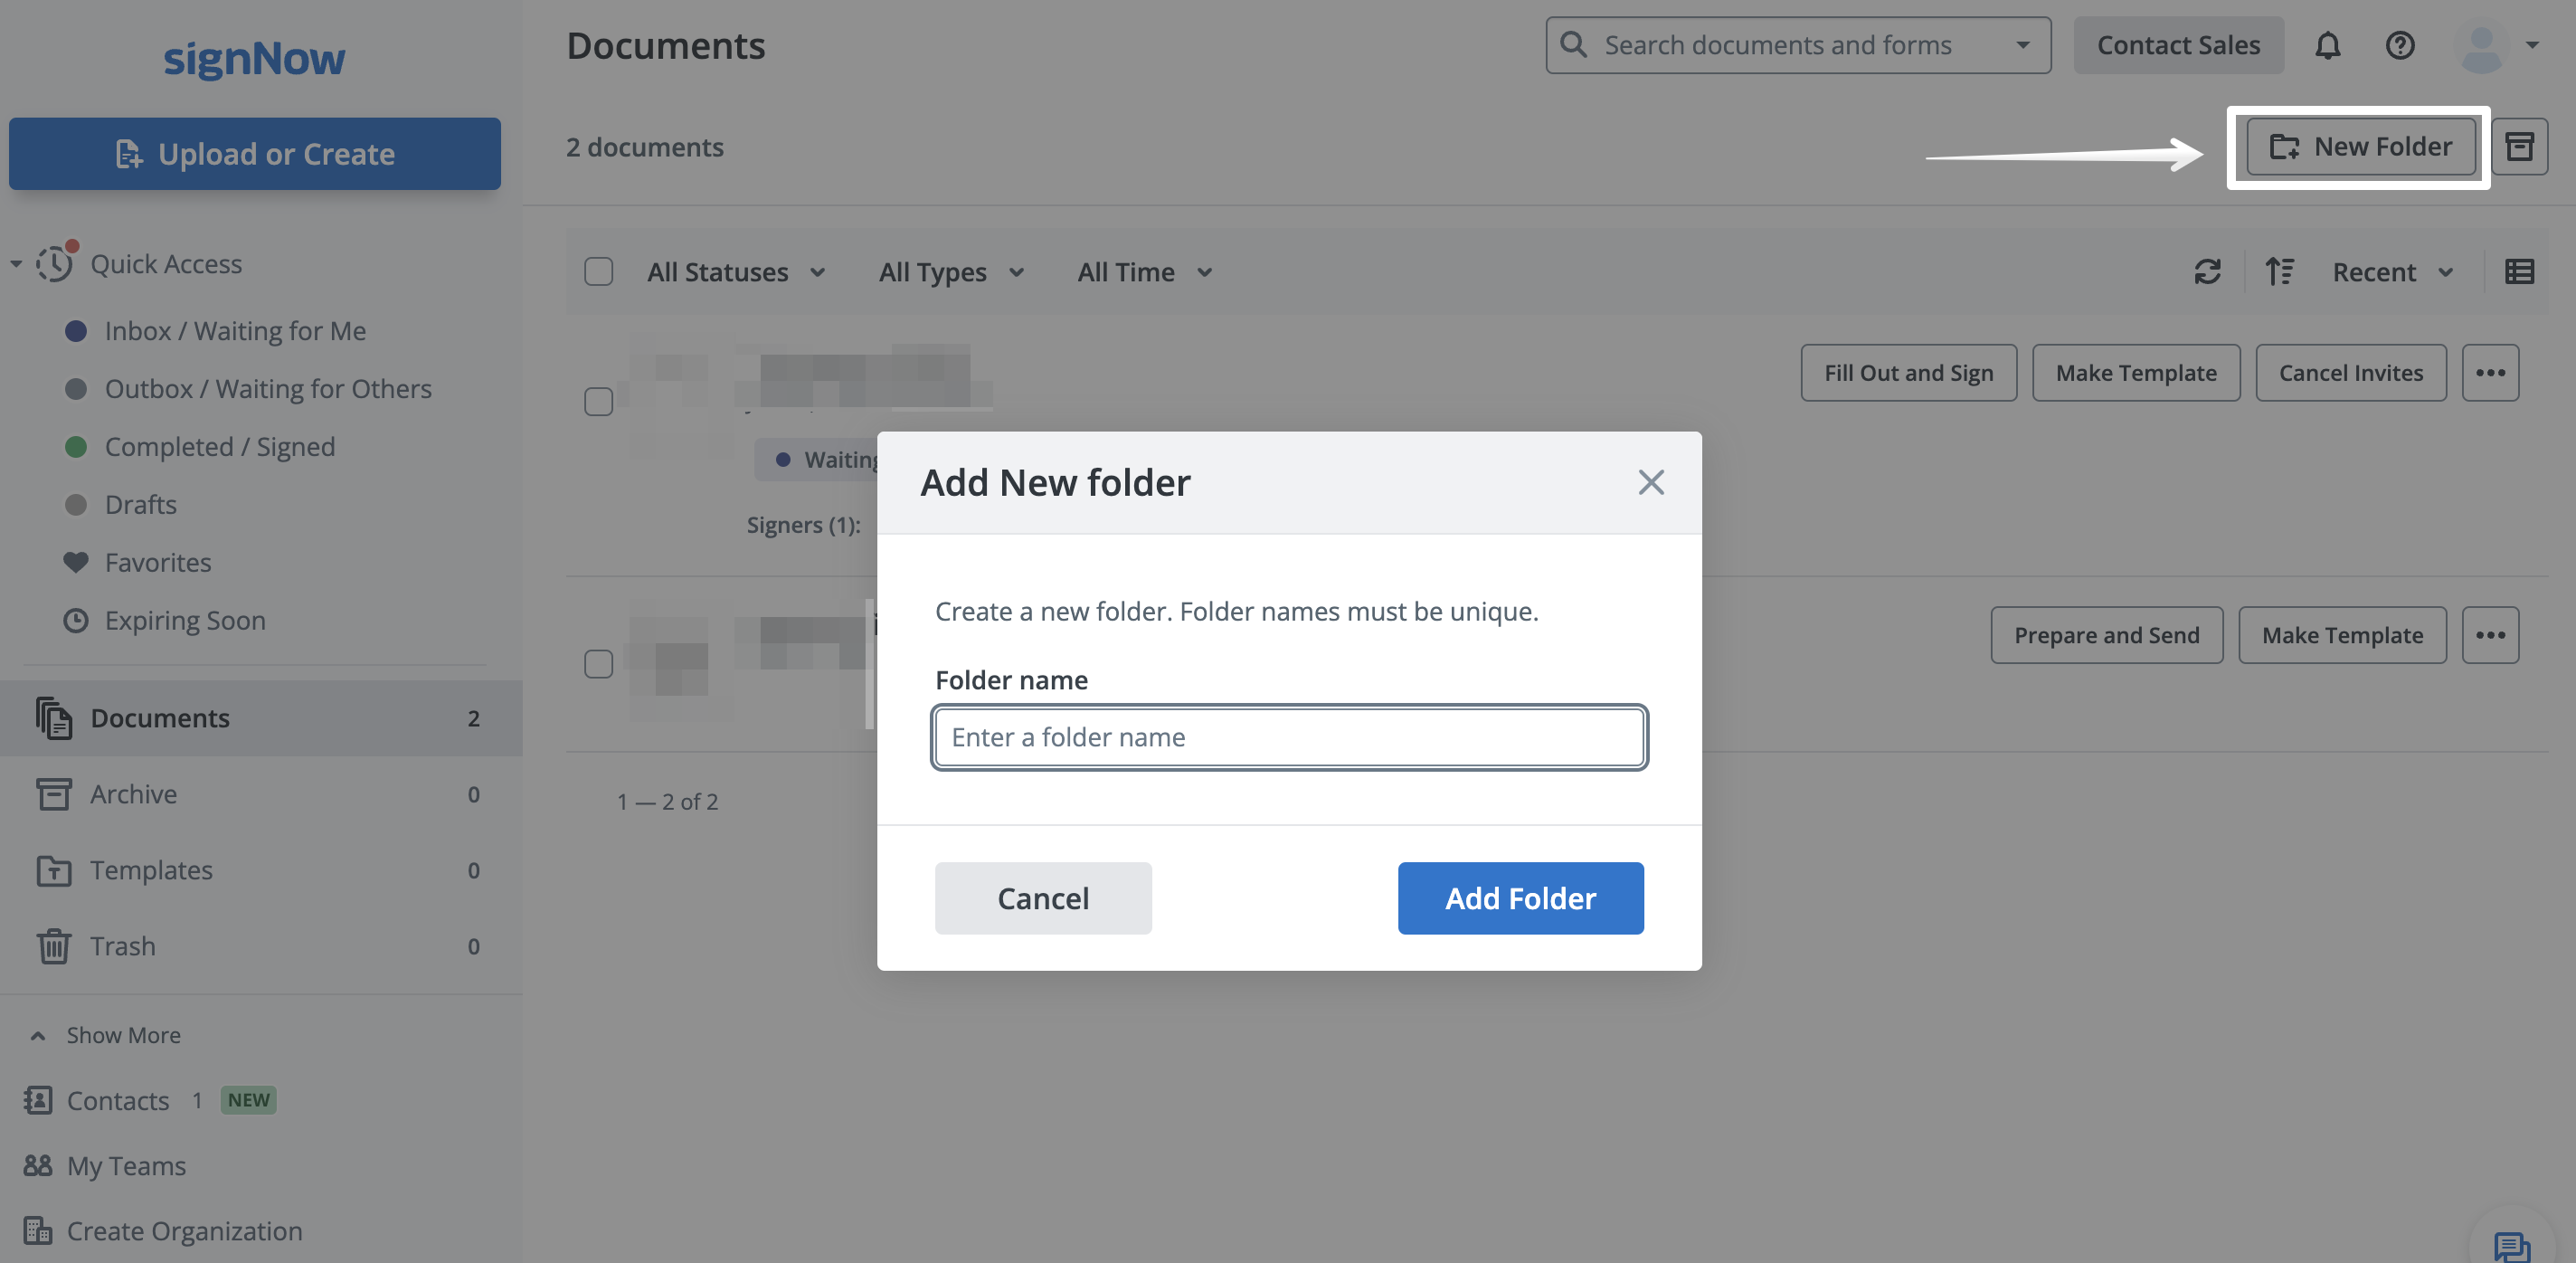
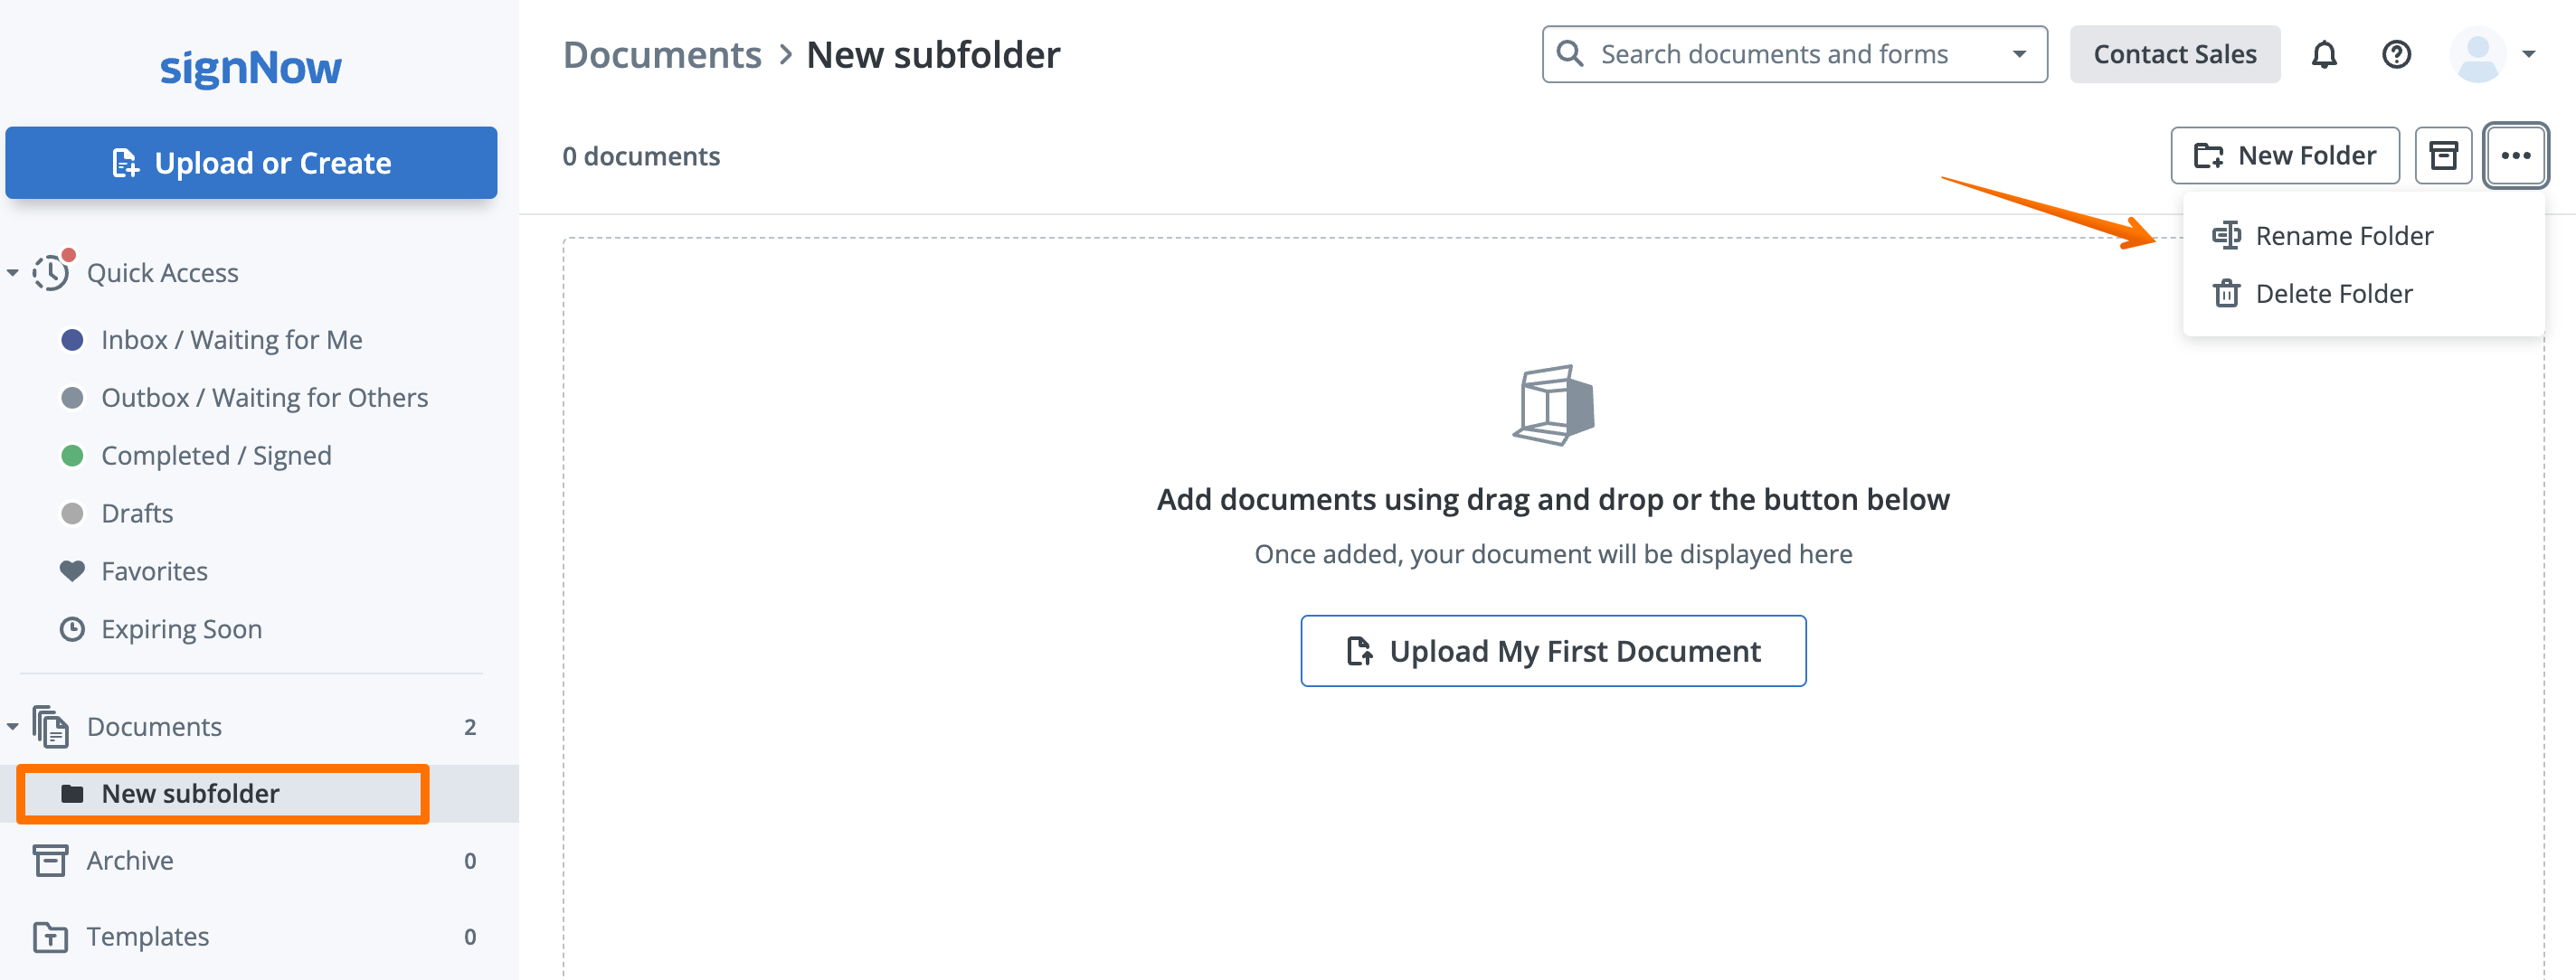
Within these, you can create custom folders and subfolders to further organize your files. For example, you might create subfolders for each client, project, or year. Right-click on any folder or use the New Folder button to add subfolders. Custom folders can be renamed or deleted, but they cannot be moved to other locations, preserving your organizational hierarchy.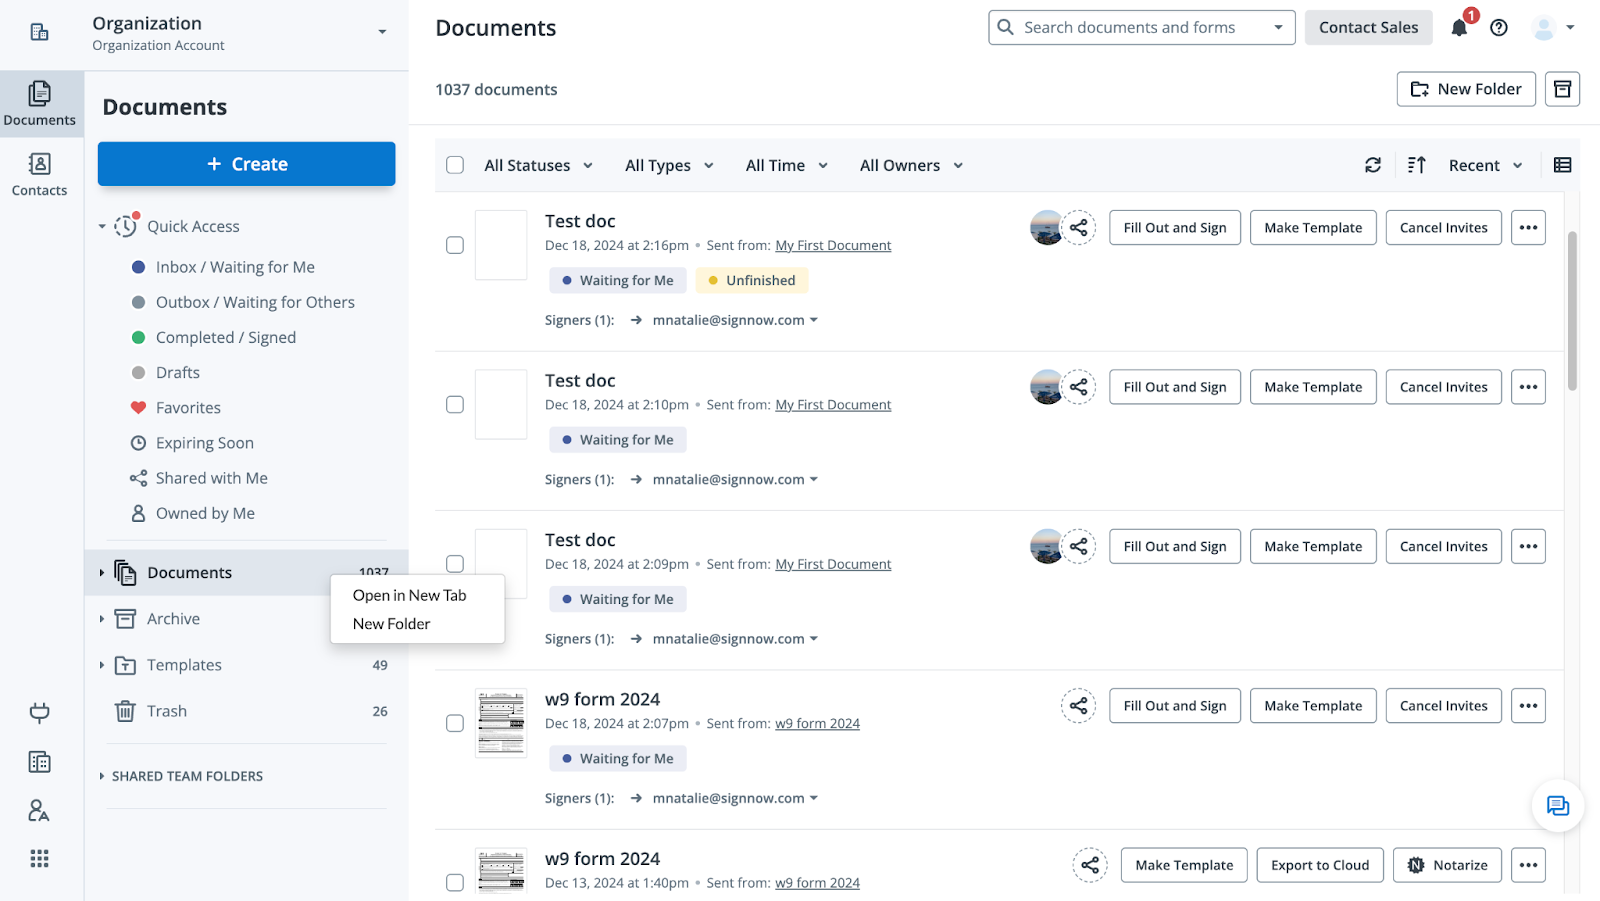
Get legally-binding signatures now!
Creating and Organizing Custom Folders
Custom folders are a powerful way to keep your dashboard tidy and tailored to your workflow. To create a new folder, simply click the New Folder button at the top right of your folder list or right-click on an existing folder to add a subfolder. You can name folders anything you like, such as "2024 Contracts" or "HR Onboarding."
Once created, you can drag documents into these folders for better organization. If you need to rename or delete a folder, use the options menu (three dots) next to the folder name. Remember, while you can delete or rename custom folders, you cannot move them to a different parent folder, which helps maintain a clear structure.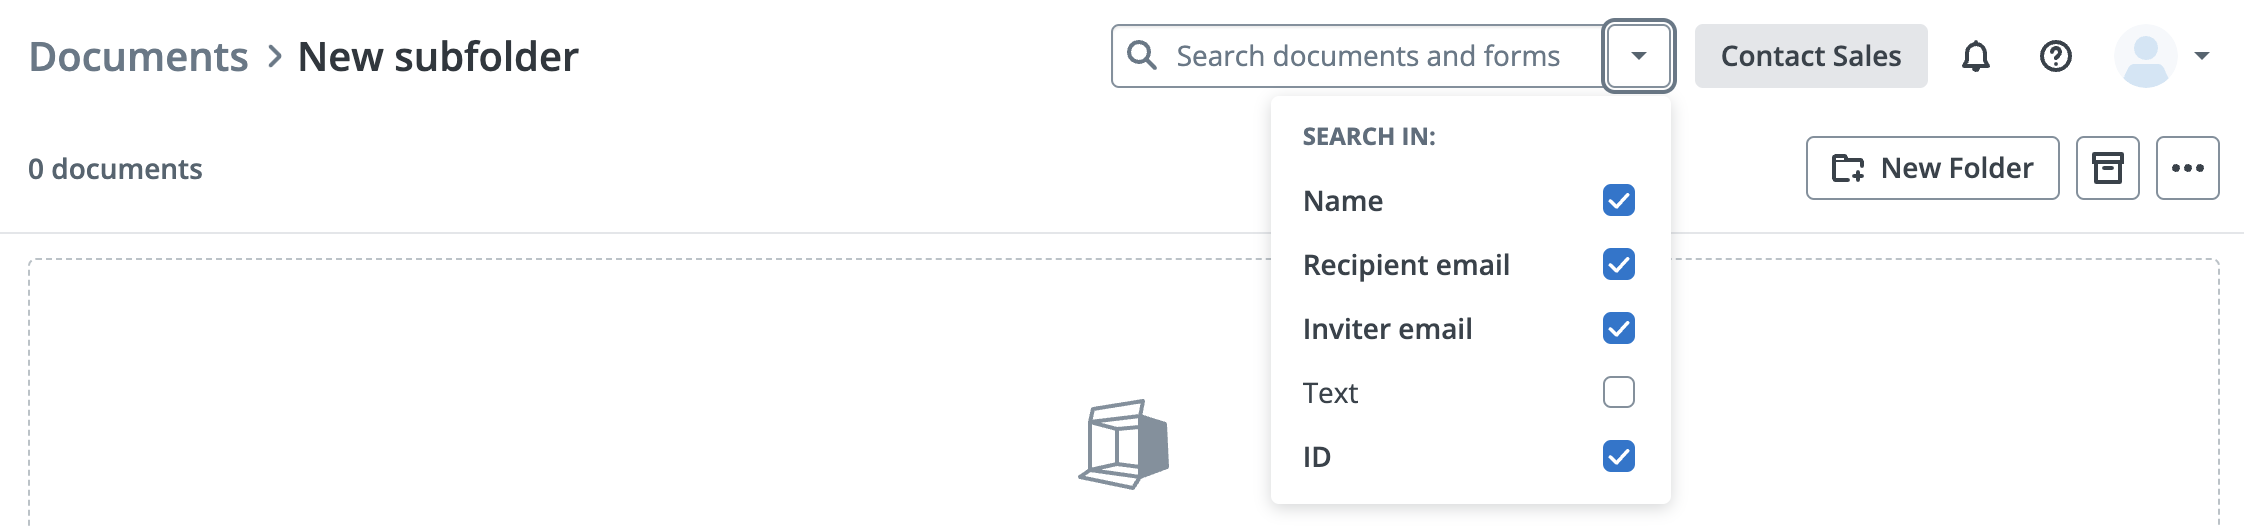
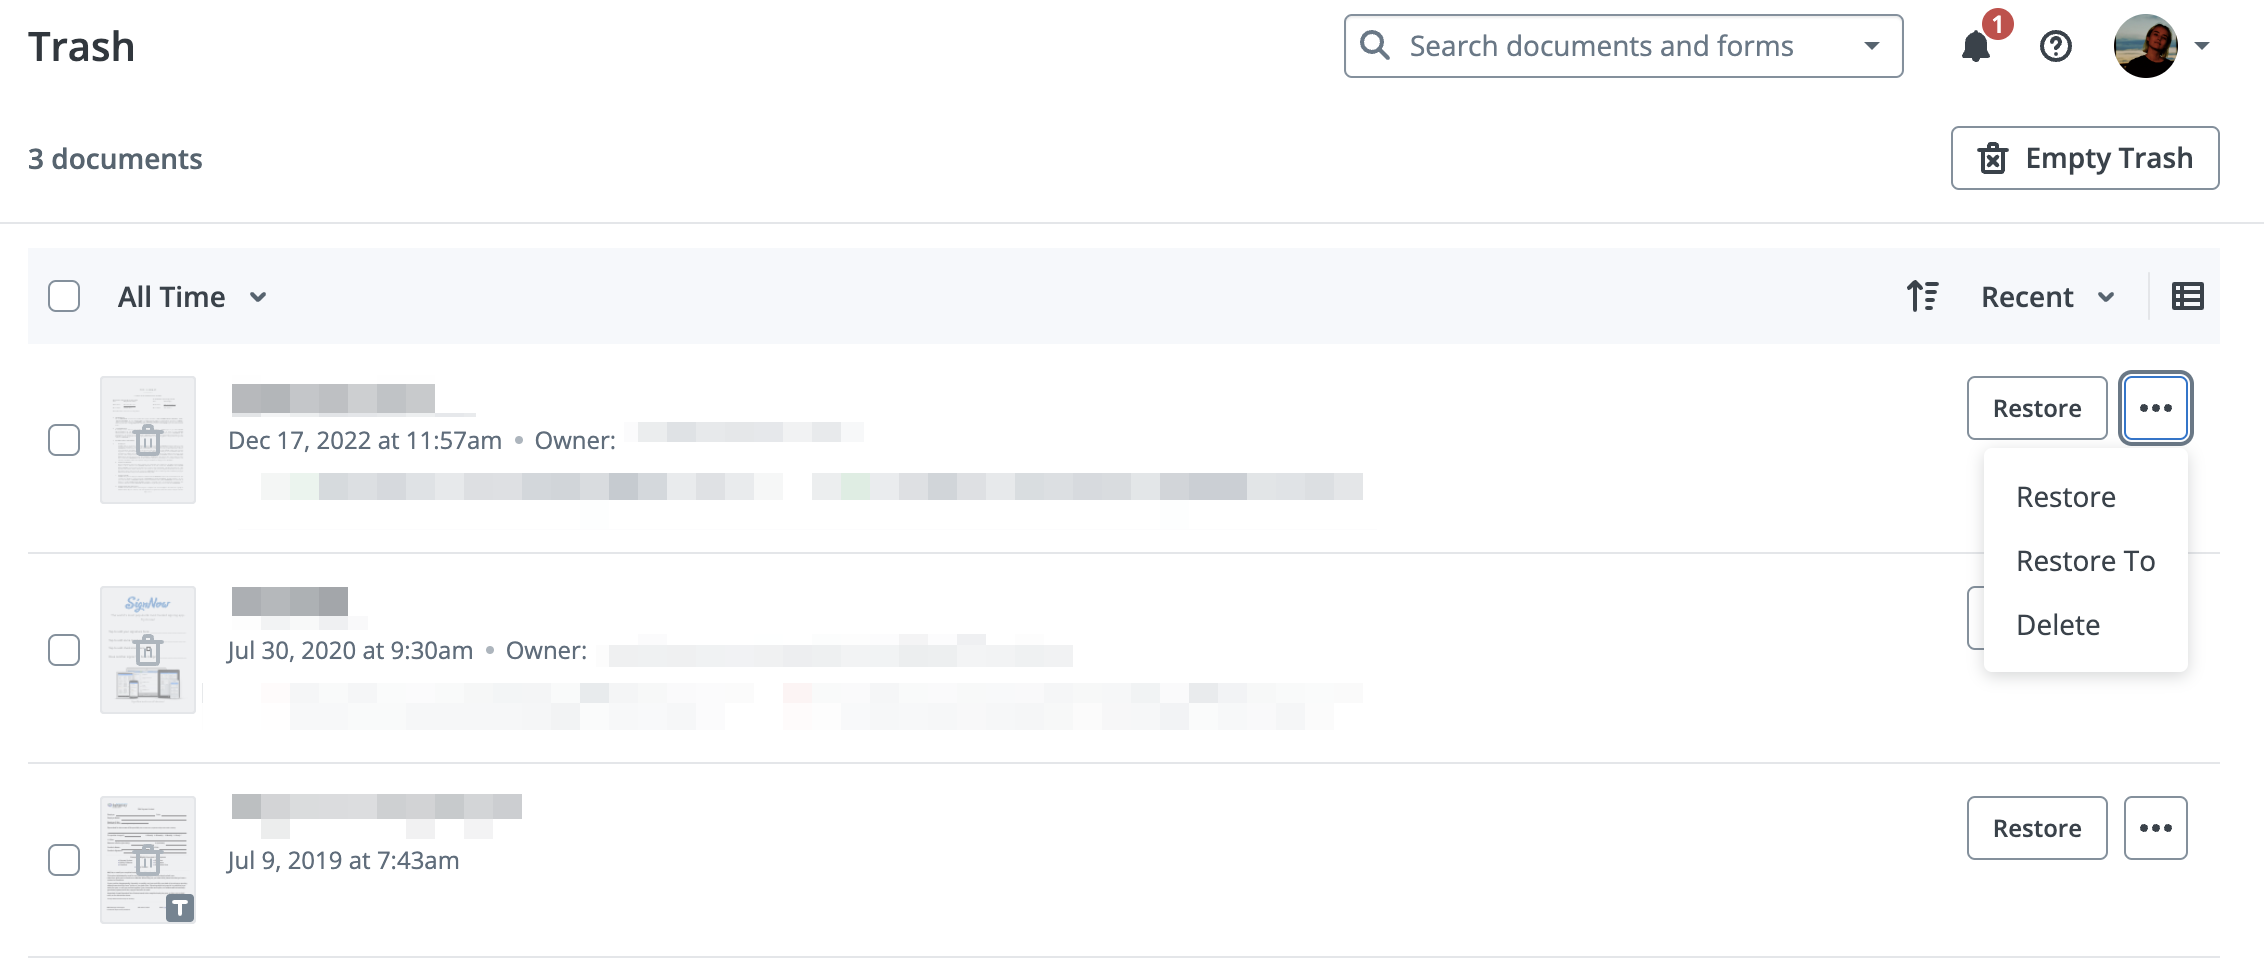
Managing Deleted Documents in Trash
When you delete a document or template, it’s not gone forever—at least not right away. Deleted items are moved to the Trash folder, where you can review and restore them if needed. This safety net ensures you never lose important files by accident.
To restore a document, open the Trash folder, select the file, and choose Restore or Restore To from the options menu. If you’re sure you no longer need a file, you can permanently delete it from Trash. Be careful: once a file is permanently deleted, it cannot be recovered.
Filtering and Sorting Your Documents
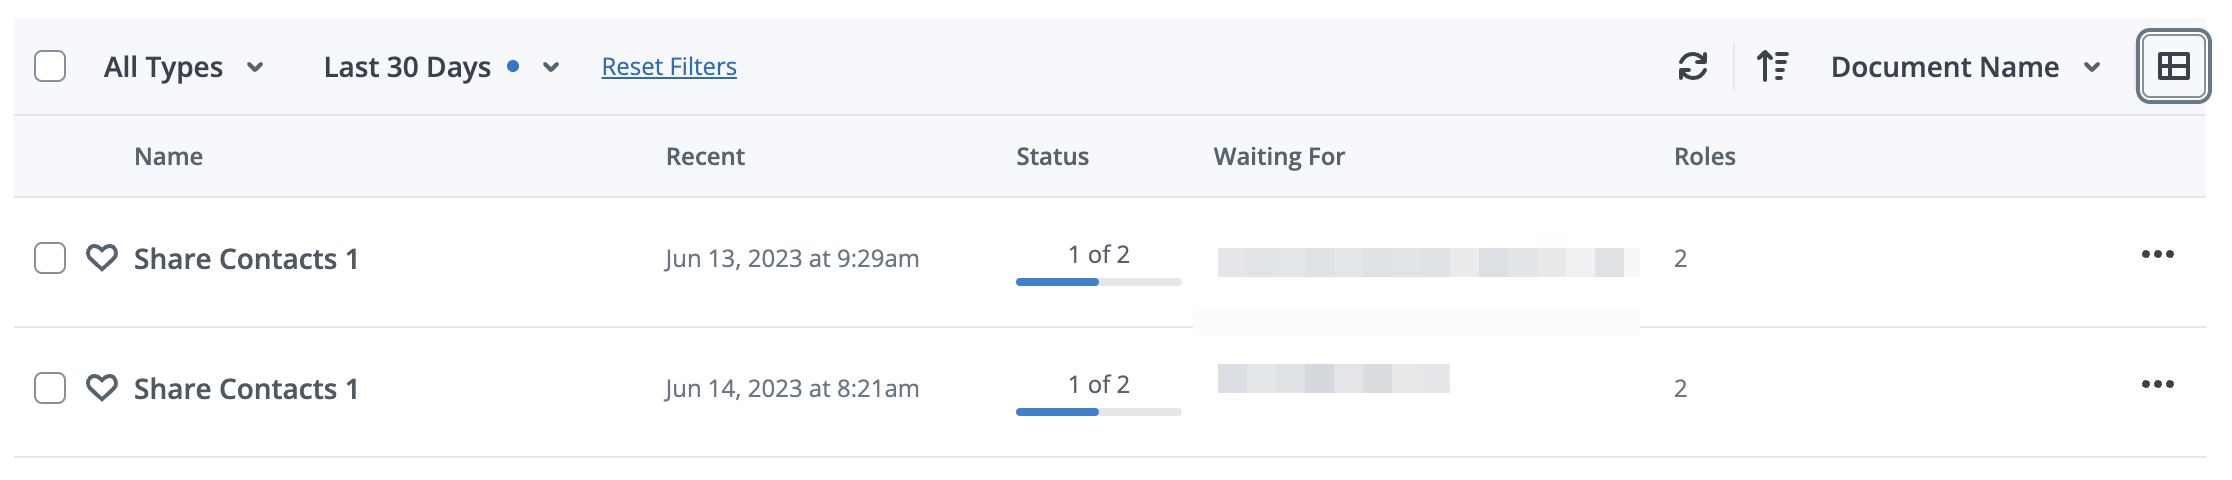
With hundreds or even thousands of documents, finding the right one quickly is essential. The dashboard offers robust filtering and sorting tools. Filter by status (such as Unfinished, Waiting for Me, Signed), type (Documents, Templates), time (creation or modification date), and ownership (owned by you or shared with you).
Sorting options let you arrange documents by name, date, or recency, in ascending or descending order. You can also toggle between Compact and Detailed views to suit your preference. The refresh button reloads all folders, ensuring you always see the latest updates.
Using Search to Find Documents and Templates
The search bar is your best friend when you need to find a document or template fast. Search by document name, signer’s email, sender’s email, document content (fillable fields), or even by unique document ID. For advanced users, searching by document ID is especially helpful for tracking down specific files.
If your search doesn’t return any results, you’ll be prompted to search the Forms Library for relevant templates, expanding your options. The Text search option is disabled by default to optimize performance, but you can enable it for deeper searches within document content. 

Bulk Actions and Multi-Select Options
Save time by performing actions on multiple documents at once. The dashboard allows you to select several documents—even across multiple pages—and apply bulk actions such as merging, resending invites, moving to another folder, or archiving. The available actions depend on the status of the selected documents (for example, you can’t resend invites for expired documents).
To select multiple documents, simply click on each one or use the checkboxes. Once selected, the action toolbar will appear, giving you access to all relevant bulk actions.
Frequently Asked Questions
-
Can I recover a document after deleting it?
Yes, when you delete a document, it is first moved to the Trash folder. You can restore it from there unless you permanently delete it. Once a document is permanently deleted from Trash, it cannot be recovered. Always double-check before emptying your Trash folder.
-
How do I organize documents for different projects or clients?
You can create custom folders and subfolders within your main Documents, Templates, or Archive folders. Name them according to your projects or clients, and drag documents into the appropriate folders for easy organization. Use the folder options menu to rename or delete folders as your needs change.
-
What is the difference between 'Shared with Me' and 'Owned by Me'?
'Shared with Me' includes documents and templates that others have shared with you, either for viewing or editing. 'Owned by Me' refers to files you have uploaded or created in your account. You can filter and manage these categories separately for clarity.
-
How can I quickly find a specific document if I have a large library?
Use the search bar at the top of your dashboard. You can search by document name, signer or sender email, document content, or document ID. For even faster results, combine search with filters for status, type, or date.
-
Are there any limitations to moving or renaming folders?
You can rename or delete custom folders, but you cannot move them to a different parent folder. This helps maintain a clear and consistent folder structure. Main folders like Documents, Templates, Archive, and Trash cannot be renamed or deleted.