Managing and Sending Document Groups
- Understanding Document Groups in signNow
- Creating a Document Group
- Adding and Organizing Documents within a Group
- Preparing Documents for Signing
- Customizing Recipients and Signing Order
- Configuring Advanced Invite and Completion Settings
- Sending Document Groups for Signature
- Managing Document Groups After Sending
- Frequently Asked Questions
Sending multiple documents for signature doesn’t have to be a hassle. With signNow’s Document Groups feature, you can bundle several documents together, customize recipient flows, and send them for signing in just a few clicks. This guide will walk you through every step — from creating and organizing document groups to preparing, sending, and managing them after dispatch. Whether you’re handling contracts, onboarding packets, or approval workflows, document groups help you streamline your process and keep everything organized.
Understanding Document Groups in signNow
Document Groups in signNow allow you to combine multiple documents into a single package, making it easy to send them together for signing or review. This is especially useful for workflows that require several forms or agreements to be completed by one or more recipients. Each group can be customized with its own signing order, recipient roles, and advanced settings, ensuring a smooth and automated signing experience. For example, you can send an onboarding packet to a new hire, with each document routed to the right person in the correct order, or send a sales contract and related forms to a client and your internal team simultaneously. Document Groups are flexible, powerful, and designed to save you time while reducing manual errors.
Creating a Document Group
Getting started with Document Groups is simple. You can create a group directly from the Document Groups section or from your main Documents folder.
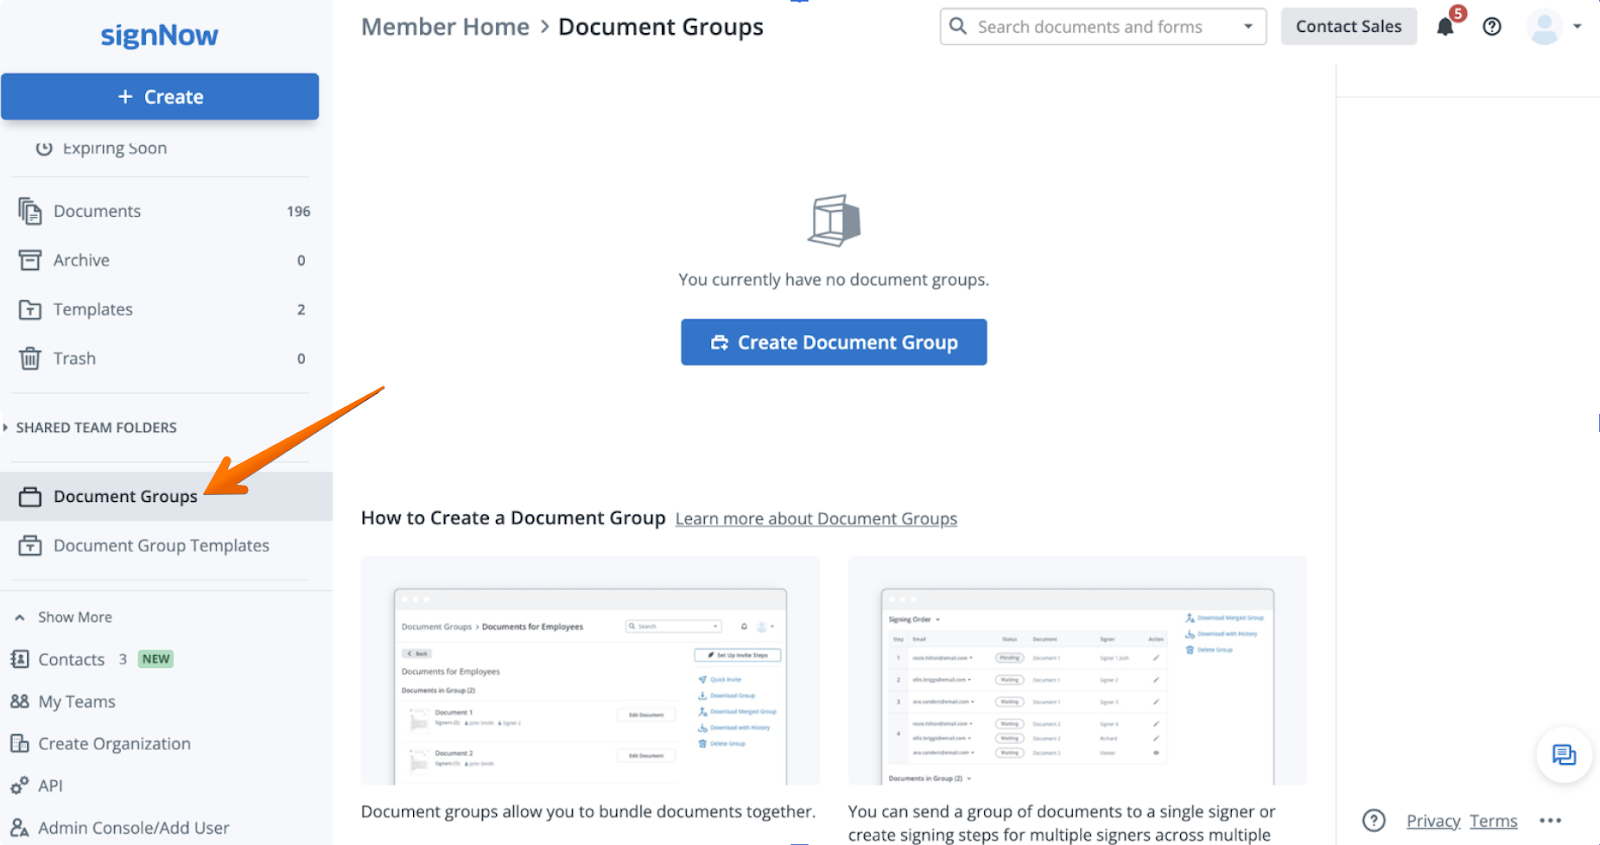
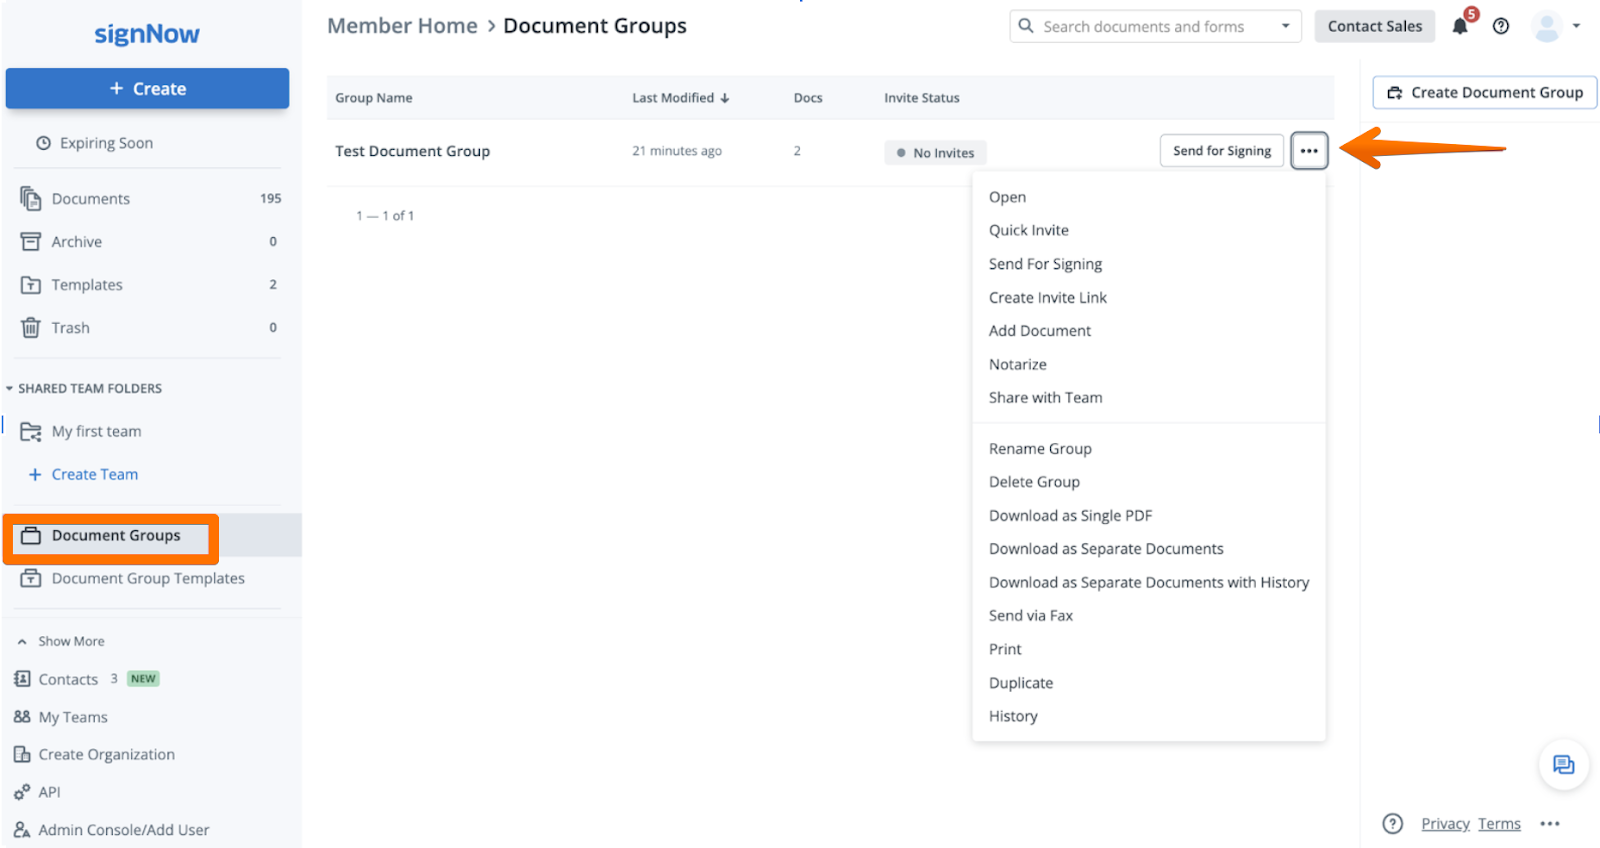
- Via Document Groups: Navigate to the left sidebar and click Document Groups. Then, click the Create Document Group button to start bundling your documents.
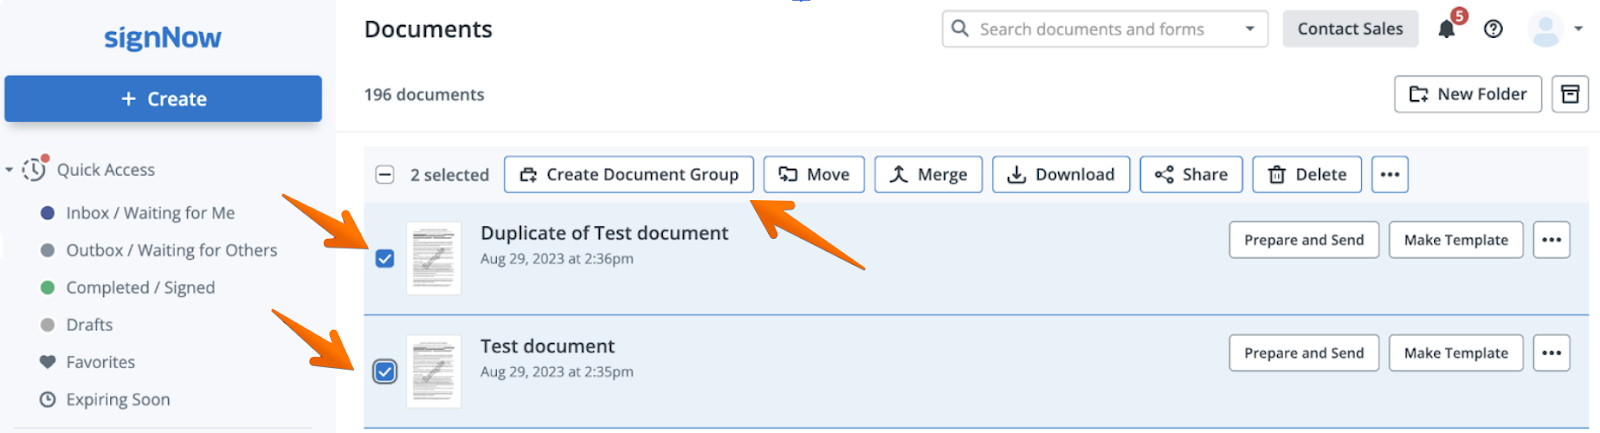
- Via Documents Folder: In your Documents folder, select the files you want to group and click Create Document Group. This method is perfect for quickly grouping related files you’ve already uploaded.
Adding and Organizing Documents within a Group
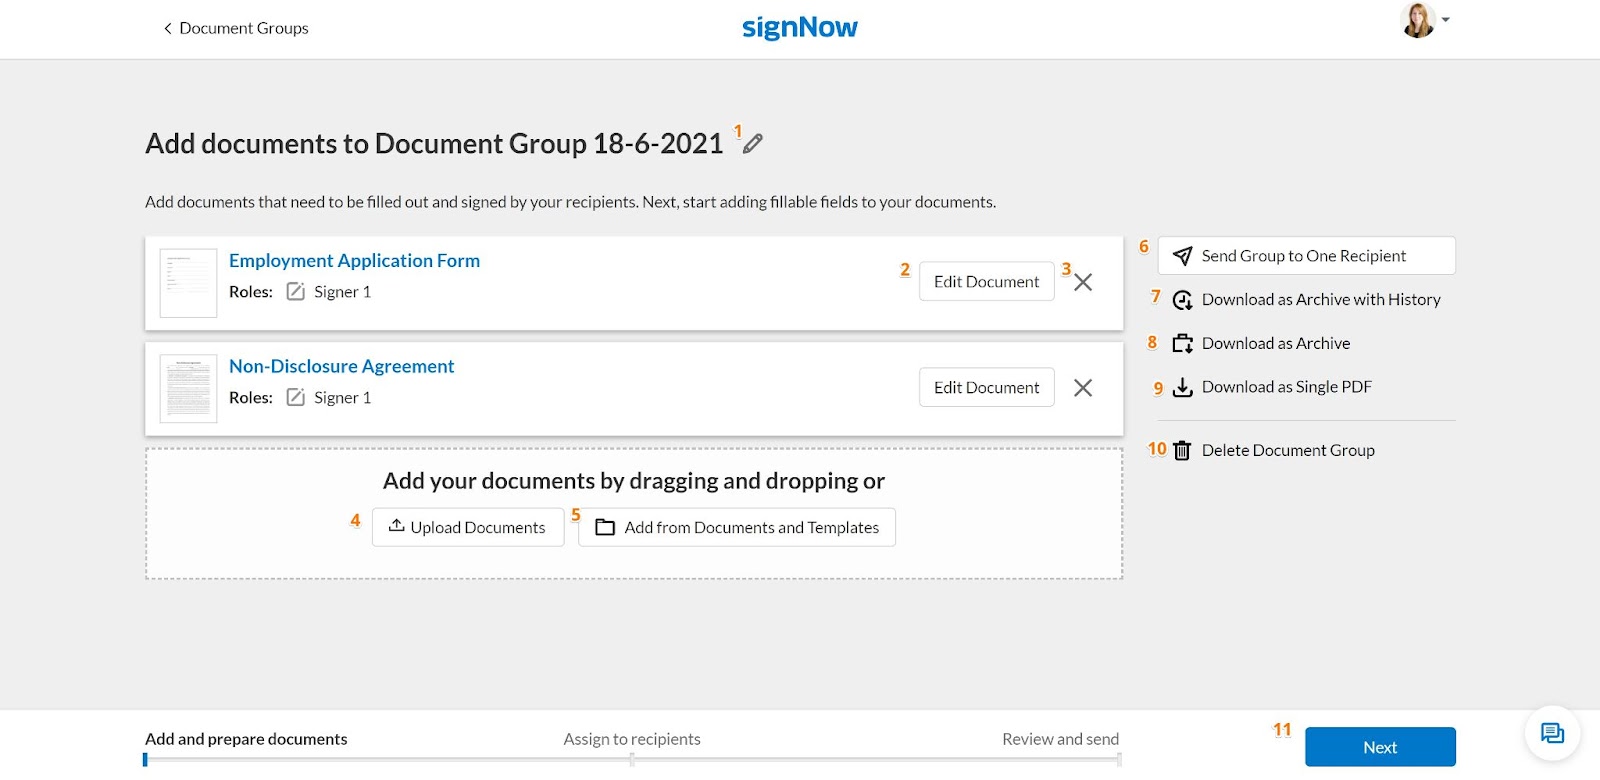
After creating your document group, you have full control over its contents. You can:
- Upload new documents from your computer.
- Add files from your Documents or Templates folders.
- Change the order of documents by dragging and dropping them within the group.
- Rename the group for clarity by clicking the pencil icon.
Get legally-binding signatures now!
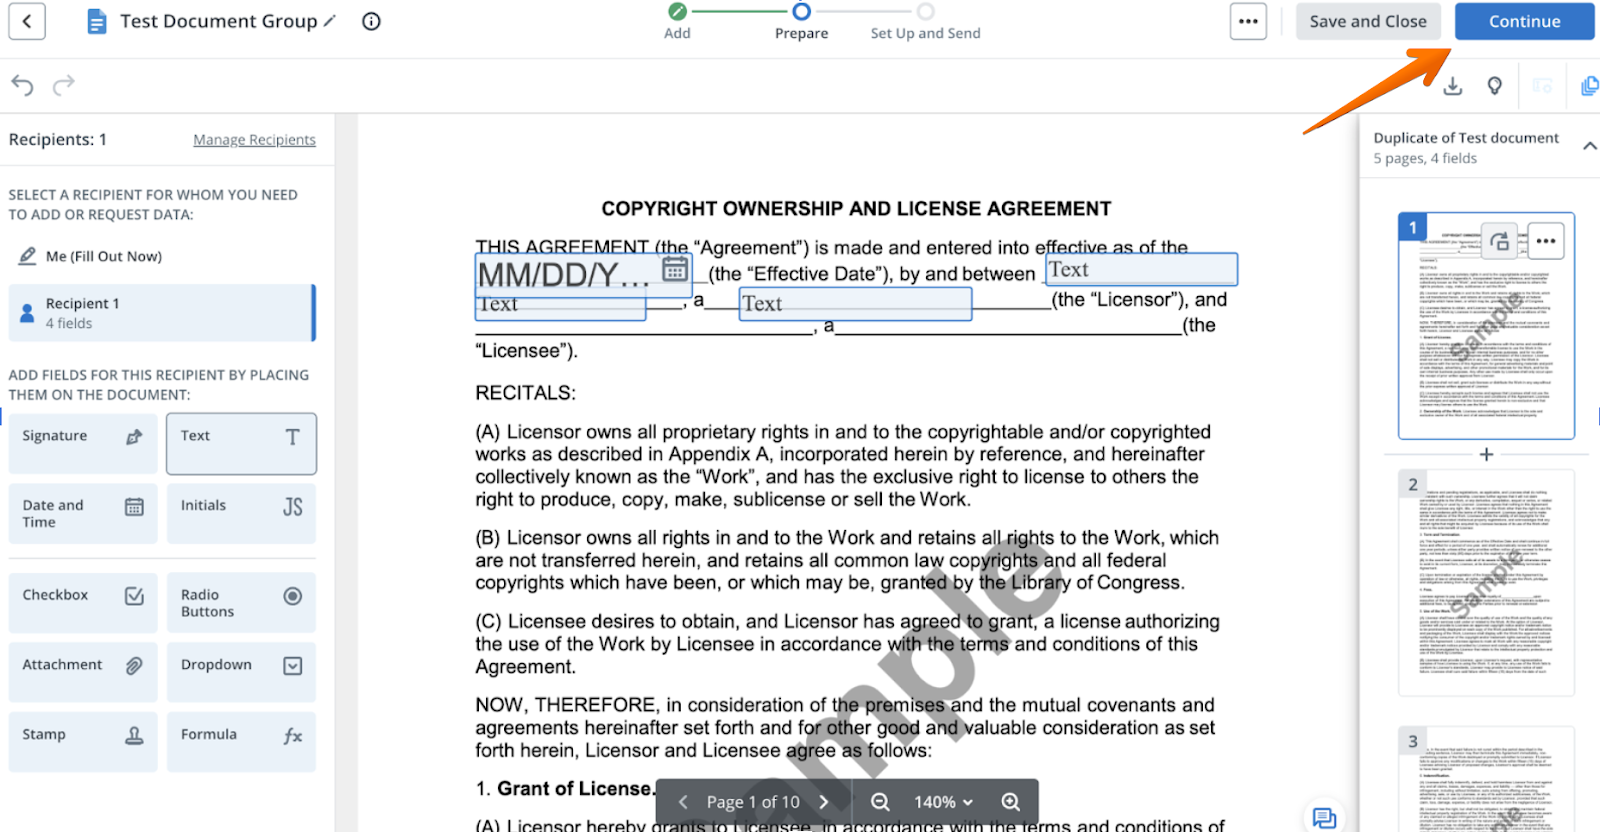
Preparing Documents for Signing
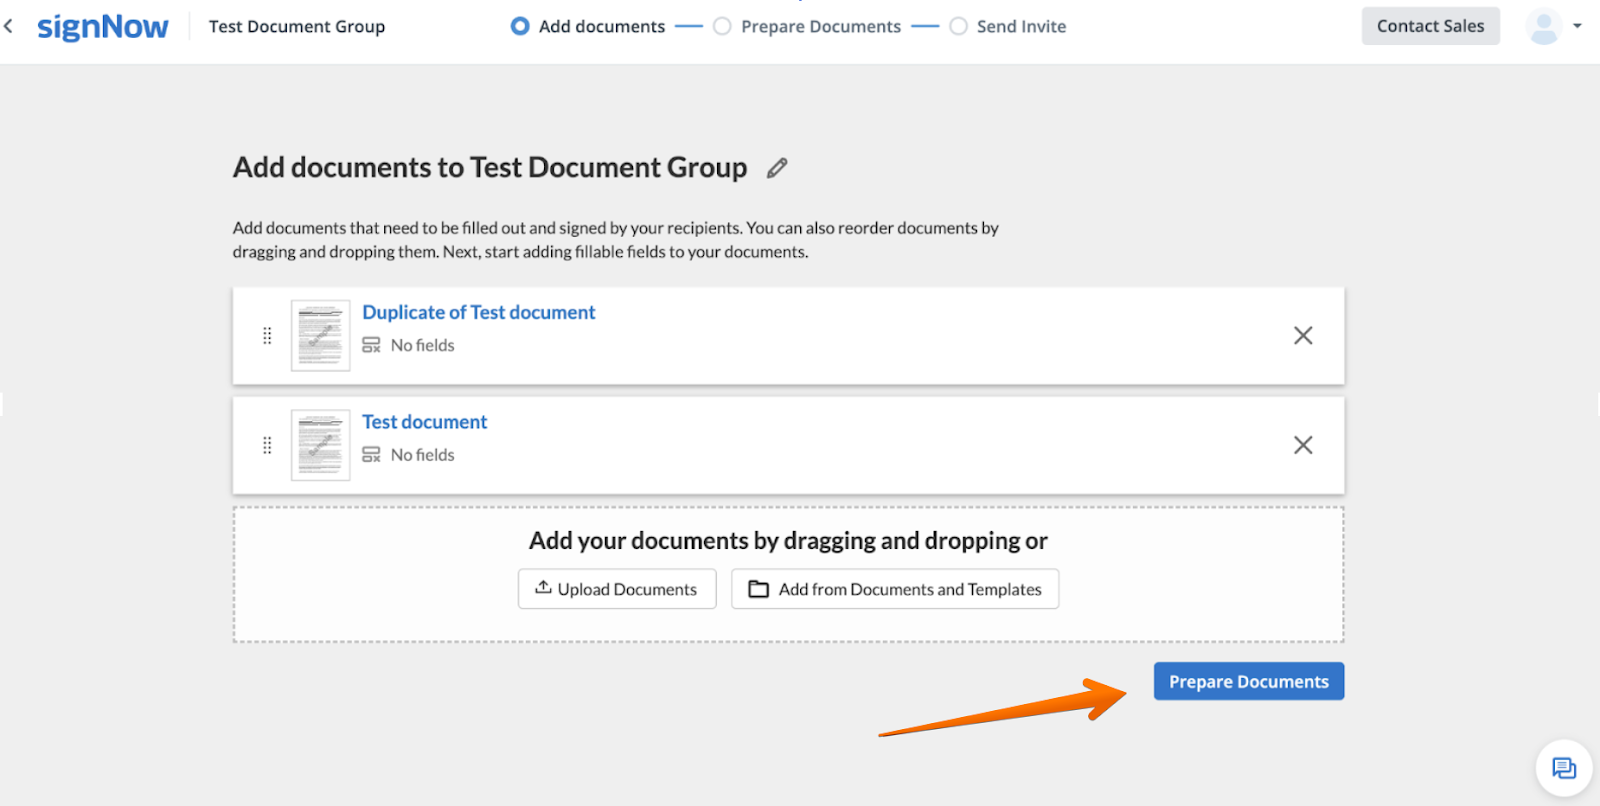
Once your documents are organized, it’s time to prepare them for signing. Click Prepare Documents or Edit Document to open the signNow editor. Here, you can:
- Edit recipients for all documents in the group.
- Add and customize fillable fields such as signatures, initials, dates, and text boxes.
- Assign or change signing roles for each field.
- Navigate between documents using the thumbnail panel for a clear overview.
- Review group information, including the number of documents and fillable fields.
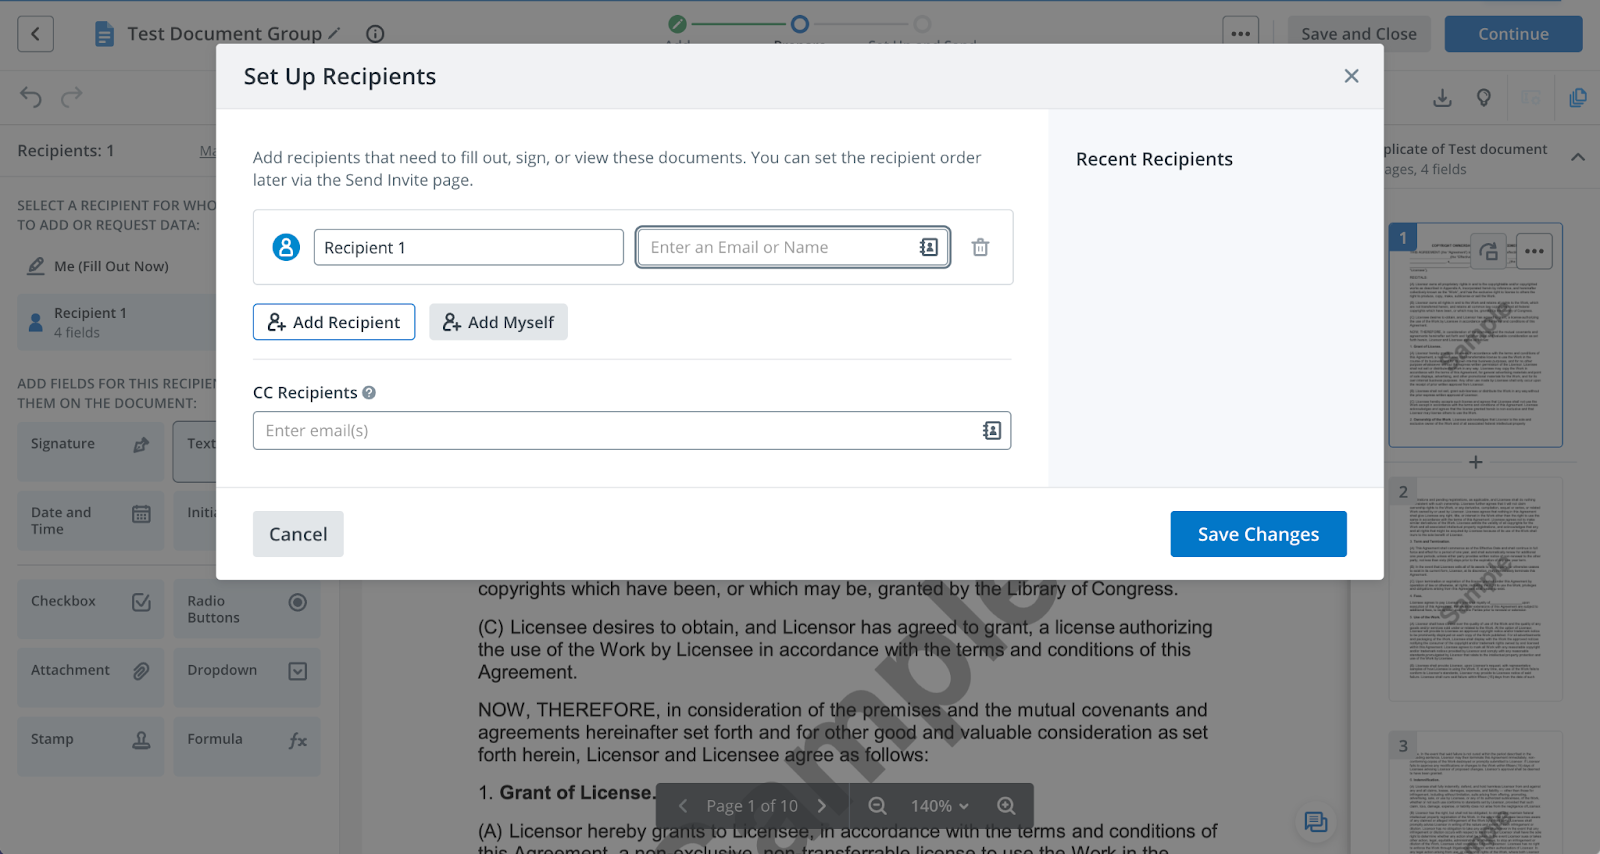
Customizing Recipients and Signing Order
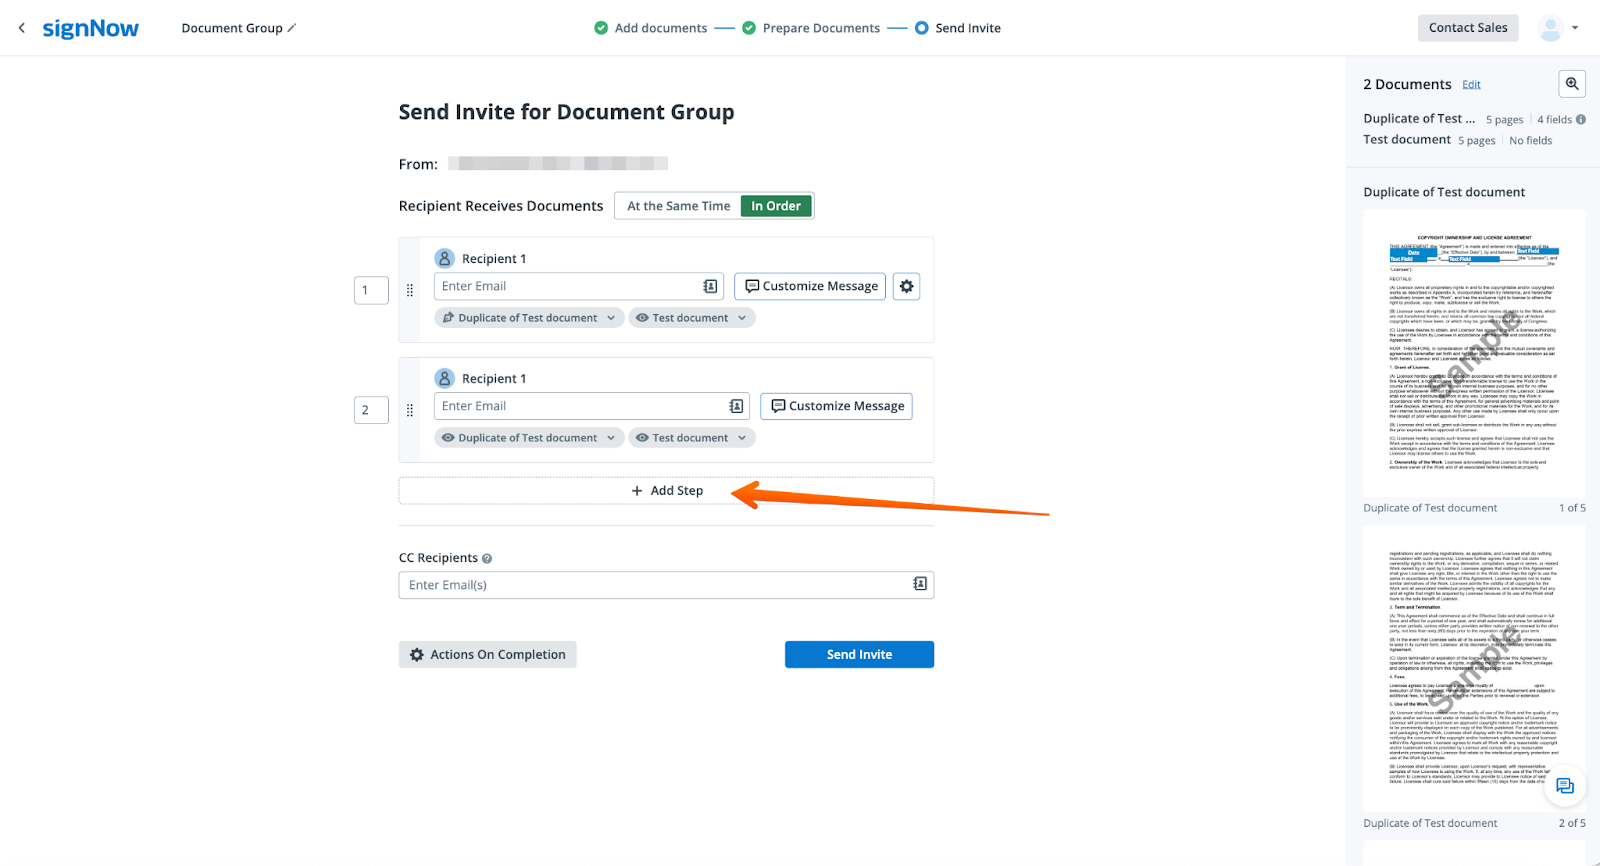
With your documents prepared, you’ll move to the Invite to Sign page. Here, you can:
- Enter recipient email addresses and assign signing roles.
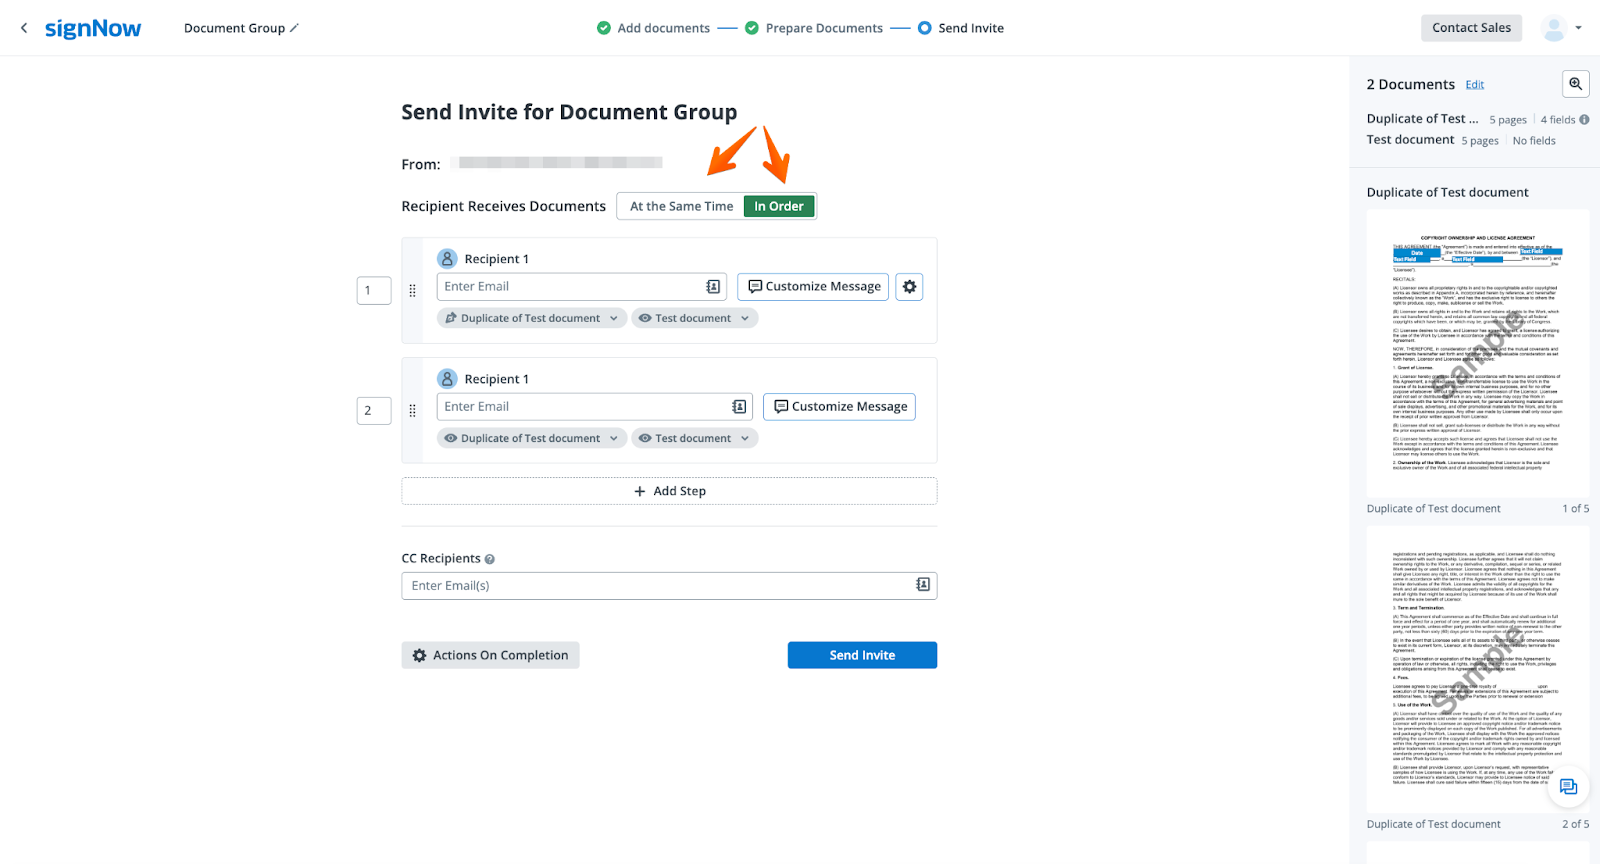
- Choose whether all recipients receive the package at the same time or in a specific order by selecting At the Same Time or In Order.
- Arrange recipients in the desired sequence and add additional signing steps as needed.
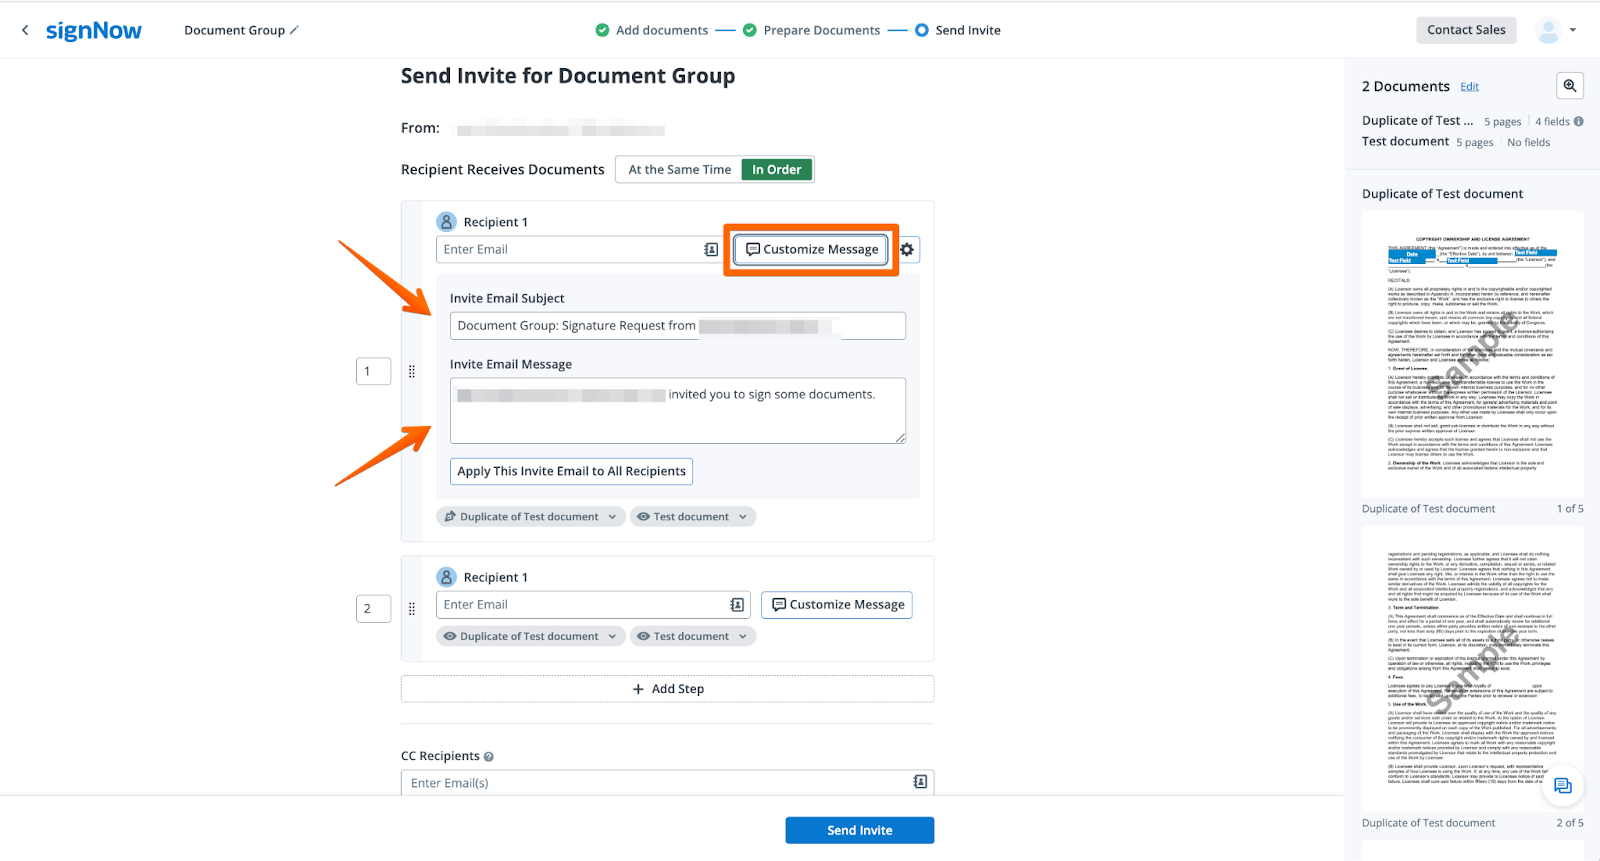
- Customize the subject line and message for each recipient to provide clear instructions or context.
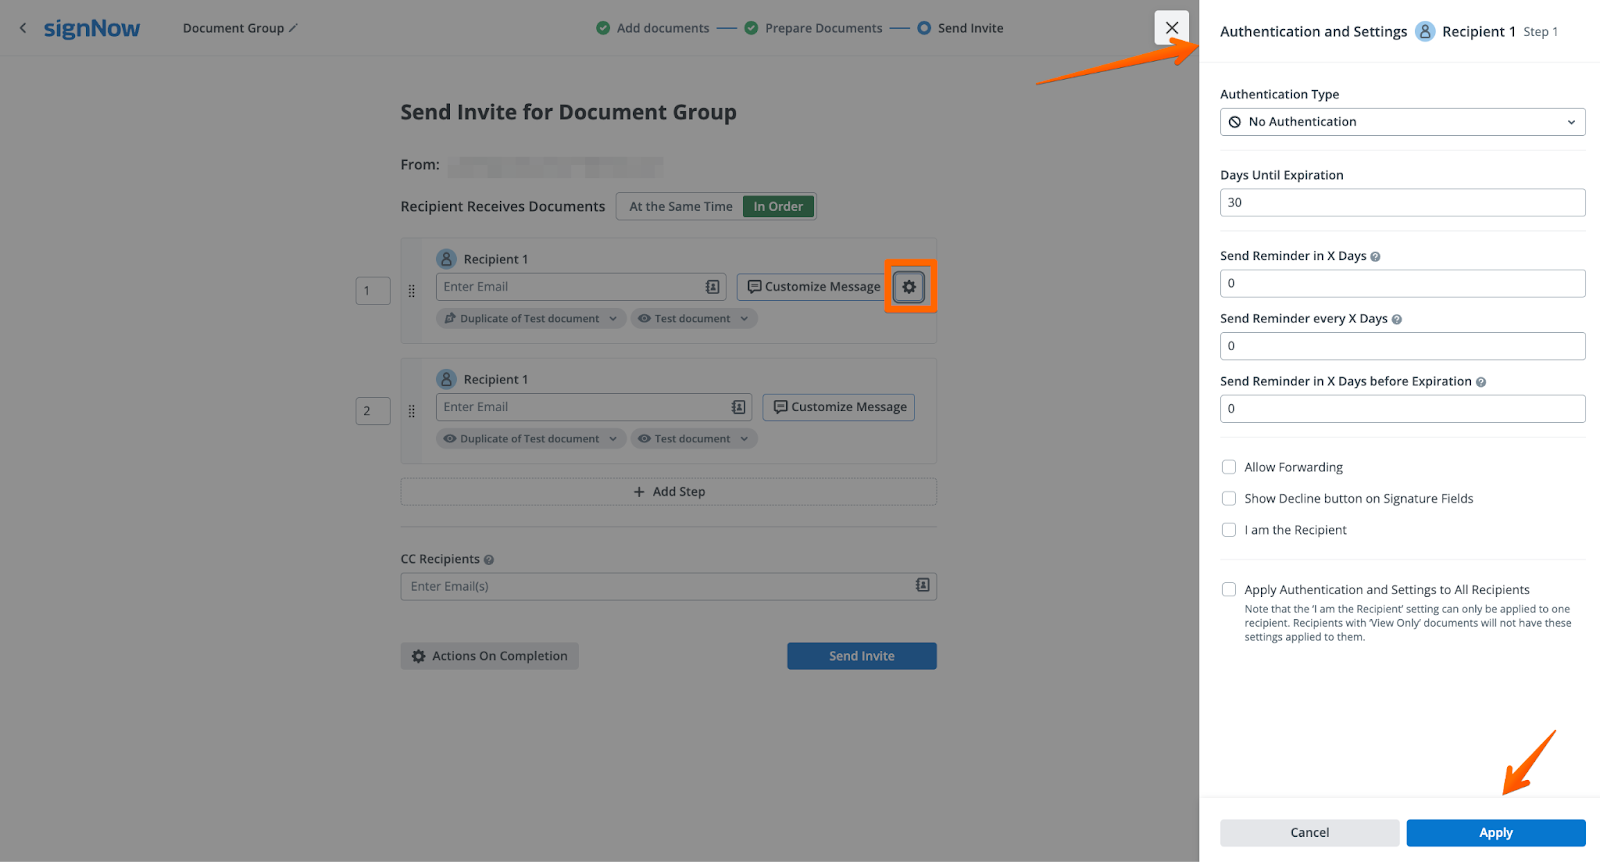
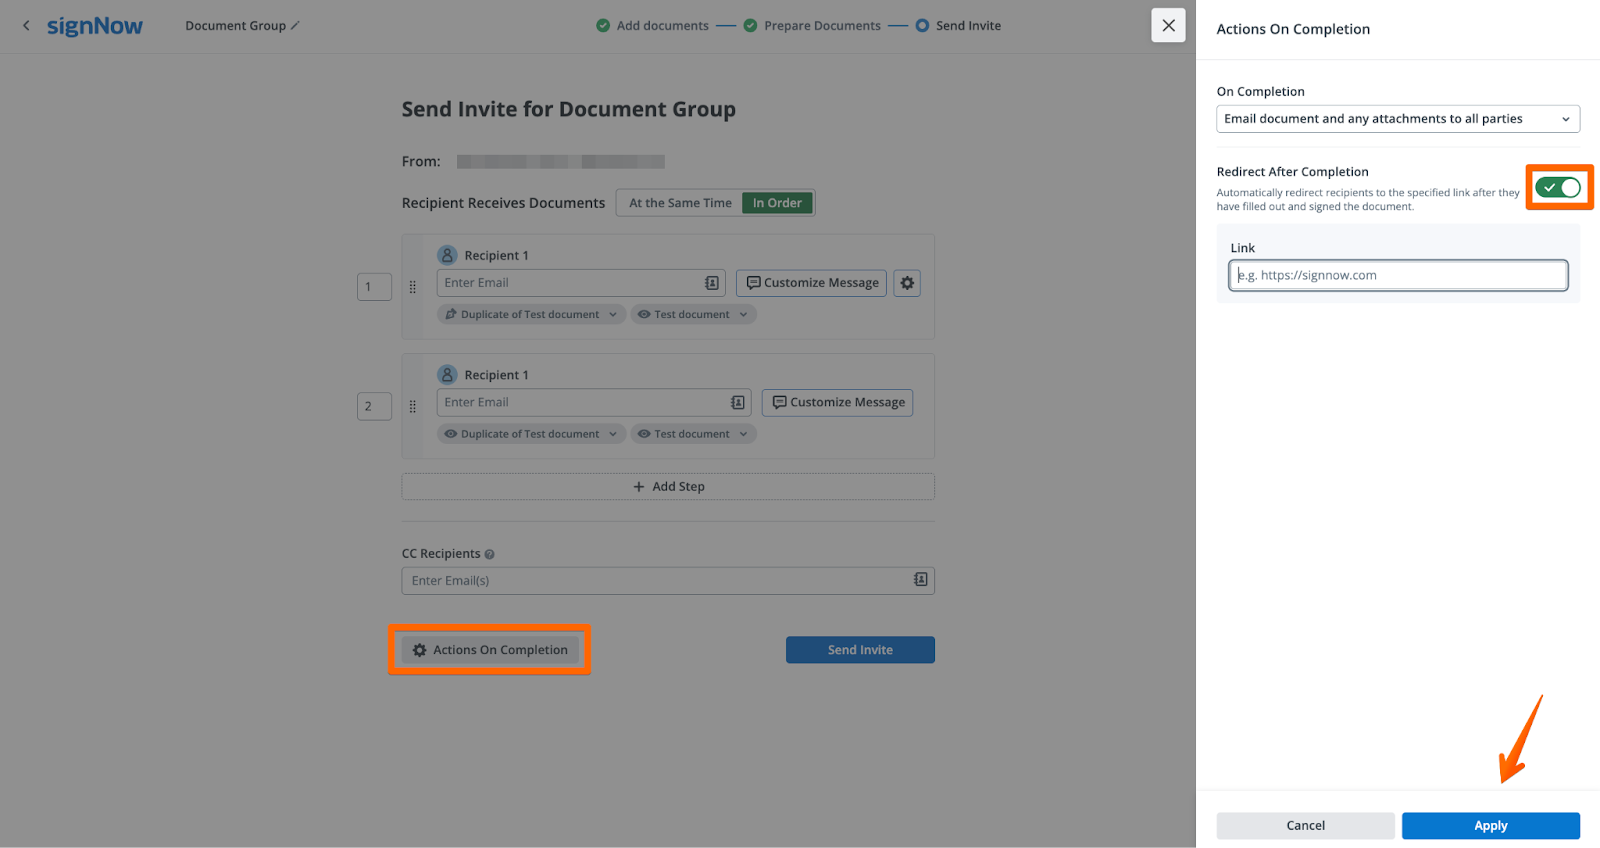
Configuring Advanced Invite and Completion Settings
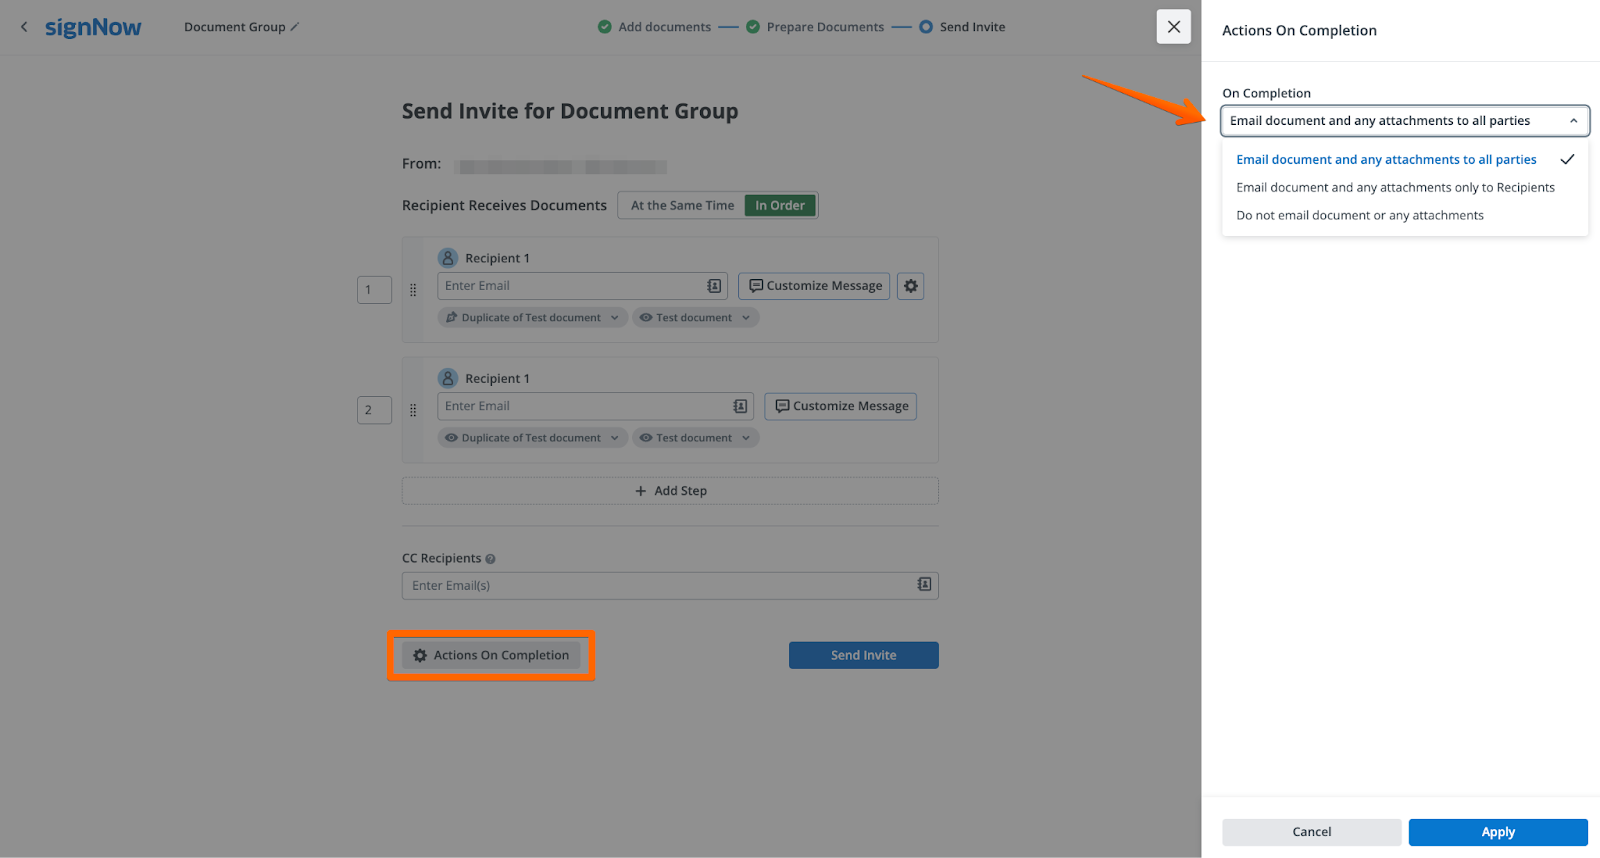
To further streamline your workflow, signNow lets you configure what happens after documents are signed. On the Actions on Completion panel, you can:
- Automatically email signed documents to recipients.
- Redirect signers to a custom URL after signing — perfect for onboarding, surveys, or next steps.
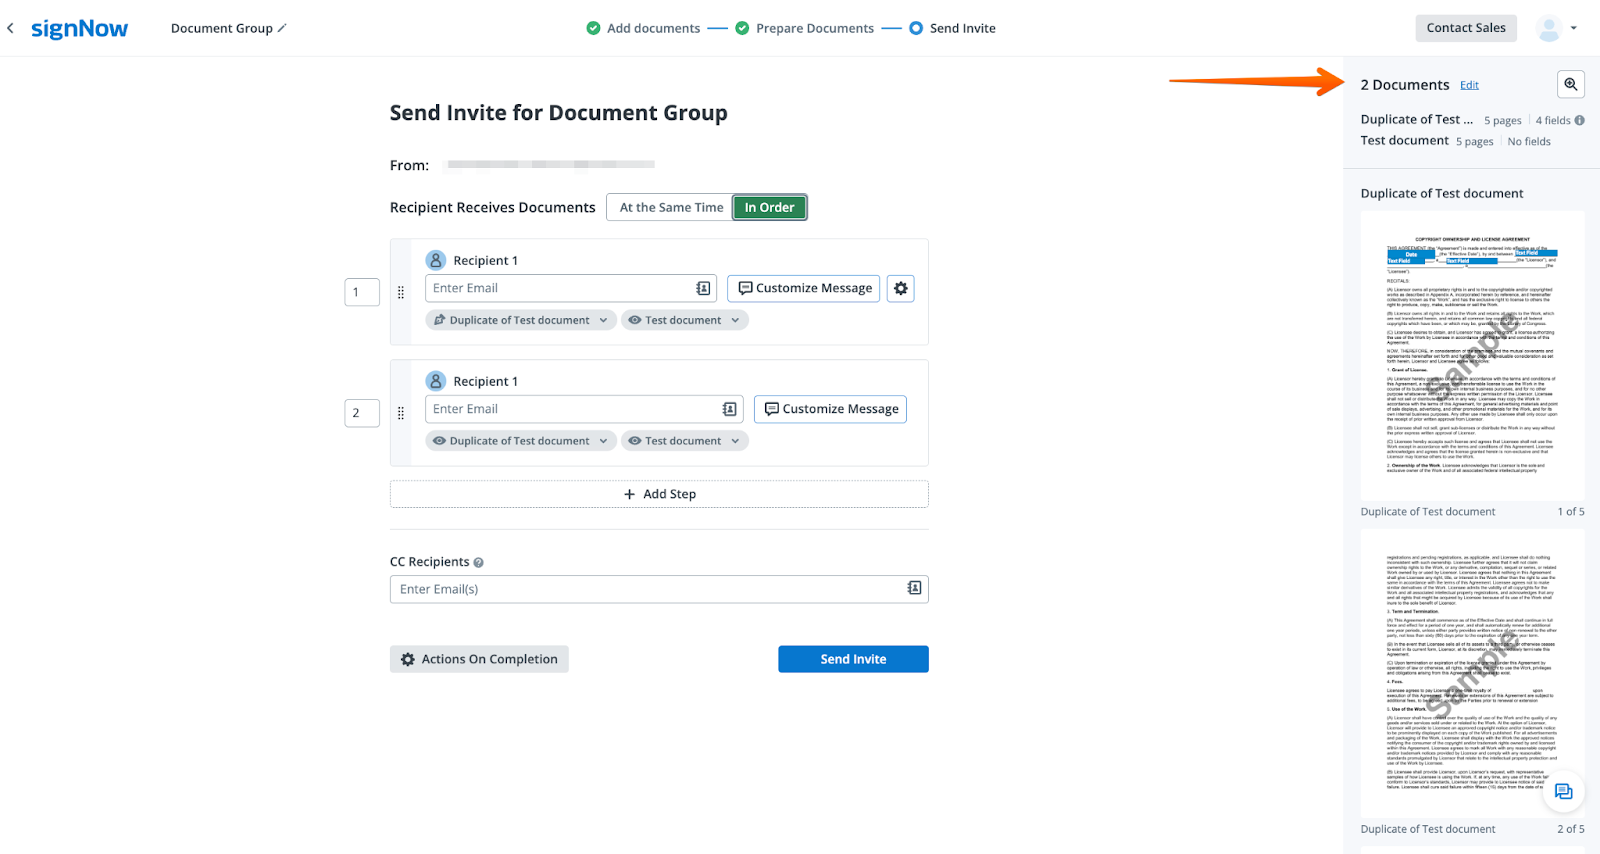
Sending Document Groups for Signature
Once all settings are finalized, you’re ready to send your document group for signature. Click Send Invite to dispatch the group to your recipients. For a quick, single-signer workflow, use the Send Group to One Recipient option from the Document Group menu. Enter the recipient’s email, subject, and message, then click Send Invite. This flexibility allows you to handle both complex multi-signer flows and simple one-off requests with ease. 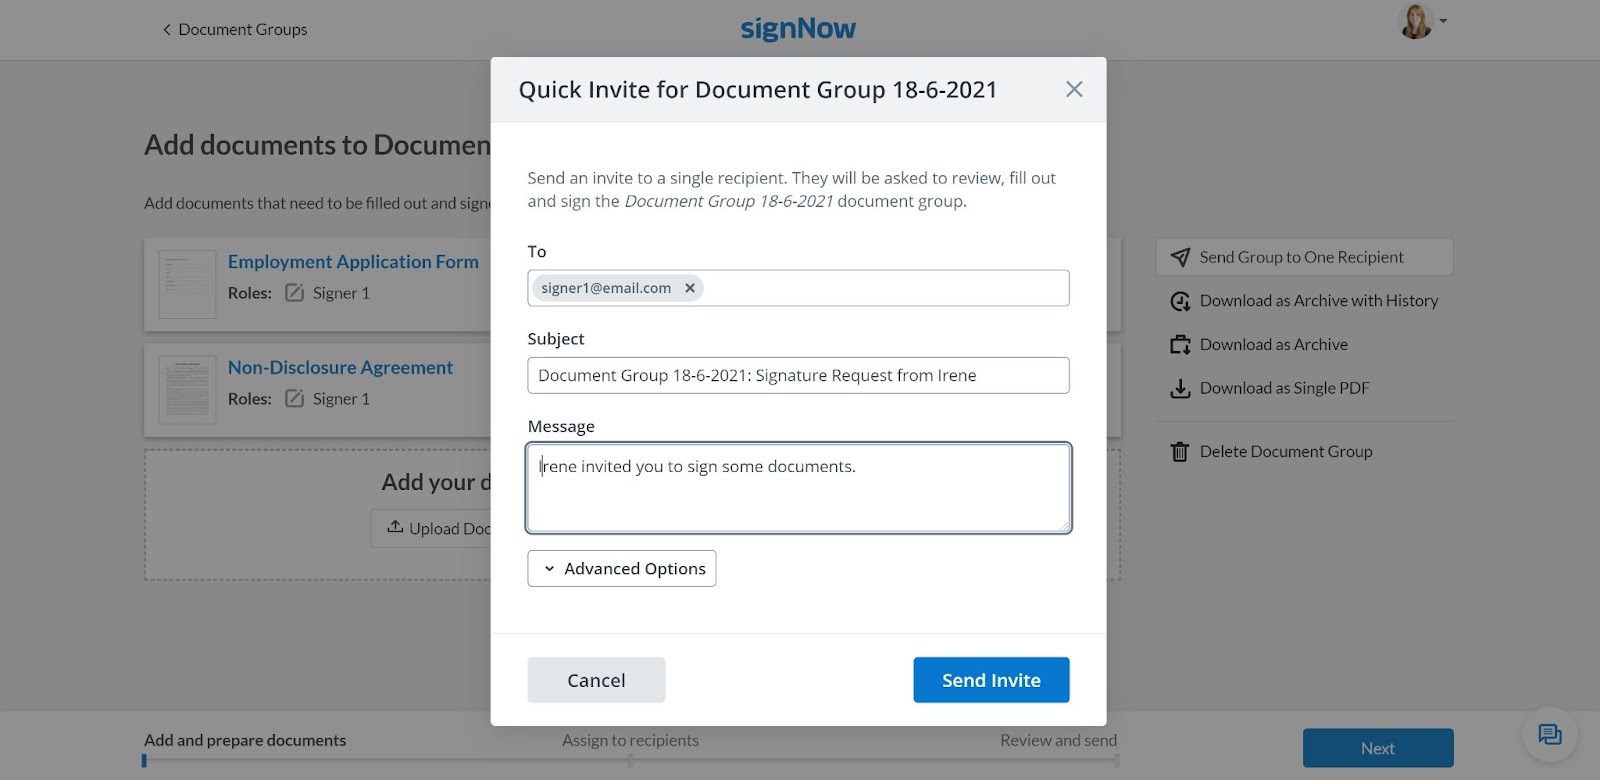
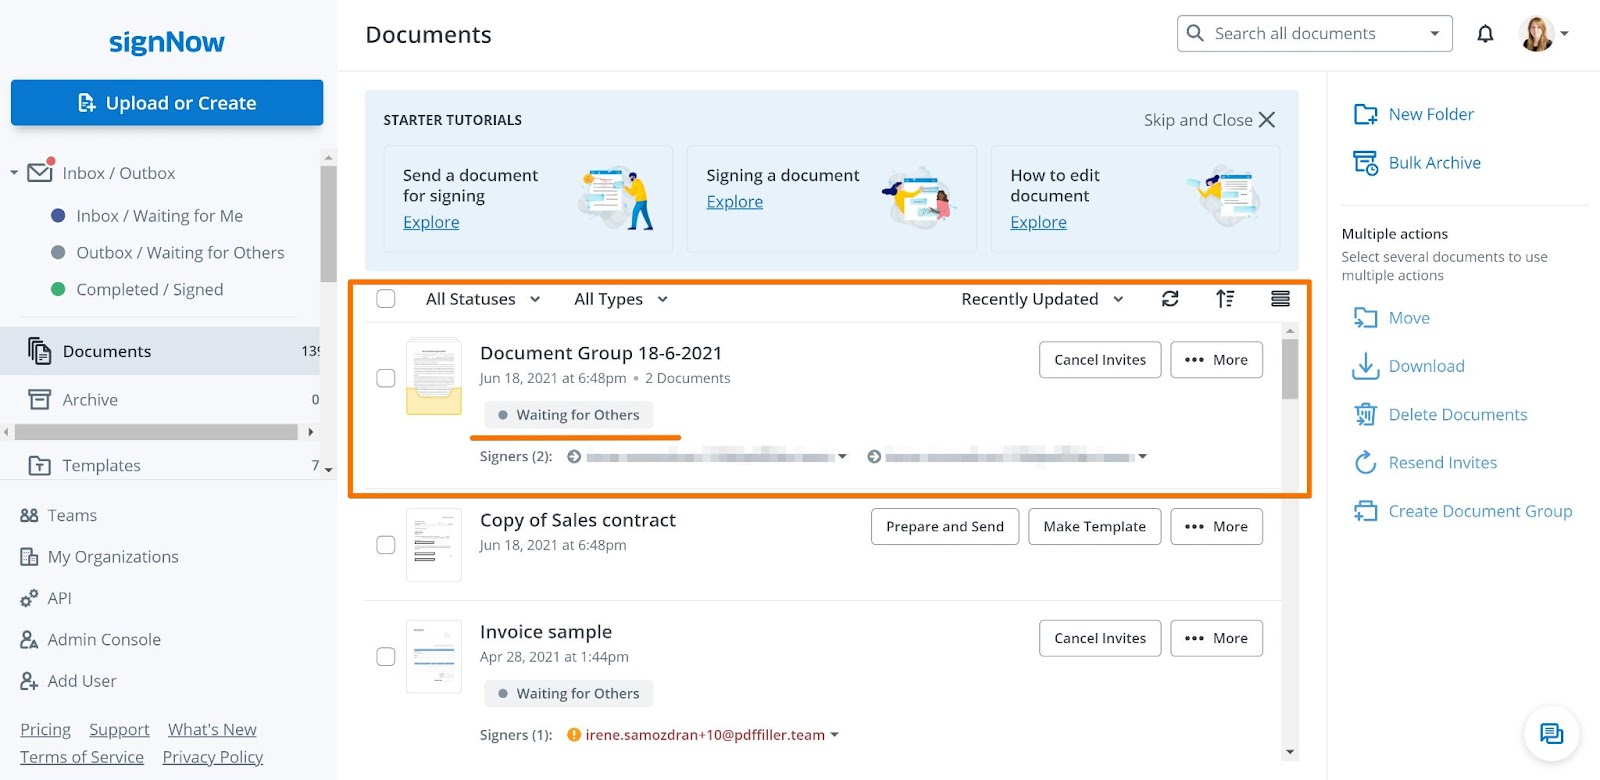
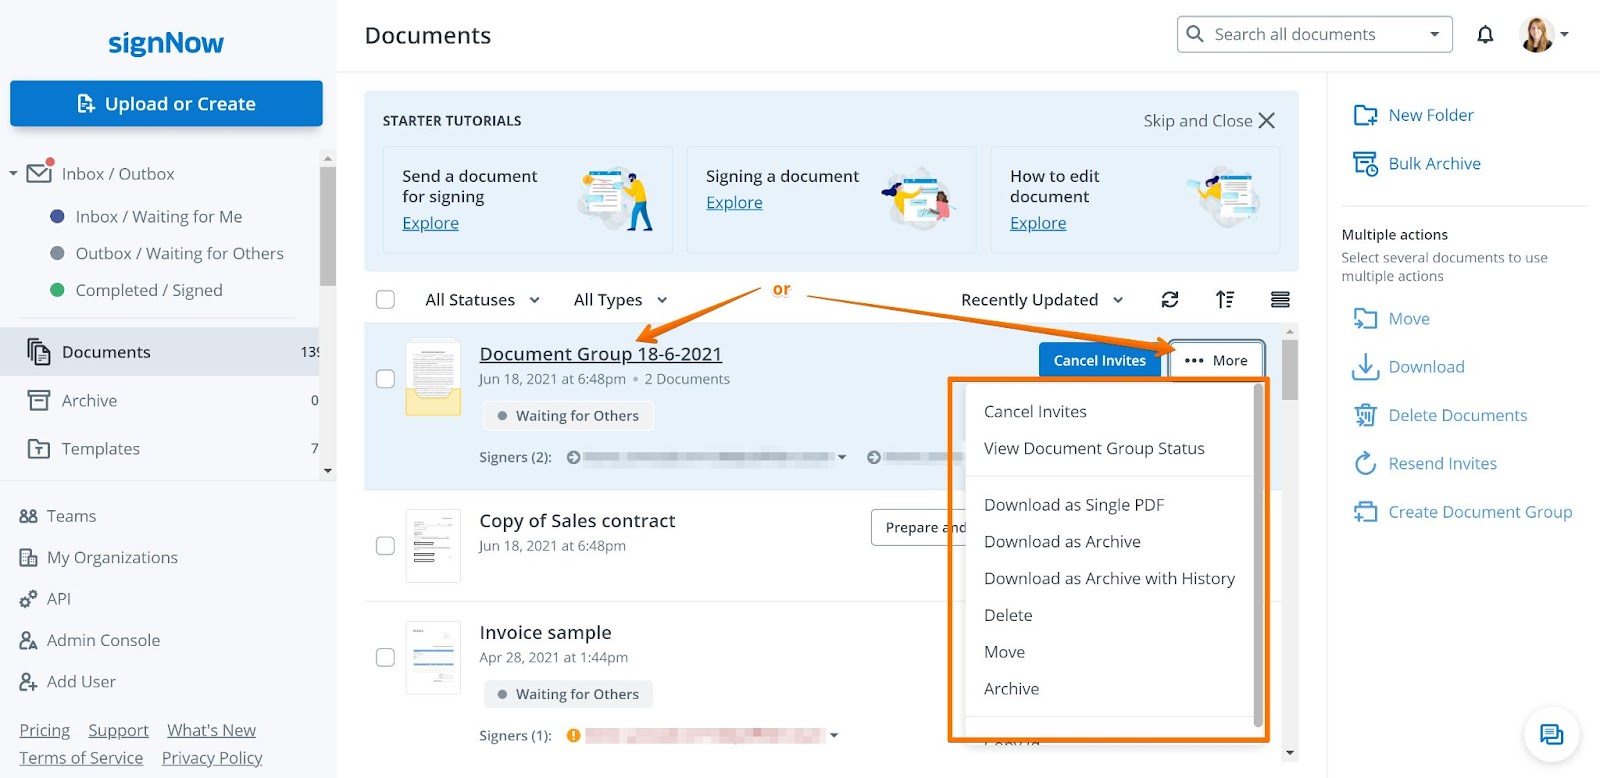
Managing Document Groups After Sending
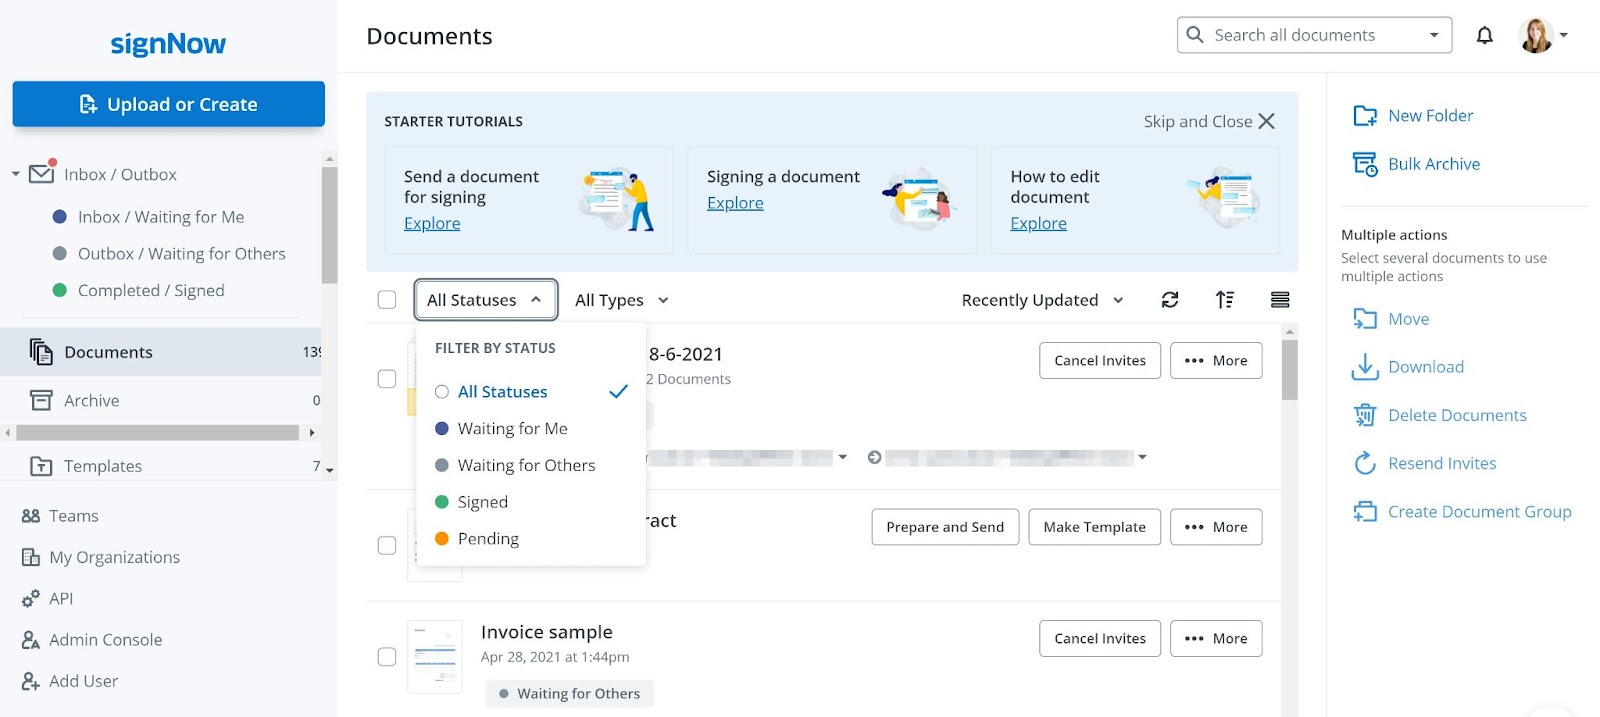
After sending, you can monitor and manage your document groups from the Documents or Document Groups folders in your account. Each group displays its current status (e.g., Waiting for Me, Waiting for Others, Signed, Pending), making it easy to track progress at a glance. Use filters to quickly find groups by status or type.
- Rename groups for clarity.
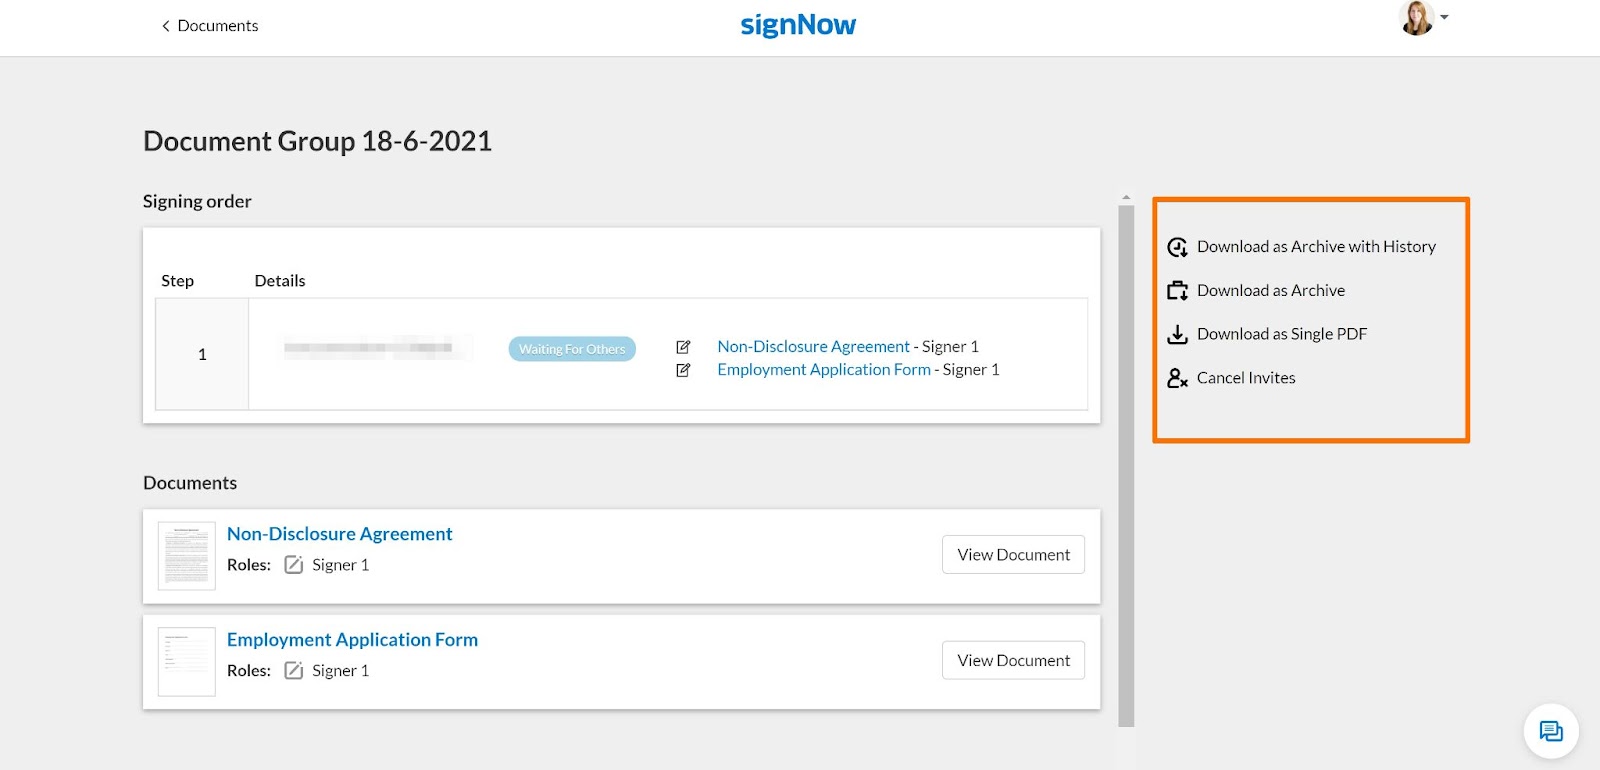
- Download groups as archives (with or without history) or as a single PDF.
- View and review document history for compliance and auditing.
- Delete groups that are no longer needed.
- Notarize documents, share with your team, or create a copy for reuse.
- Send documents via fax or create and share an invite link.
- Add additional documents to existing groups as your workflow evolves.
Frequently Asked Questions
Q: Can I edit a document group after sending it for signature?
A: Yes, you can edit documents in a group after sending. Click Edit Documents to reopen the editor, make your changes, then click Save and Close or Continue. You’ll need to resend the invite to ensure recipients receive the updated documents. 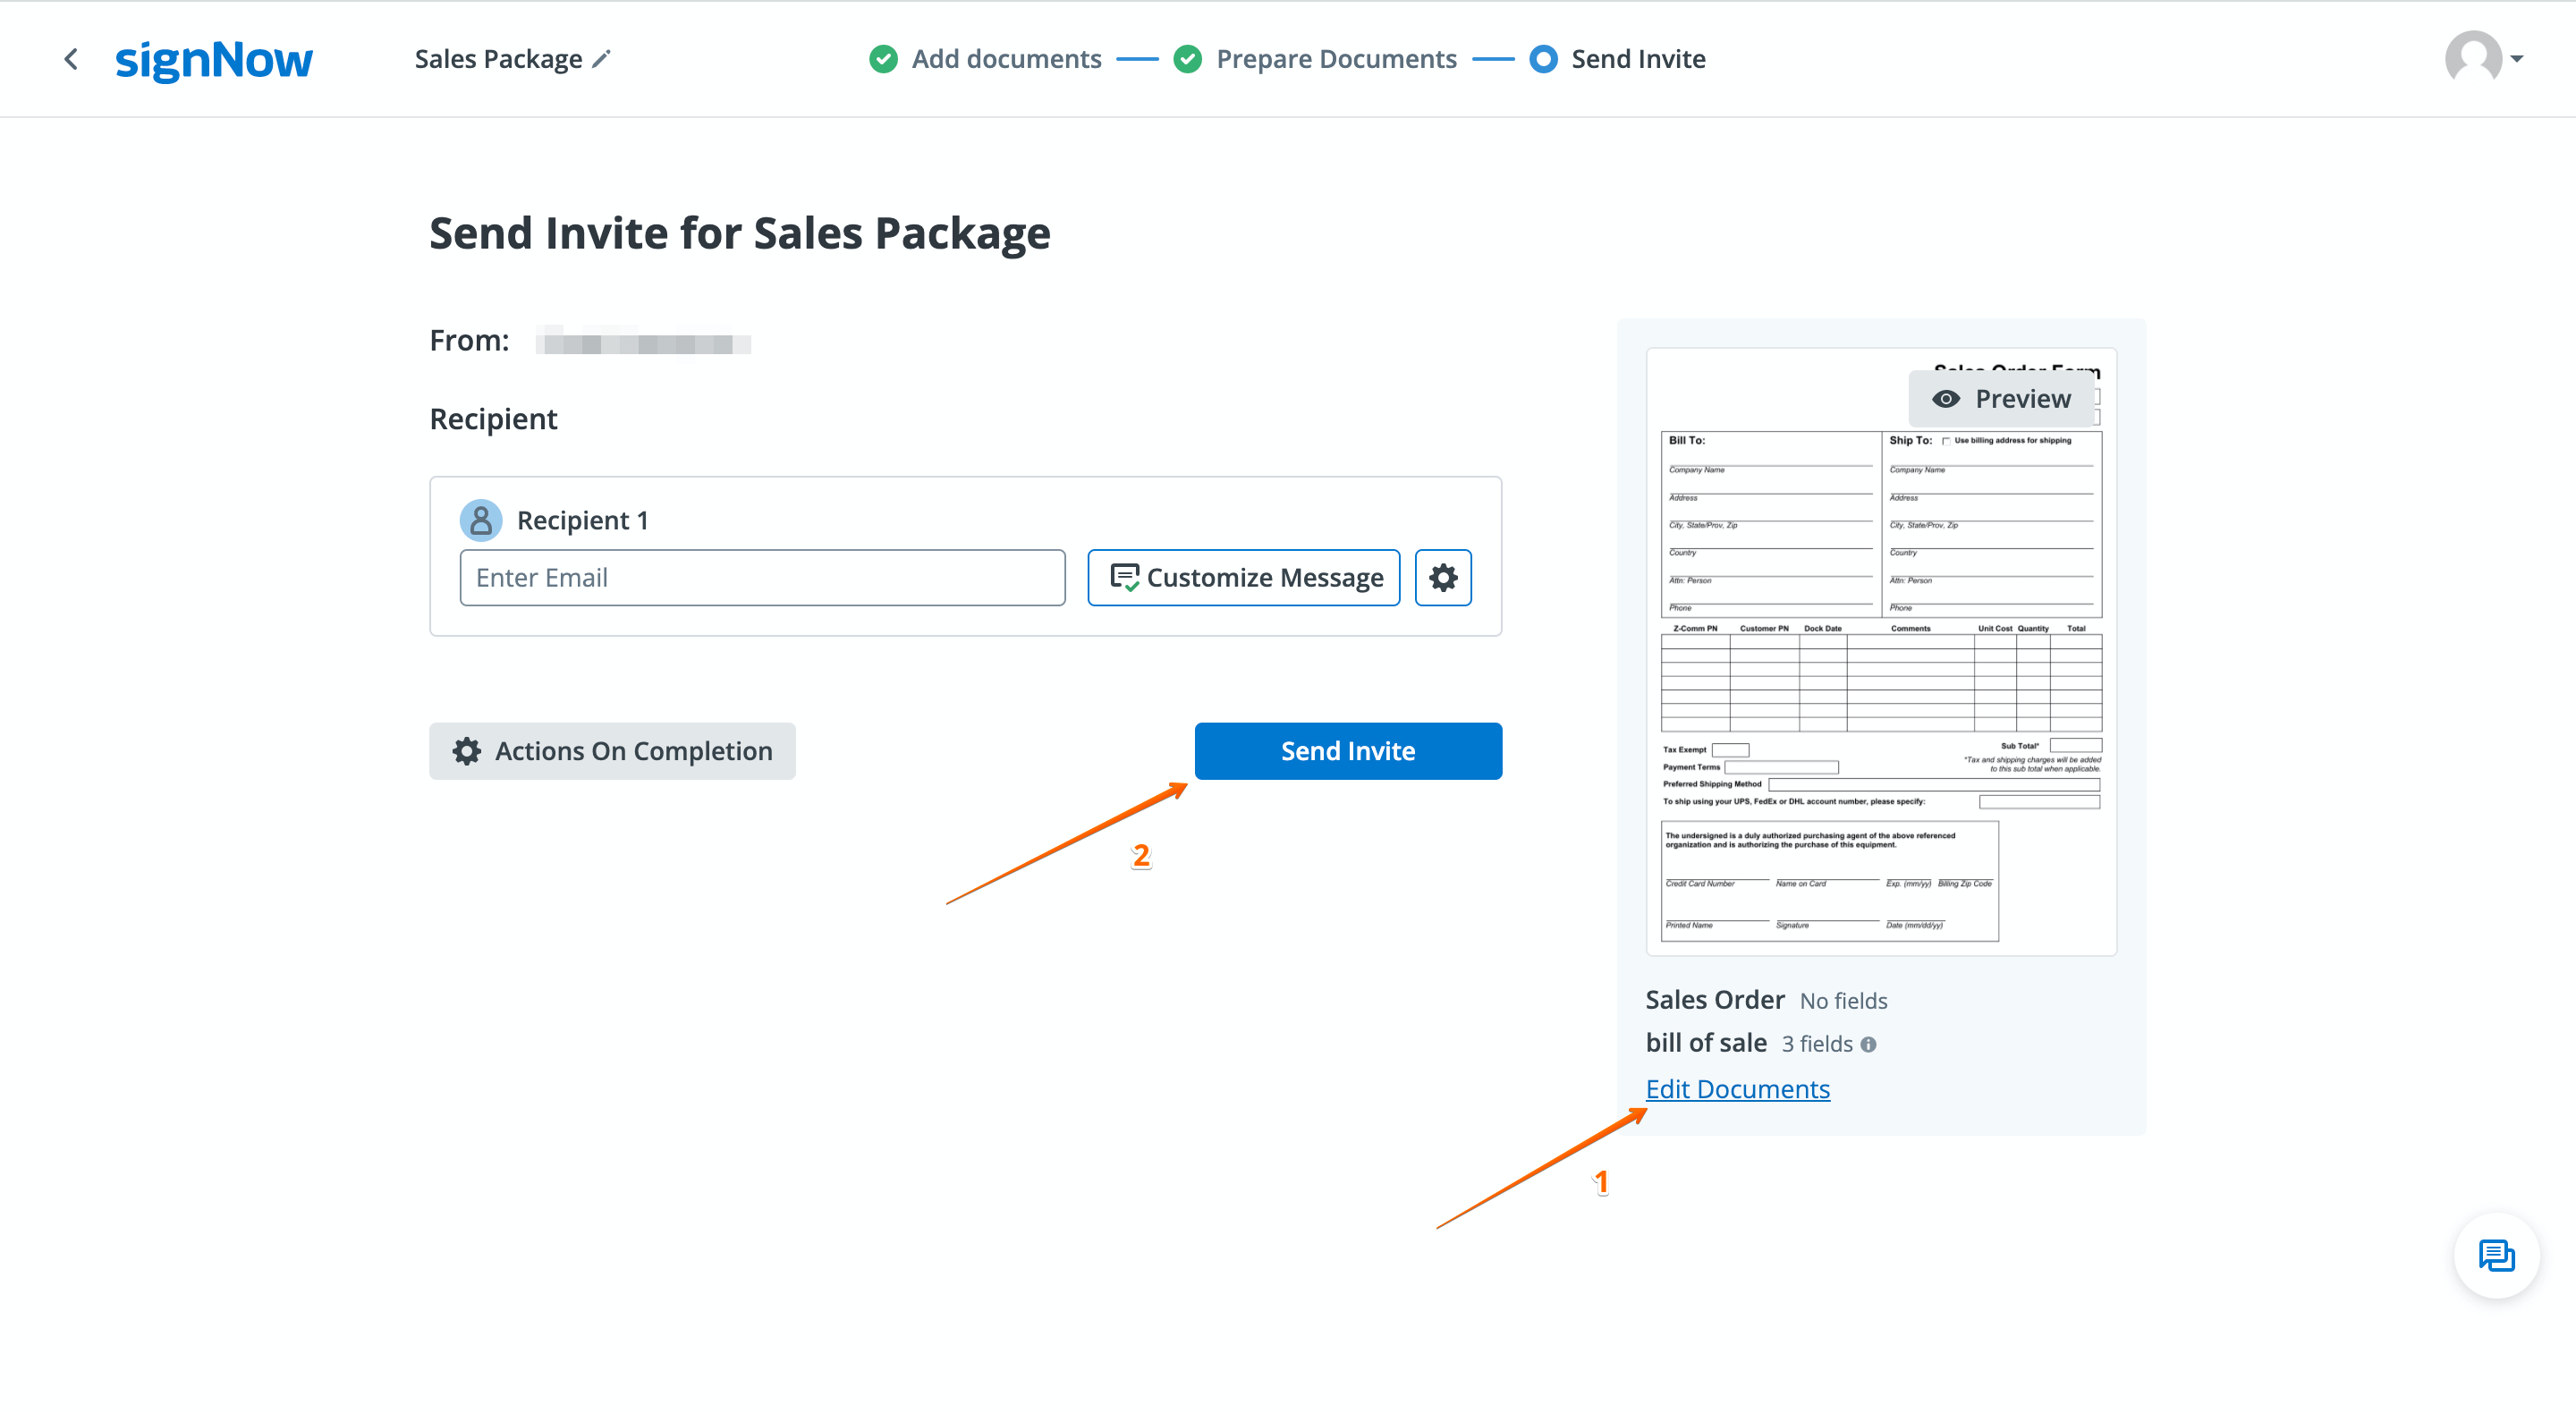 Q: How do I track the status of my document group?
A: The status of each document group is visible in your Documents or Document Groups folders. Use filters to quickly find groups by status (e.g., Waiting for Me, Waiting for Others, Signed, Pending).
Q: Can I send a document group to just one recipient?
A: Absolutely. Use the Send Group to One Recipient option for a fast, streamlined workflow. Enter the recipient’s details and send the invite in seconds.
Q: What file formats can I download my document group in?
A: You can download your group as an archive (with or without history) or as a single merged PDF, depending on your needs.
Q: Where can I find more information about pricing for document groups?
A: For the most up-to-date information on plans and pricing, please visit our pricing page.