Customize Organization Email Branding
- Understanding Email Branding in SignNow
- Accessing the Email Customization Settings
- Uploading and Managing Your Organization Logo
- Customizing Email Template Appearance
- Previewing and Sending Test Emails
- Restoring Default Email Branding Settings
- User Roles and Permissions for Email Branding
- Troubleshooting and Best Practices
Make every email your organization sends a reflection of your brand. With SignNow, you can easily customize the look and feel of your organization's email communications—adding your logo, choosing brand colors, and crafting a custom footer. This guide walks you through every step, from accessing the right settings to previewing your changes and ensuring only authorized users can make updates. Professional, branded emails not only build trust with your recipients but also reinforce your organization's identity at every touchpoint.
Understanding Email Branding in SignNow
Email branding in SignNow empowers organizations to personalize the emails sent to document recipients. This includes adding your company logo, selecting the position of branding elements, customizing call-to-action button colors, and including a tailored footer message. These features help ensure that every email aligns with your corporate identity, making your communications instantly recognizable and more trustworthy.
To access these features, your organization may need to be on a qualifying plan. If you don't see the customization options, contact our sales team to learn more about unlocking advanced branding capabilities.
Accessing the Email Customization Settings
To begin customizing your organization's email branding, you first need to access the Email Customization settings in the Admin Panel. Start by navigating to the My Organizations tab from the left-hand panel of your SignNow account. This section lists all organizations you manage or belong to, and provides direct access to administrative controls.
Once you've selected your organization, click Go to Admin Panel to enter the organization's settings dashboard.
Inside the Admin Panel, locate the Email Customization tab. Click Customize to open the settings sidebar where you can begin making changes.
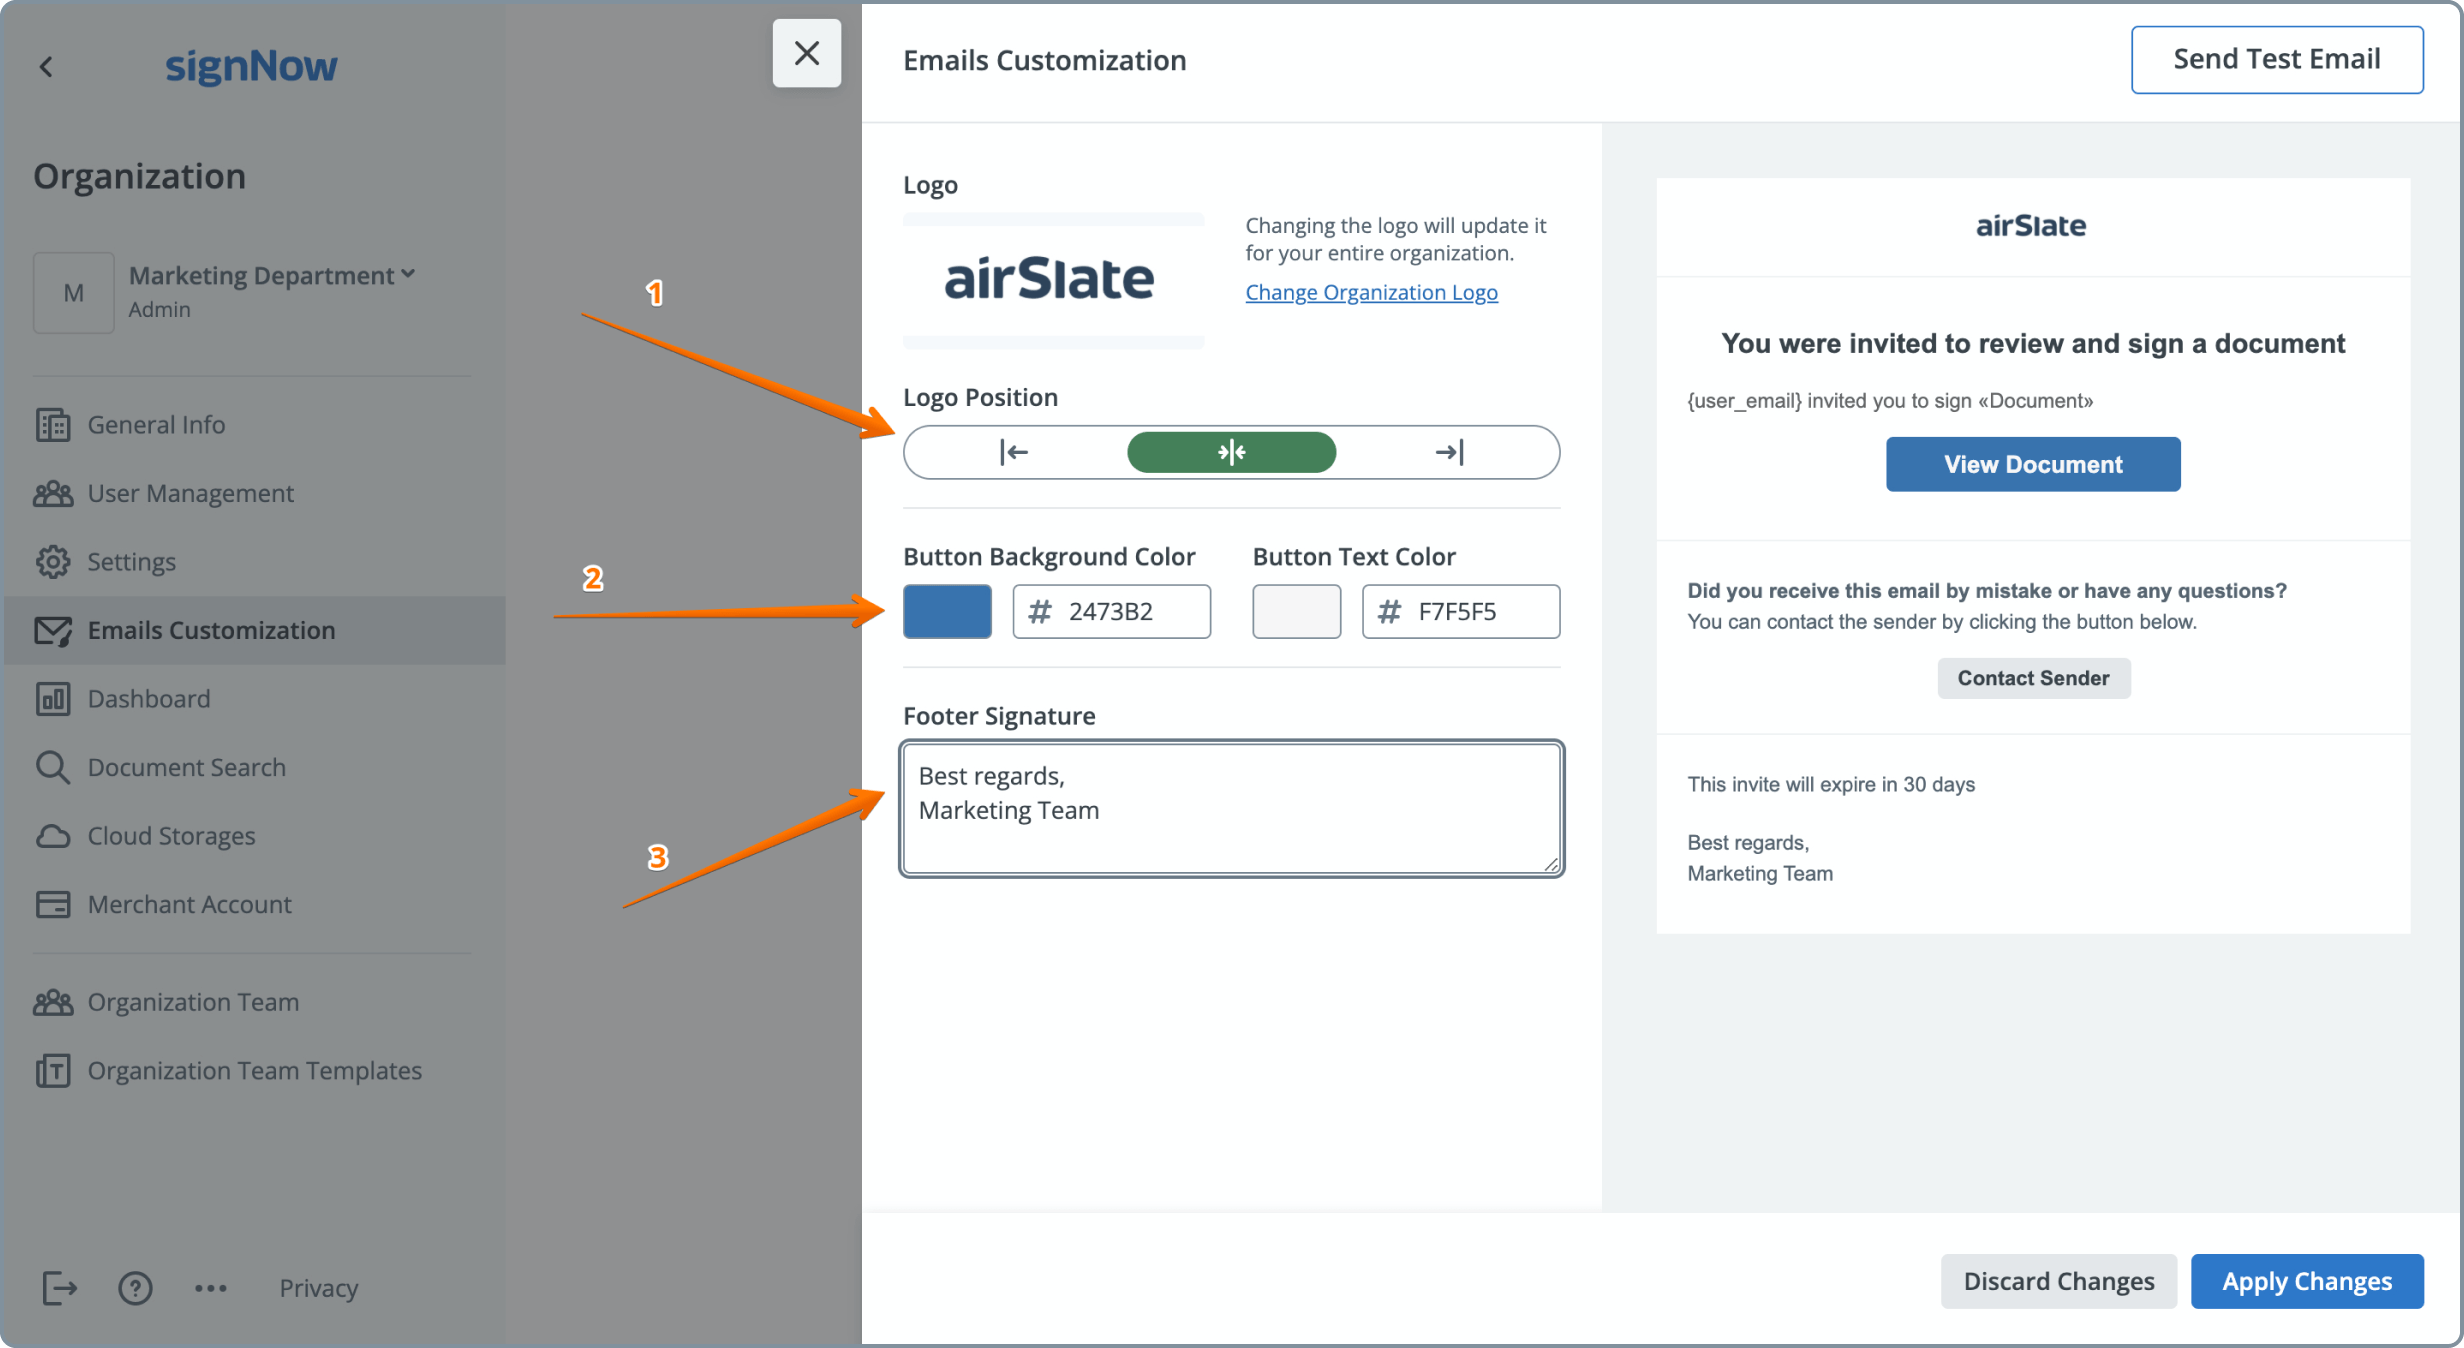
Uploading and Managing Your Organization Logo
Your logo is the centerpiece of your organization's email branding. To add or update your logo, click the Add Logo button in the Email Customization panel.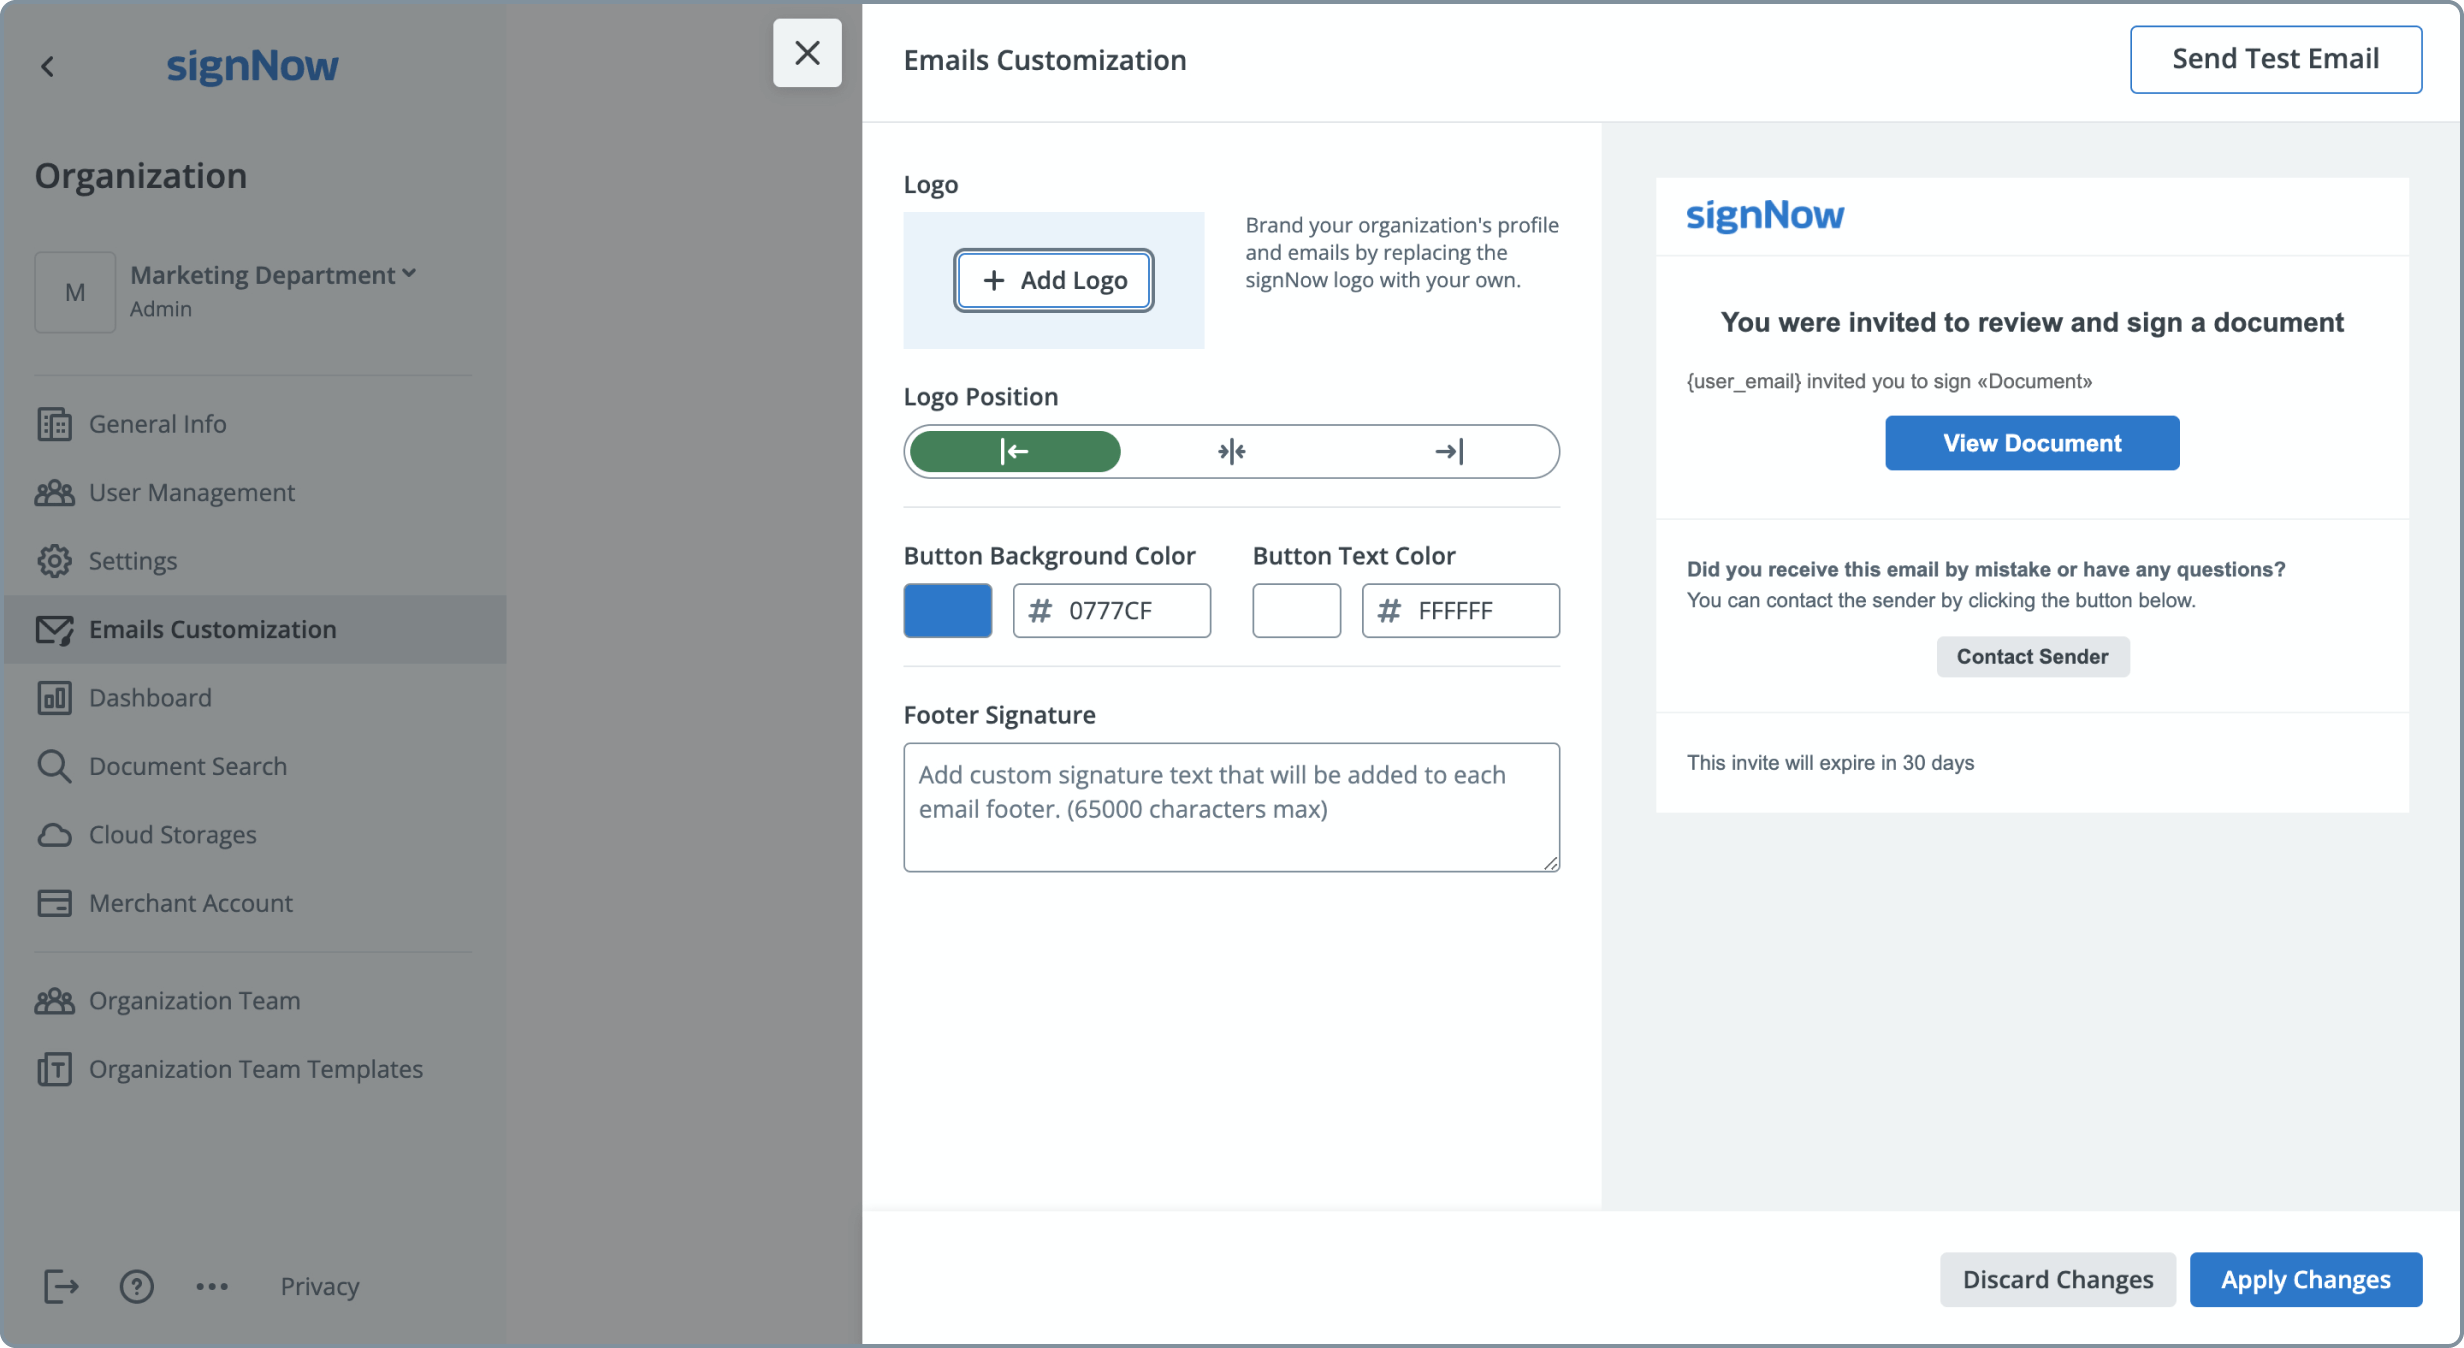
In the upload modal, you can drag and drop your logo file or click Upload Image to select a file from your computer. Supported formats include JPG, GIF, PNG, and JPEG, with a recommended size ratio of 115x60 pixels or less for optimal display.
After uploading, you'll see a preview window that lets you check how your logo will appear in different email templates and within your account. Use the tabs to switch between views and ensure your logo looks perfect in every context. If satisfied, click Apply; if not, click Back to try another image.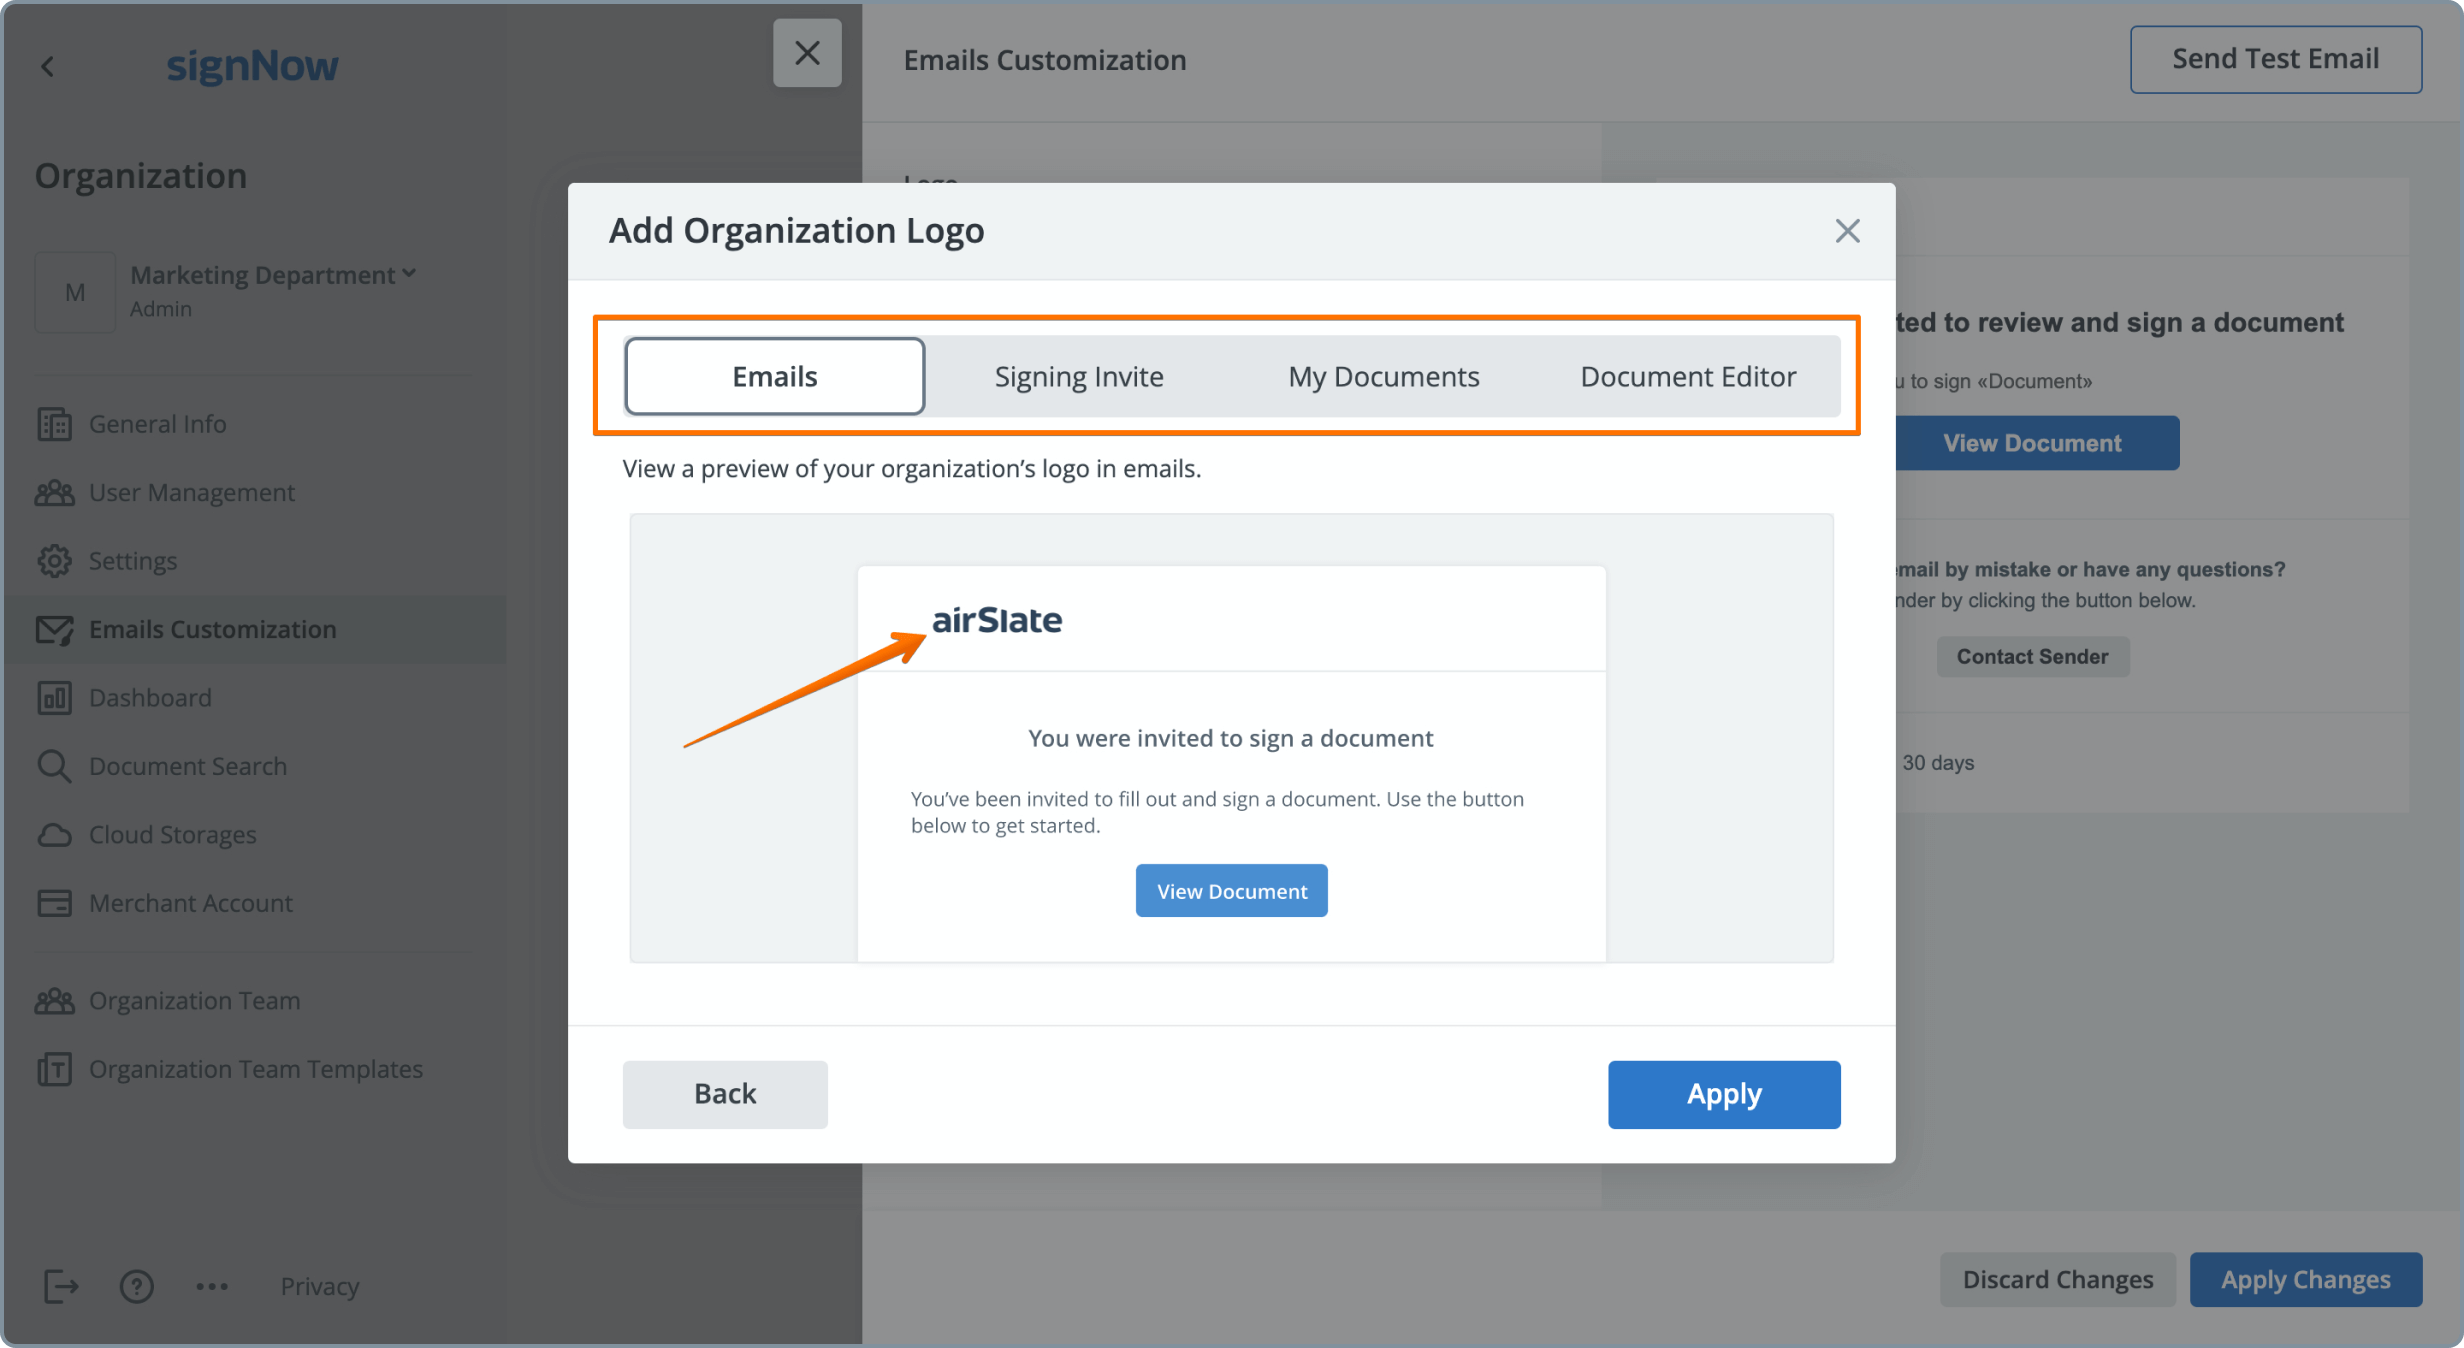
Customizing Email Template Appearance
Once your logo is in place, you can further tailor your email template to match your brand's style. The customization panel allows you to:
- Adjust the logo position (left, center, or right) for optimal visual impact.
- Select a color for the call-to-action button and its text, using color pickers or hex codes to match your brand palette.
- Add a custom footer—a personalized message or legal disclaimer that appears at the bottom of every email.
Previewing and Sending Test Emails
Before finalizing your changes, it's essential to preview your customized email and send a test to your inbox. Click the Send Test Email button at the top right of the customization panel. This sends a sample email using your current branding settings, allowing you to review the appearance and ensure everything displays as intended. When you open the test email, clicking the View Document button will confirm it's a test and not a live document.
If you're happy with the results, return to the customization panel and click Apply Changes to make your branding live for all outgoing organization emails.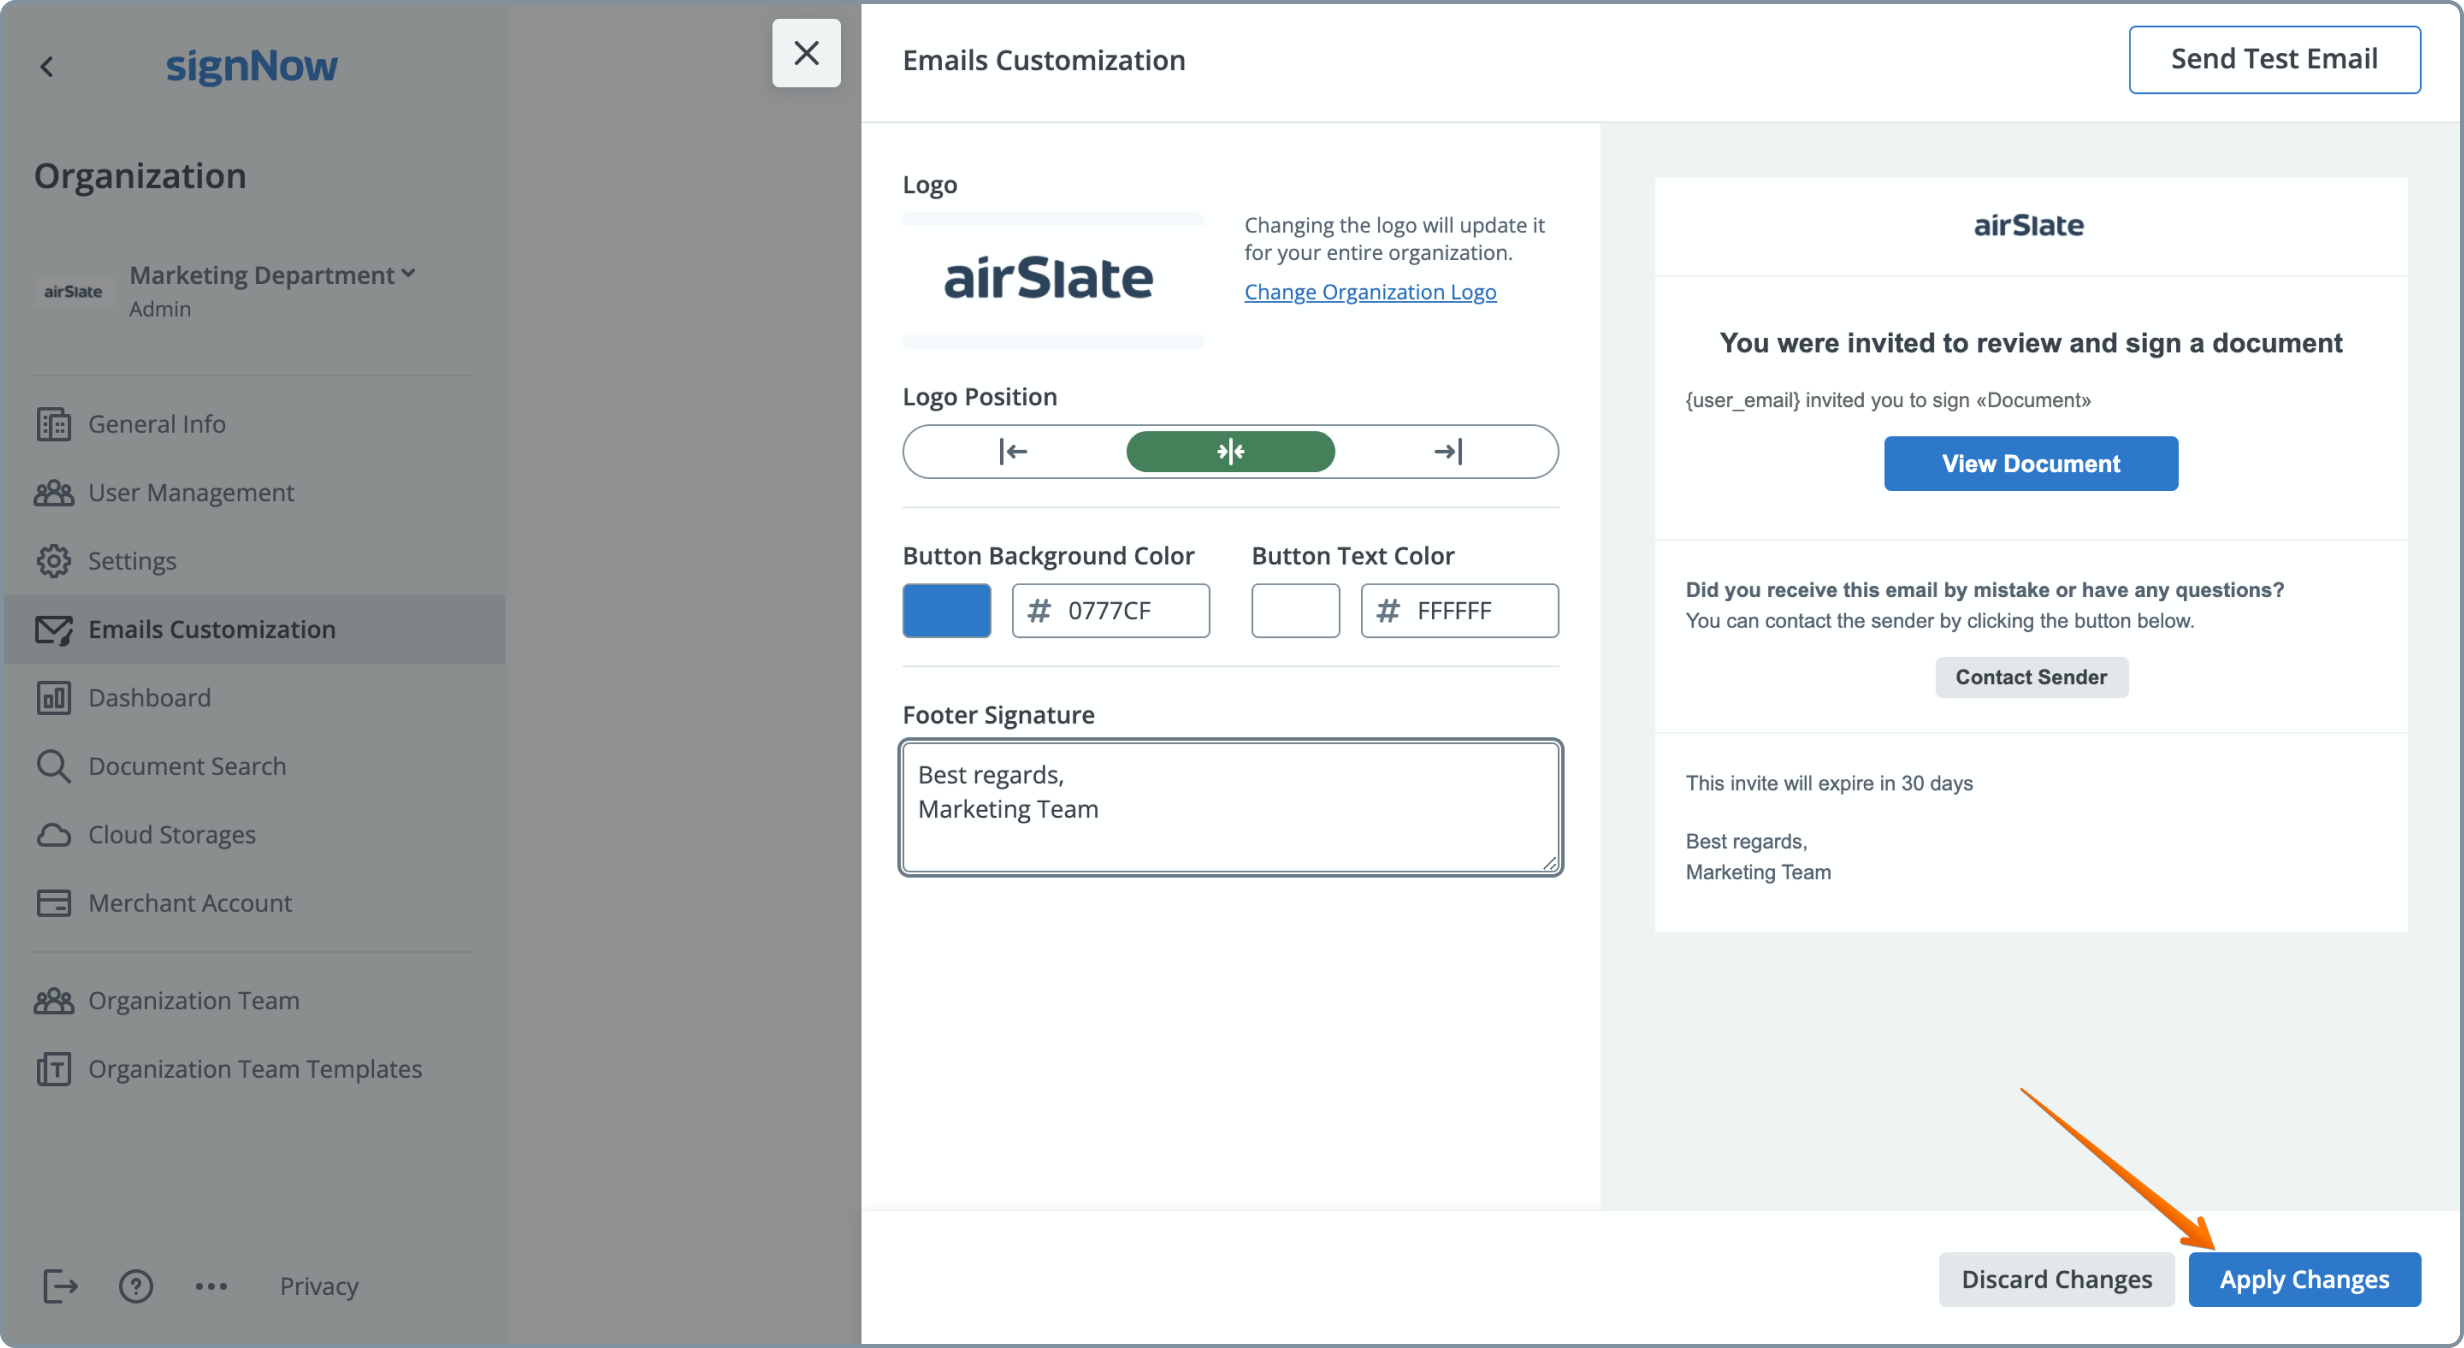
Get legally-binding signatures now!
Restoring Default Email Branding Settings
If you ever need to revert your email branding to the original SignNow defaults, you can do so easily. After applying customizations, a Restore to Default button will appear in the customization panel. Click this button and confirm your choice in the pop-up window to instantly reset all branding changes.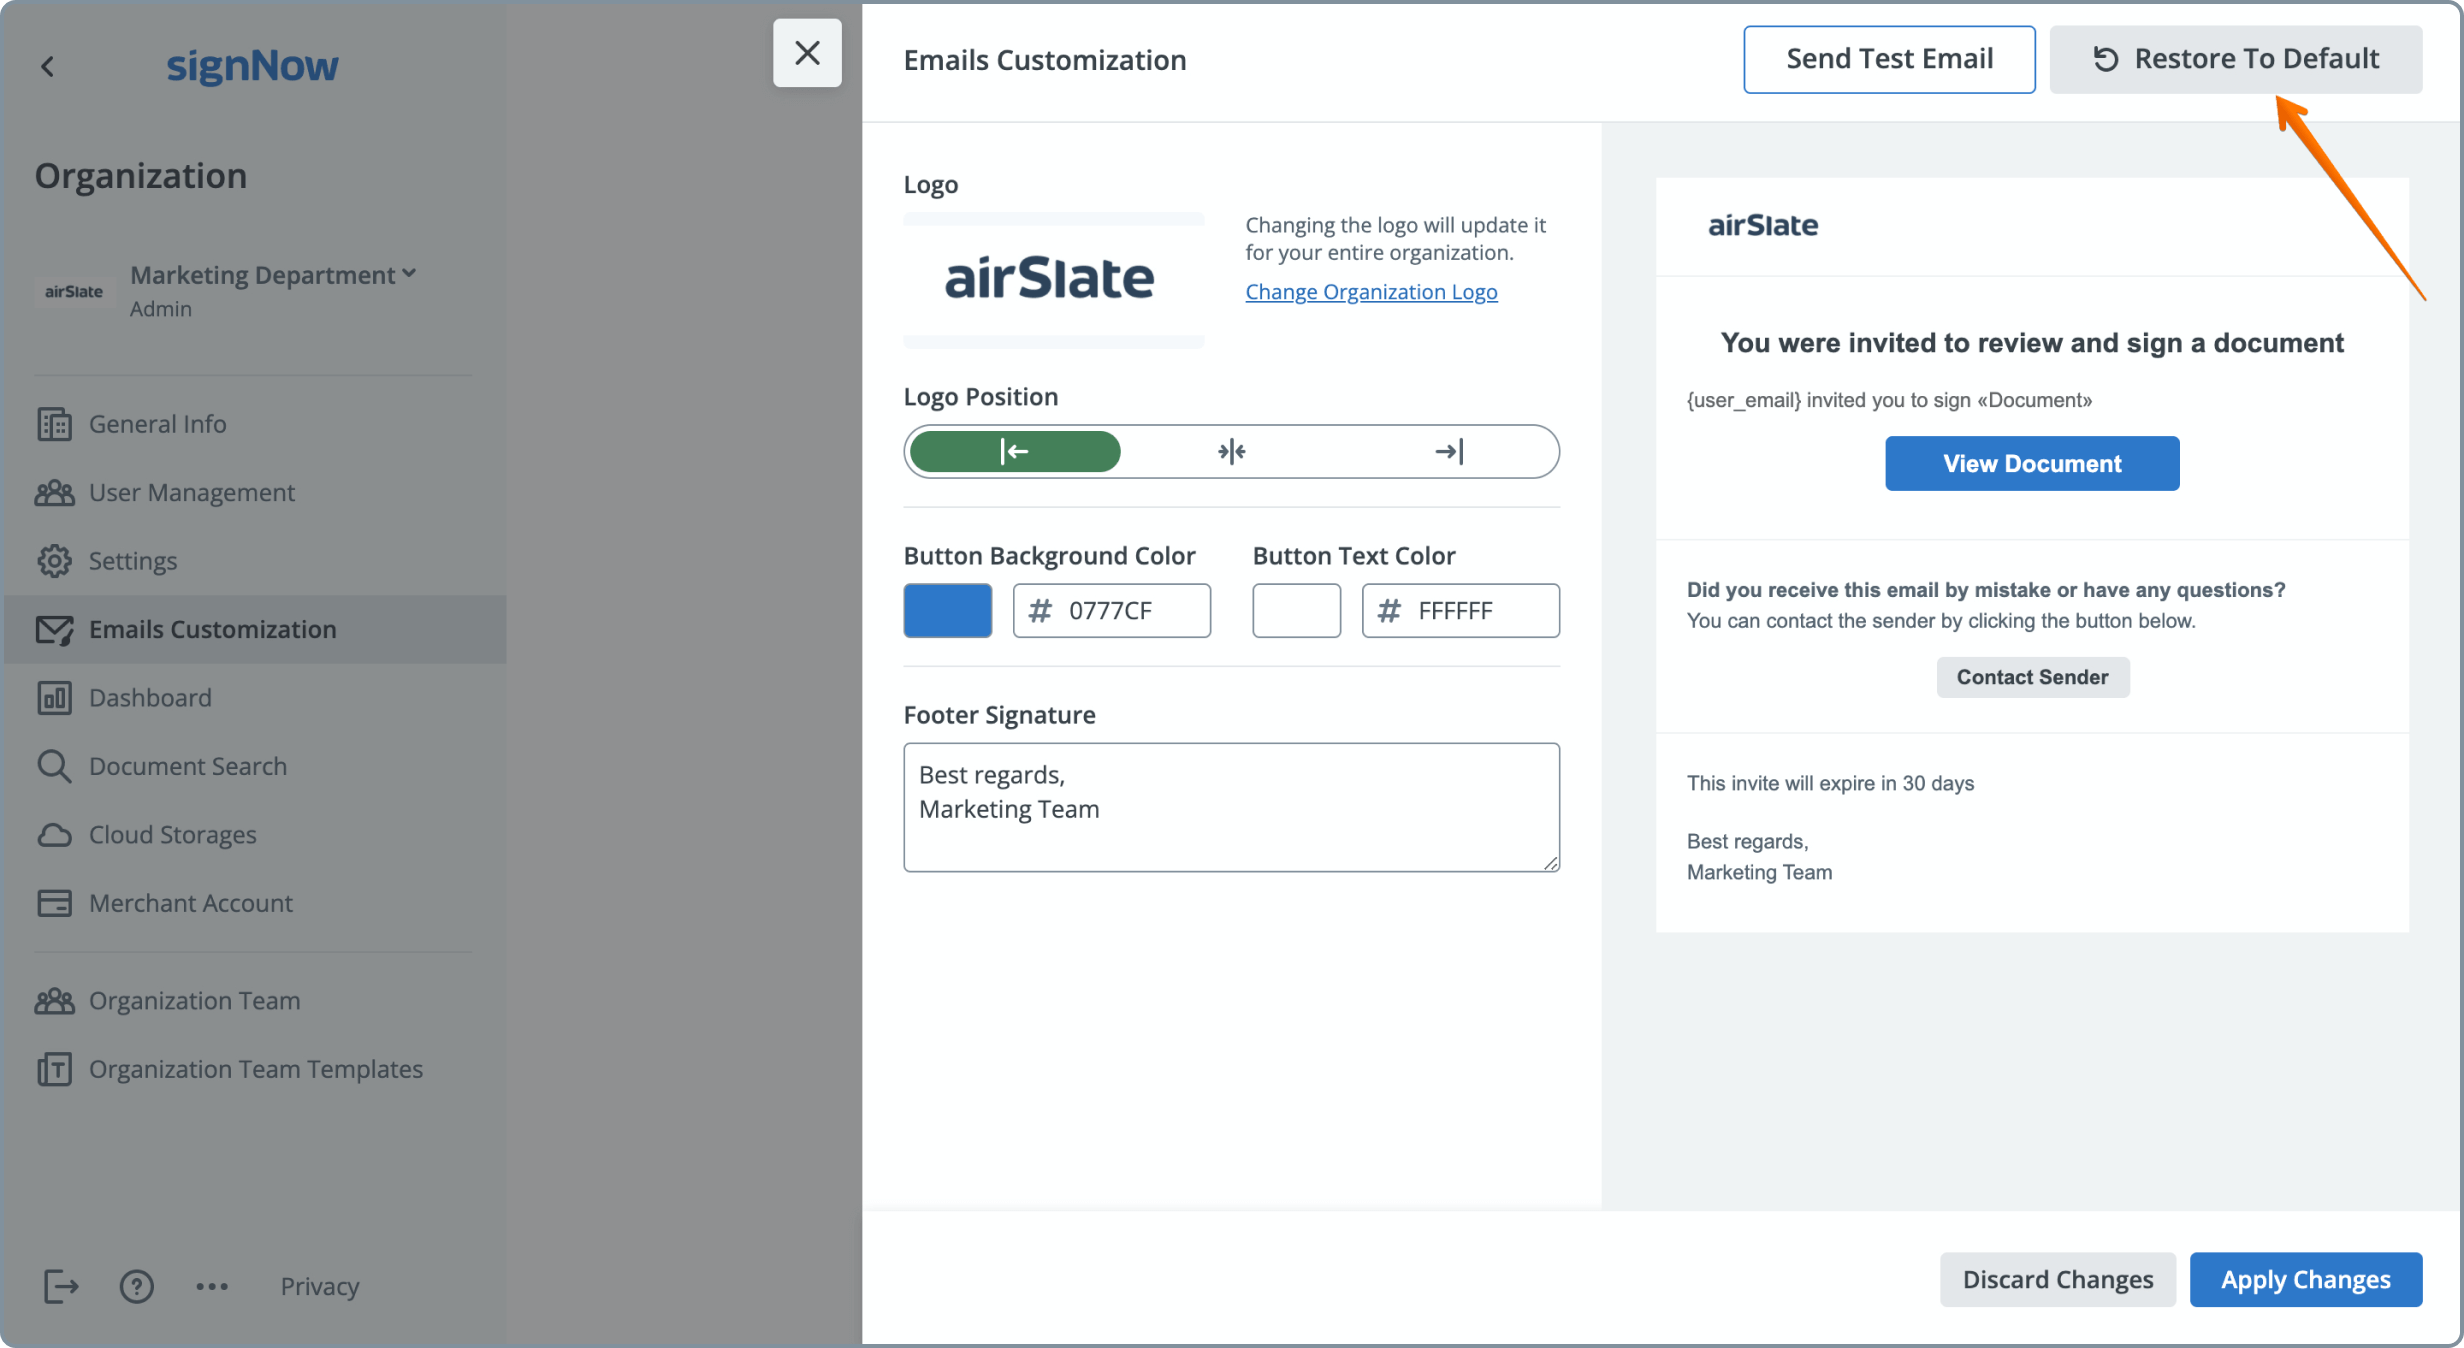
You can also access this option from the ellipsis (three dots) menu on the customization page, where you'll find both Restore to Default and Send Test Email options for quick access.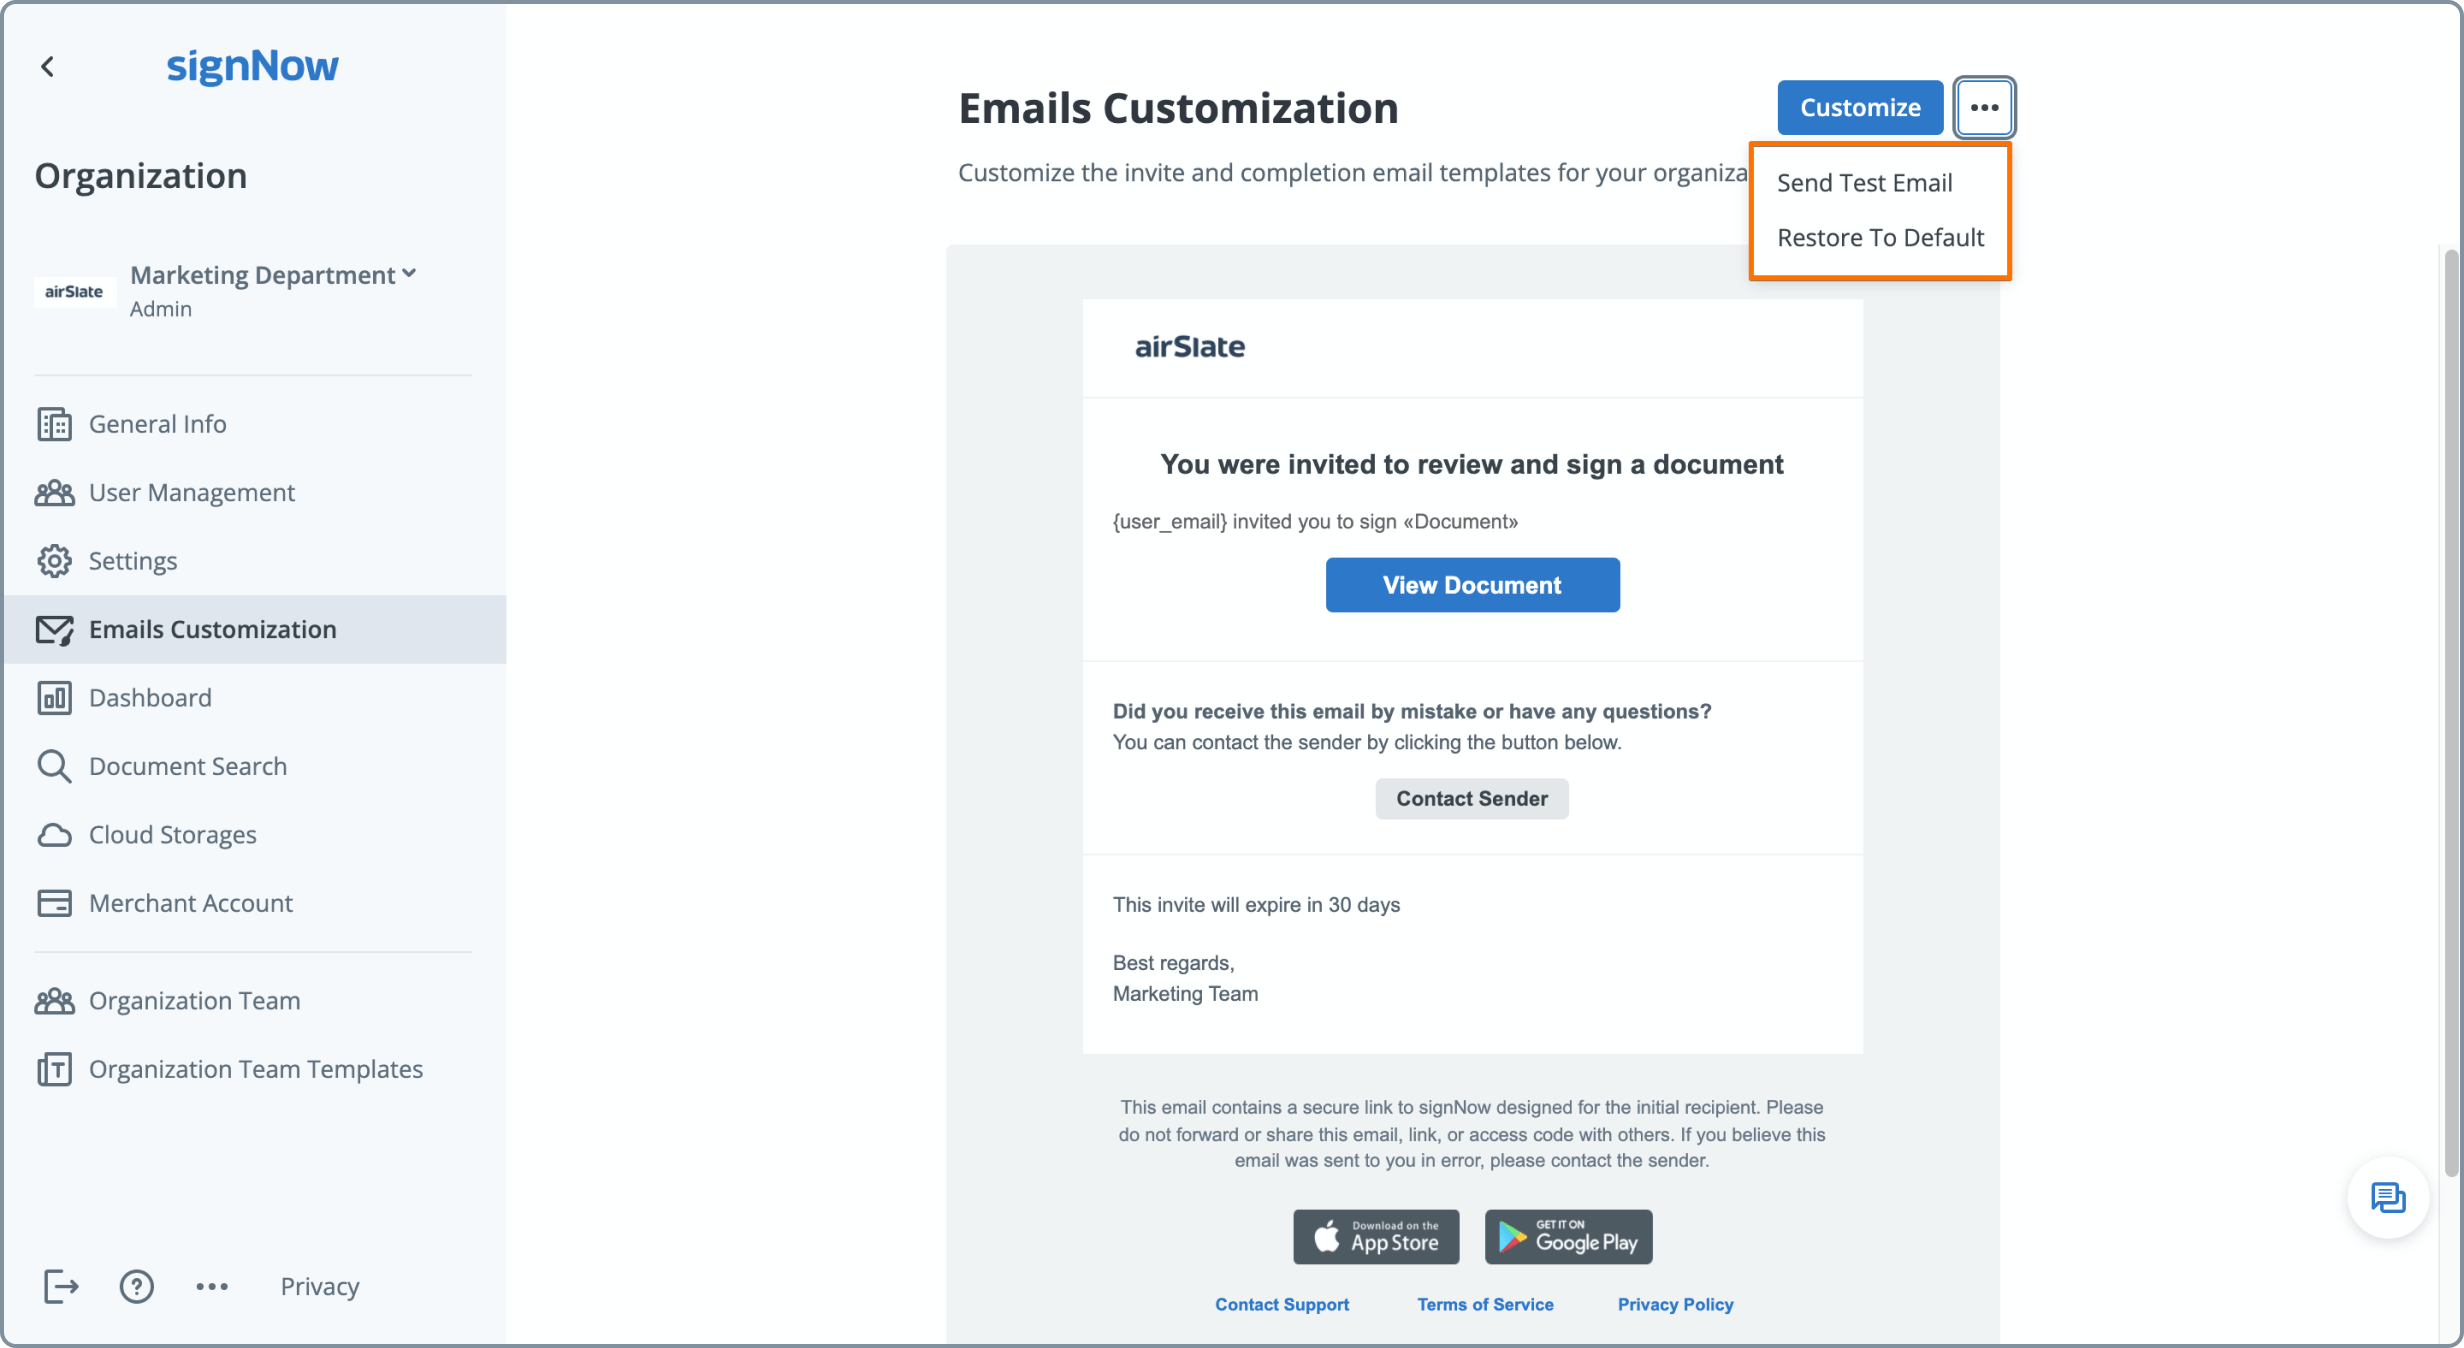
User Roles and Permissions for Email Branding
SignNow uses a robust role-based access system to ensure only authorized users can customize organization email branding. Typically, Admins and Moderators have access to the Email Customization tab and can make changes to branding settings.
To display your organization's branding in emails and documents, you must be a Member of the organization. Admins and Moderators can add users as Members via the User Management tab. If you manage multiple organizations, you can update branding for each, but you must be a Member to see the branding applied to your own documents and emails.
Troubleshooting and Best Practices
- Logo not displaying? Double-check that your image meets the recommended size (115x60 pixels or less) and is in a supported format (JPG, GIF, PNG, JPEG). If issues persist, try re-uploading or using a different image.
- Changes not appearing in emails? Make sure you've clicked Apply Changes after customizing. Only applied changes will be reflected in outgoing emails.
- Test emails look different from live emails? Some email clients may render images or colors differently. Always test across multiple devices and email platforms for consistency.
- Permissions issues? If you can't access the Email Customization tab, verify your role with your organization's Admin or contact support for assistance.
- Need more advanced branding? If you want to remove SignNow references or further customize templates, reach out to our sales team to discuss unlocking additional features.
Frequently Asked Questions
-
Who can customize organization email branding in SignNow?
Only users with Admin or Moderator roles in the organization can access and modify email branding settings. Members can view the branding in their emails and documents but cannot make changes. If you need access, contact your organization's Admin.
-
How do I ensure my logo appears in all organization emails?
After uploading your logo and applying changes in the Email Customization tab, make sure you are a Member of the organization. Only Members see the organization's branding in emails and documents. Admins and Moderators can add users as Members in the User Management tab.
-
Can I preview my email branding before making it live?
Yes! Use the Send Test Email feature to send a sample email to your inbox. This allows you to review the appearance and make any necessary adjustments before applying changes organization-wide.
-
What happens if I restore default settings?
Restoring to default will remove all custom branding, including your logo, button colors, and footer text, reverting emails to the original SignNow template. You can always reapply your customizations later if needed.
-
How do I unlock advanced branding features?
Some branding features, such as removing SignNow references or accessing advanced customization, may require a specific subscription plan. To explore these options, contact our sales team for details.
Ready to make your organization's emails stand out? Start customizing your email branding today and deliver a professional, cohesive experience to every recipient. For more information on plans and unlocking advanced features, visit our pricing page or contact our sales team.