Using Advanced Forms
SignNow's advanced forms empower you to create seamless, multi-step signing workflows that keep your business moving efficiently. Whether you're onboarding new employees, managing contracts, or coordinating approvals, advanced forms let you set up templates with multiple roles and enable the first signer to route the document to the next recipient in a specific order. This page will guide you through what advanced forms are, their benefits, setup requirements, and step-by-step instructions for configuring and using them to their fullest potential.
What Are Advanced Forms in SignNow?
Advanced forms in SignNow are a powerful feature designed for workflows that require multiple signers to complete a document in a specific sequence. Unlike basic eSignature requests, advanced forms work exclusively with templates that have more than one assigned role. This means you can predefine the order in which each participant signs, ensuring compliance and clarity throughout the process. For example, in a hiring scenario, you might require a supervisor to sign first, followed by the new hire, and finally the HR manager. Advanced forms are available on both web and mobile platforms, making them accessible for teams working remotely or on the go.
Key Benefits of Advanced Forms
- Streamlined Sequential Signing: Documents are routed automatically from one signer to the next, reducing manual follow-up and ensuring every required signature is collected in the correct order.
- Role-Based Workflows: Assign specific roles to each signer, so everyone knows their part in the process and only sees the fields relevant to them.
- Enhanced Compliance: By enforcing signing order and role assignments, advanced forms help organizations meet regulatory and internal policy requirements.
- Mobile and Web Flexibility: Advanced forms are accessible on iOS, Android, iPad, and web browsers, so your team can participate from anywhere.
- Automated Notifications: Each participant receives timely notifications when it's their turn to sign, and the sender is alerted when the process is complete.
- Integration with Advanced Features: Combine advanced forms with conditional fields, smart fields, and API integrations for even more robust workflows. Explore all advanced features here.
Requirements and Limitations
- Templates Only: Advanced forms require the use of templates. Each template must have at least two assigned roles to enable sequential routing.
- Role Assignment: Every signer must be assigned a unique role within the template. This ensures the correct order and permissions for each participant.
- Platform Support: Advanced forms are supported on both web and mobile platforms, but certain advanced field types (like hyperlinks) may not be visible on mobile apps. For more on field compatibility, see our University article.
- Feature Availability: Some advanced features may require specific subscription plans. For details, visit our pricing page.
Setting Up a Multi-Role Template
To use advanced forms, you must first create a template with multiple roles. This process involves preparing your document, adding fillable fields, and assigning each field to a specific role. The intuitive SignNow editor makes this easy, allowing you to drag and drop fields, set validation rules, and manage recipients.
 The recipient management modal (shown above) lets you add, edit, or remove recipients, assign roles, and quickly add yourself as a signer. You can also select from recent recipients for faster setup. Once your roles are defined, you can proceed to add fields for each participant, ensuring that everyone has the right access and responsibilities.
Enabling and Configuring Advanced Forms
After your template is set up with multiple roles, enabling advanced forms is straightforward. In the template management interface, you can generate invite links or send invitations directly to the first signer.
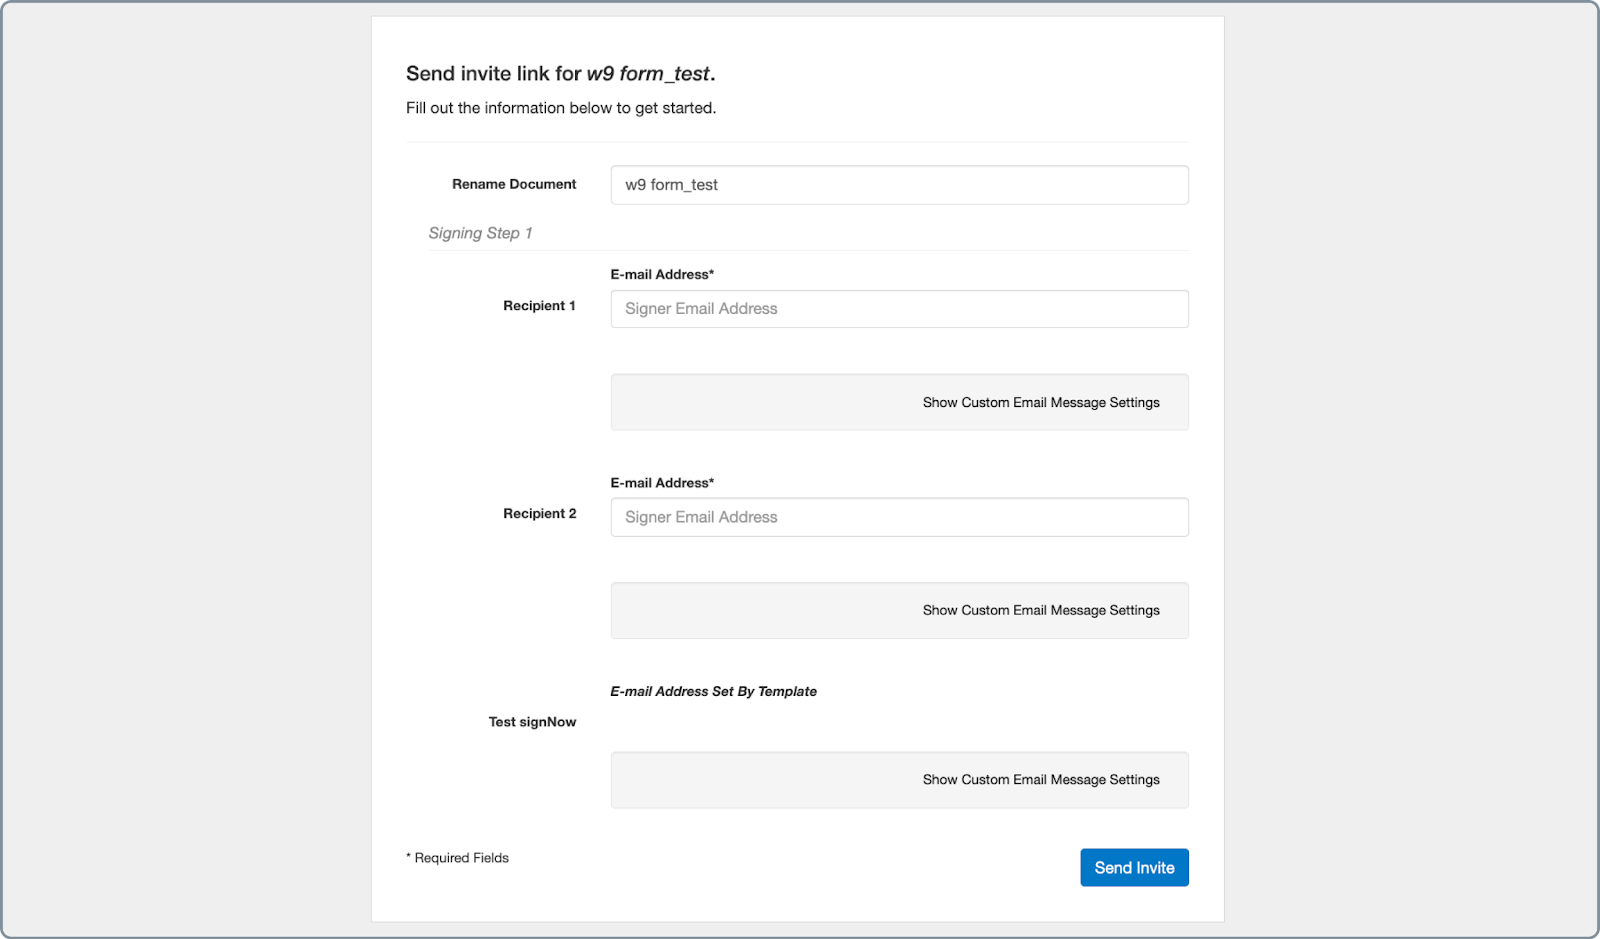
 From the templates list, use the "Create Invite Link" option to generate a shareable link for your advanced form. This link can be distributed to the first signer, who will then complete their part and forward the document to the next participant in the sequence. You can also manage invites, track progress, and organize templates for efficient workflow management.
Get legally-binding signatures now!
Signer Workflow and Document Routing
Once the advanced form is enabled and the first signer receives the invite, the workflow becomes a seamless chain of actions:
- First Signer Completes Their Fields: The initial recipient fills out and signs their assigned sections.
- Forwarding to Next Signer: After signing, the first signer is prompted to send the document to the next role in the sequence. This continues until all roles have participated.
- Role-Based Field Visibility: Each signer only sees and interacts with the fields assigned to their role, ensuring privacy and clarity.
- Completion Notification: When the final signer completes their part, the original sender receives a confirmation email with the completed document attached.
Managing Notifications and Document Completion
SignNow automates notifications at every stage of the advanced form workflow. Each signer receives an email when it's their turn, with clear instructions and a secure link to access the document. The sender is kept in the loop with status updates and receives a final confirmation once all signatures are collected. This ensures transparency and accountability throughout the process.
For additional control, you can monitor document status, resend invites, or adjust recipient details from the template management dashboard. If you need to create multiple invite links for different workflows, the invite link modal makes it easy to generate, copy, and manage links or QR codes for sharing.

Troubleshooting Common Issues
- Missing Roles or Fields: Ensure your template has at least two roles and that each field is assigned to the correct recipient. Use the recipient management modal to review and adjust roles as needed.
- Signer Can't Access Document: Double-check that the invite link is active and has been sent to the correct email address. You can resend invites or generate new links from the template dashboard.
- Field Visibility Problems: If a signer can't see their fields, verify that each field is assigned to the right role and that conditional logic isn't hiding required fields. For advanced field settings, consult our step-by-step guide.
- Mobile Compatibility: Some advanced field types, such as hyperlinks, may not display on mobile apps. Advise signers to use a web browser if they need to access all features.
- Feature Access: If you can't enable advanced forms, check your subscription plan or contact support. For plan details, visit our pricing page.
Frequently Asked Questions
-
Can I use advanced forms with any document?
Advanced forms are only available for templates with two or more assigned roles. If your document isn't a template or only has one role, you'll need to convert it to a template and add additional roles before enabling advanced forms.
-
How do I assign roles to signers in a template?
When preparing your template, use the recipient management modal to add each signer and assign them a unique role. You can also select from recent recipients for faster setup. Each field you add can then be assigned to a specific role, ensuring only the intended signer can access it.
-
What happens if a signer doesn't forward the document to the next recipient?
If a signer doesn't complete their part or fails to forward the document, the workflow will pause until action is taken. You can monitor progress from the template dashboard and send reminders or new invite links as needed.
-
Are advanced forms available on mobile devices?
Yes, advanced forms are supported on iOS, Android, and iPad devices, as well as on the web. However, some advanced field types, such as hyperlinks, may not be visible on mobile apps. For the best experience, advise signers to use a web browser if they need to access all features.
-
How do I know when my document is fully signed?
Once all assigned signers have completed their parts, SignNow will automatically send you a confirmation email with the completed document attached. You can also check the status in your template management dashboard.
Ready to streamline your document workflows? Explore more advanced features, or get started with advanced forms by visiting our step-by-step University guide. For plan details and feature availability, check our pricing page.